We are now ready to go into the soldering phase of the installation.
PART 4
EBAY AUCTIONS
[email protected]

| TIGHT TURNS SERVO STEERING MOD | ||||||||||||||||||||||||||||||||||||||||||||||||||||
| PART 3 | ||||||||||||||||||||||||||||||||||||||||||||||||||||
|
||||||||||||||||||||||||||||||||||||||||||||||||||||
| At this point some people may find it easier to remove the electronics before doing the installation. | ||||||||||||||||||||||||||||||||||||||||||||||||||||
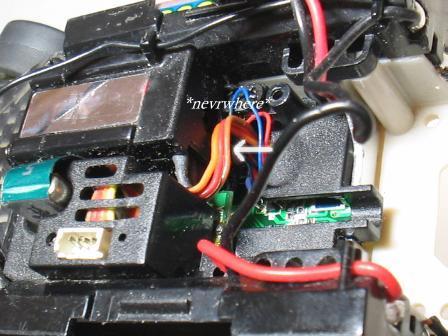
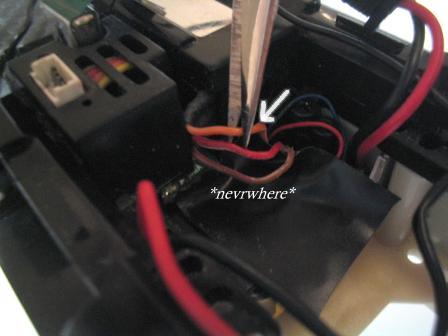
| Now we can see the servo wires. There is a top wire (orange), a middle wire (red), and a bottom wire (brown). We will only be working with the top (orange) and the bottom (brown) wires. | ||||||||||||||||||||||||||||||||||||||||||||||||||||
|
||||||||||||||||||||||||||||||||||||||||||||||||||||
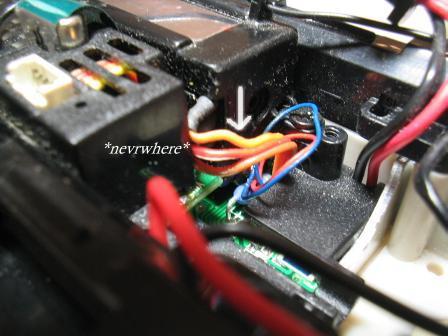
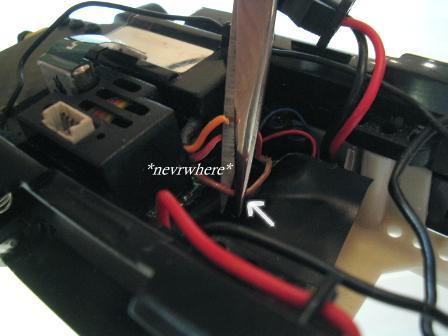
| The wires are connected together so before we start working with the top (orange) and bottom (brown) wires we will first have to seperate them. | ||||||||||||||||||||||||||||||||||||||||||||||||||||
|
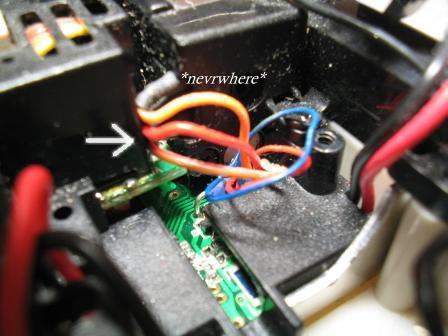
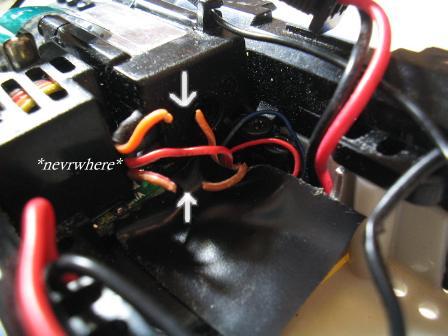
Here you see the wires seperated. They pull apart fairly easily. I used 2 sets of tweezers to help me grab hold of the wires and to pull them apart. I first pulled the orange from the red wire, then the brown from the red wire. Just use the tweezers to grab hold of the orange and red wire and slowly pull them apart from each other. Then do the same with the red and brown wires. | |||||||||||||||||||||||||||||||||||||||||||||||||||
|
||||||||||||||||||||||||||||||||||||||||||||||||||||
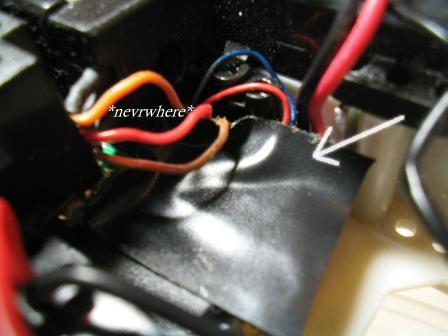
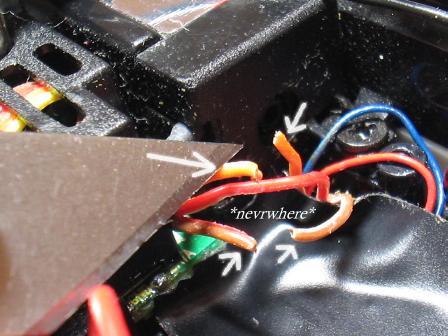
| Next, I placed a piece of electrical tape underneath the wires. I did this for 2 reasons. I used the tape to push the very thin blue and red servo motor wires out of the way while I work. The other reason is to protect the components underneath the servo wires when I get to the soldering phase of the installation. | ||||||||||||||||||||||||||||||||||||||||||||||||||||
|
||||||||||||||||||||||||||||||||||||||||||||||||||||
| Now I am ready to cut my first wire. First the top (orange) servo wire. Cut near the center of the wire.. | ||||||||||||||||||||||||||||||||||||||||||||||||||||
|
||||||||||||||||||||||||||||||||||||||||||||||||||||
| Then I cut the bottom (brown) servo wire. Cut near the center of the wire. | ||||||||||||||||||||||||||||||||||||||||||||||||||||
|
||||||||||||||||||||||||||||||||||||||||||||||||||||
| Here you see the top (orange) servo wire and the bottom (brown) servo wire. These are the only 2 wires we will cut. | ||||||||||||||||||||||||||||||||||||||||||||||||||||
|
||||||||||||||||||||||||||||||||||||||||||||||||||||
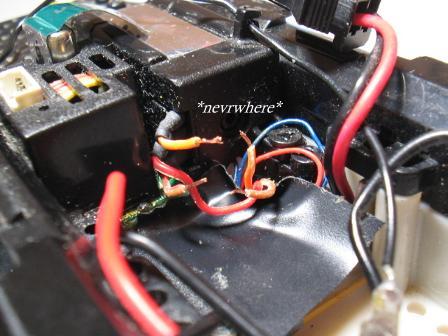
| After the wires are cut we will need to strip some of the plastic insulation off each end of the cut wires. I did this by making a small cut using an exacto knife about 2-3mm from the tip of the cut end of each wire. Then I grasped the wire with a tweezer and used either my finger nails or another tweezer to pull off the cut piece of plastic insulation. Do this for each of the cut ends. | ||||||||||||||||||||||||||||||||||||||||||||||||||||
| You should now have something that looks like this. All 4 cut ends with the ends stripped so that the copper wire is exposed on all 4 cut ends. We are now ready to go into the soldering phase of the installation. |
||||||||||||||||||||||||||||||||||||||||||||||||||||
|
||||||||||||||||||||||||||||||||||||||||||||||||||||
| Click here to go to PART 4 |
||||||||||||||||||||||||||||||||||||||||||||||||||||
| INSTALLATION GUIDE | ||||||||||||||||||||||||||||||||||||||||||||||||||||
| CLICK LINKS | ||||||||||||||||||||||||||||||||||||||||||||||||||||
| OVERVIEW | ||||||||||||||||||||||||||||||||||||||||||||||||||||
| PART 1 | PART 2 | |||||||||||||||||||||||||||||||||||||||||||||||||||
| PART 3 | ||||||||||||||||||||||||||||||||||||||||||||||||||||
| PART 5 | ||||||||||||||||||||||||||||||||||||||||||||||||||||
| PART 4 | ||||||||||||||||||||||||||||||||||||||||||||||||||||
| Click here to view my EBAY AUCTIONS |
||||||||||||||||||||||||||||||||||||||||||||||||||||
| If you have any questions, please email me: [email protected] |
||||||||||||||||||||||||||||||||||||||||||||||||||||
|
|
||||||||||||||||||||||||||||||||||||||||||||||||||||