
- Home
- Exterior
- Interior
- Engine
- Gearbox Swap
- Airbox Mod
- AMSOIL Air Filter
- Performance Chip
- Center Caps
- Cupholders
- S2 Brochure
- Window Sticker
- PCA Valuation
- On the Track
- PCA
- PCA Northeast
- Porsche USA
- Rennlist
- P-CarOnline
- Pelican Parts
- 944S2.com
- 944S2 Central
- 951 RacerX
- 968.net
- DS 944S2
- 944 Garage
- 12v.org
- Audi USA
- Audifans.com
- Audiworld.com
- Quattro Club USA
- My Audi site
- My Audi 100S
- My QSW (Sold)
- My 914 (Sold)
- My AMSOIL site
Porsche Links
Audi Links
Misc
![]()
©
2001
[email protected]
Jim Griffin


This page outlines the procedures for replacing the air filter on an S2, and details the airbox modification that I performed.
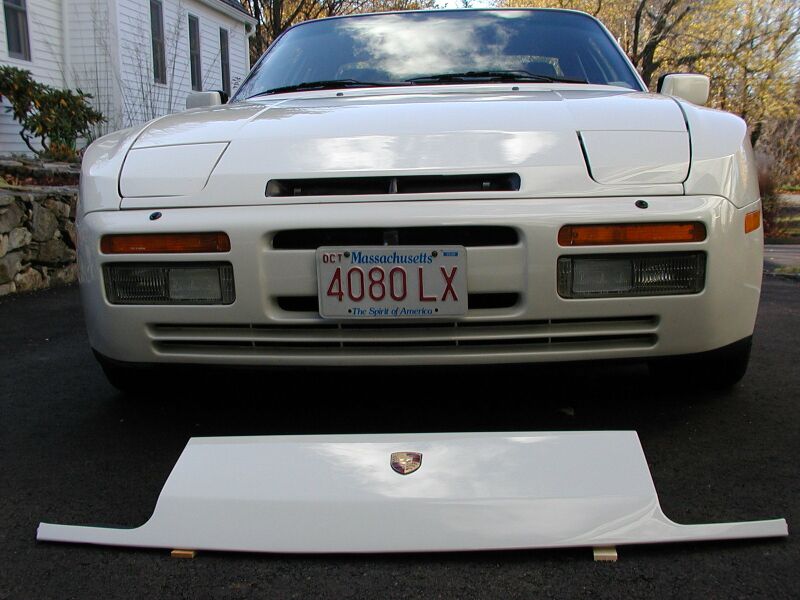
Part of the reason for this project was also to put the OEM nose panel back on. The previous owner had it repainted at some point. However, once I put the OEM nose on, it appeared to be of a different shade of white. So, I decided to re-install the slotted nose for now.
At first, I was intending on simply removing the nose panel to get to the air filter, to measure the airbox and filter for purposes of ordering an AMSOIL high-flow panel air filter. But once I removed the nose panel, I couldn't resist the idea of swiss-cheesing the airbox to improve airflow.
At first, I kept the OEM paper filter in, until I could get a high-performance AMSOIL unit. I eventually installed one. More info on that can be seen here: AMSOIL Air Filter
Water ingestion was the only concern that I had with the set-up as shown in these pictures. However, given the size and location of the slots I drilled (in relation to the bumper), it appears that I would have to drive through a very deep puddle to hydrolock the engine. Rain has not been a problem... even heavy down-pour rain.
For now, I'm keeping it as is. I may have the OEM nose re-painted, and then re-install it.
The air filter on the S2 is underneath the nose panel.
Here is the high-flow fiberglass nose panel that came with this car when I bought it.
Note that there is no Porsche badge.
Turn the ignition key to on, turn on the headlights, and then turn the knob one turn to leave the parking lights on.
Turn the ignition key to off. The parking lights will remain on, and the warning chime will continue to sound.
Some people recommend disconnecting the battery at this point.
I believe this is to avoid the potential of the headlight doors accidentally closing on your hands and fingers.
I wasn't sure if I had my radio code, so I didn't disconnect the battery, and therefore took a chance.
Pop open the hood, and you'll see four screws holding the top of the nose panel on.
Remove those four screws.
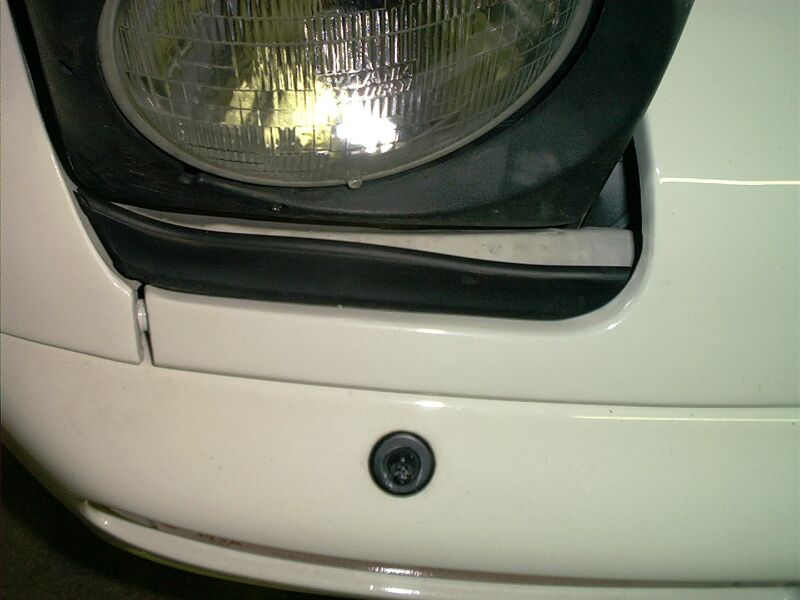
Remove the rubber in front of the headlight on each side. Pull it towards the bulb. It should come out with a little bit of effort.
This is a picture of the OEM nose and rubber. The rubber doesn't fit with the fiberglass nose.
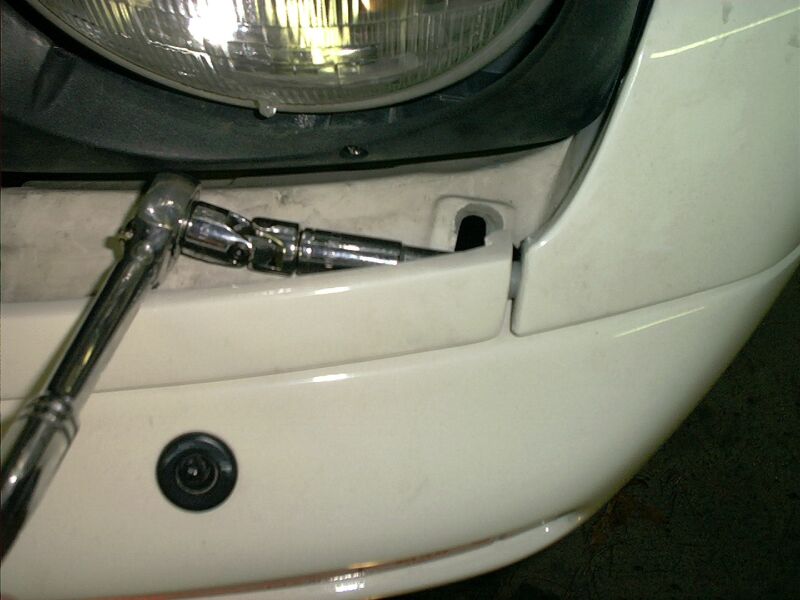
There are nuts on four vertical bolts that must be removed (not shown).
This picture shows the slot where the OEM nose panel bolt slides into. The fiberglass nose doesn't have these bolts.
Then remove the two horizontal screws with a 10mm socket (as shown). I used a flex head socket extension.
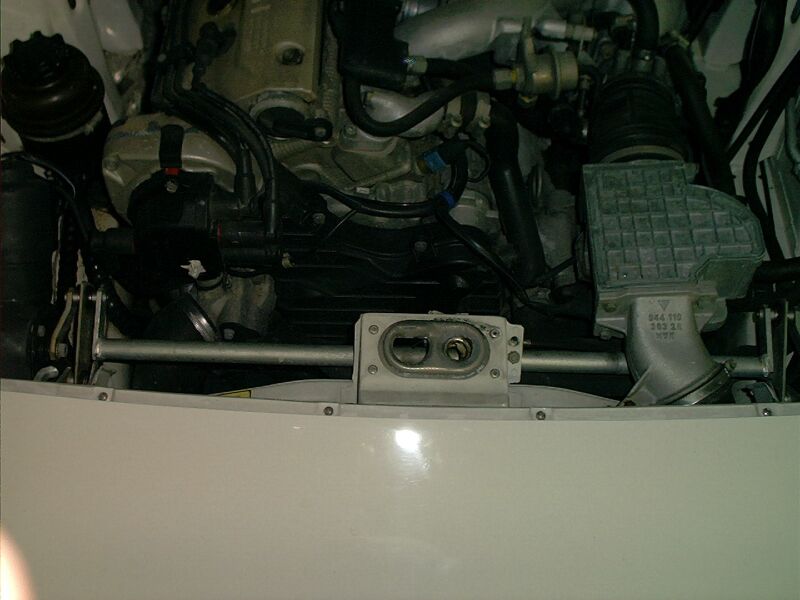
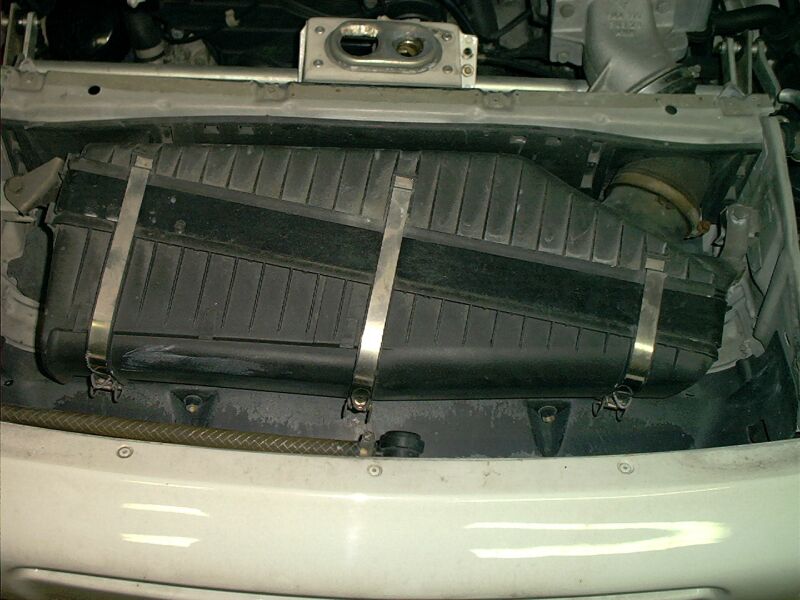
Here is a picture of the OEM airbox in the car.
There are three straps that hold the airbox panels together. They easily unclamp.
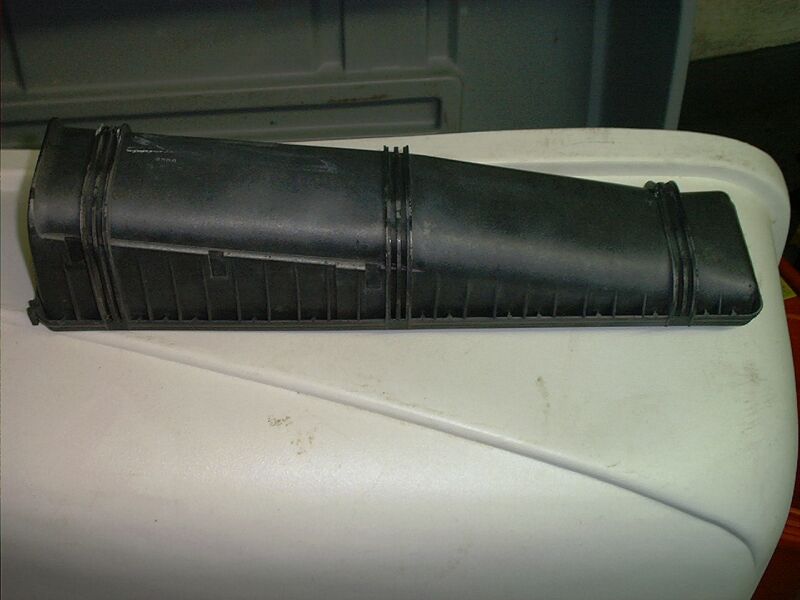
Here is the unmodified front panel of the airbox.
The only air inlet is on the left.
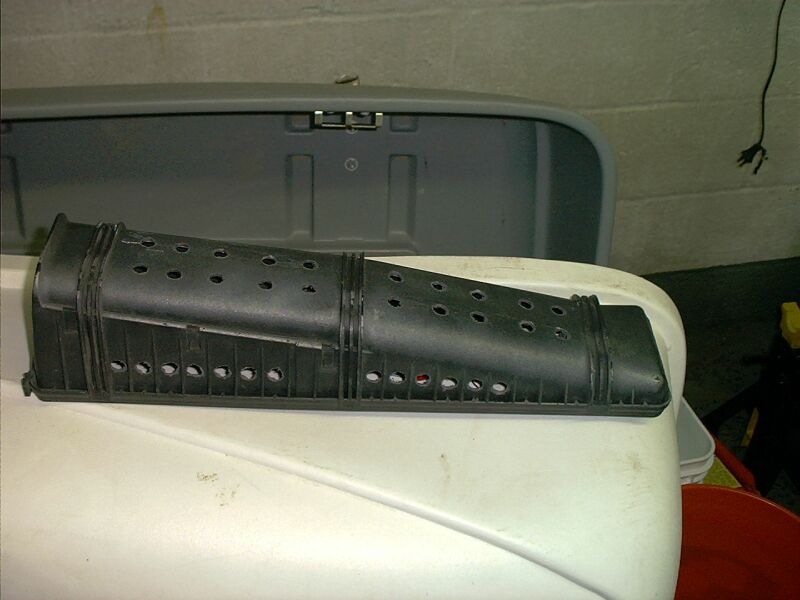
Here is the modified front panel of the airbox.
I swiss-cheesed it by drilling a bunch of 7/16" holes in it.
It ended up with twenty holes in front, and thirteen holes underneath.
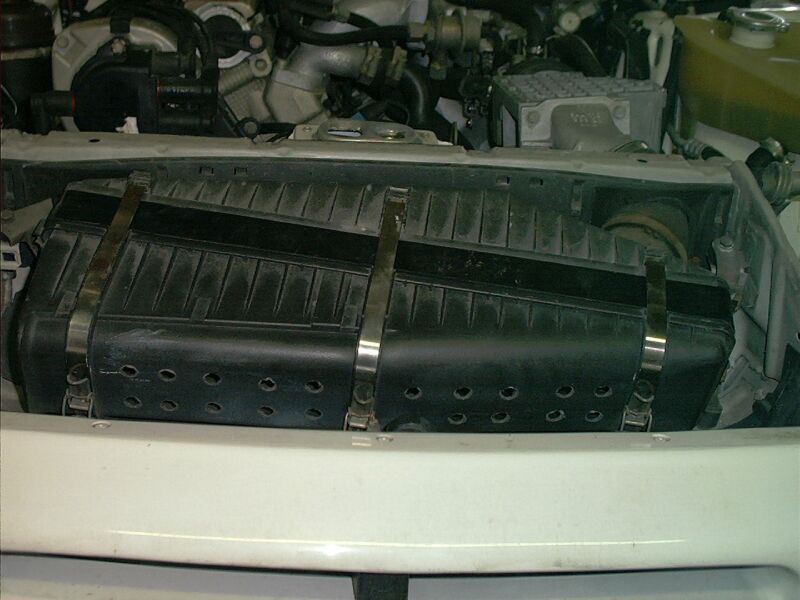
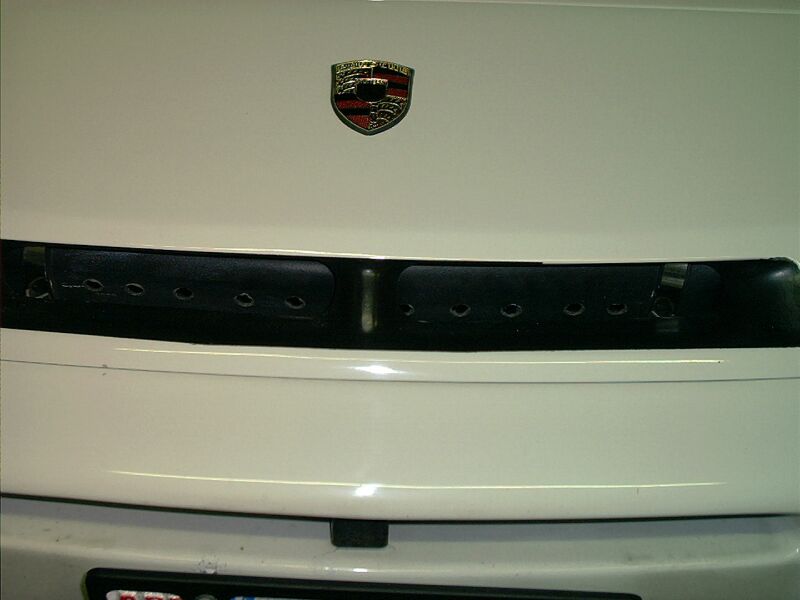
Here is the modified front panel re-installed.
Note that there is now a lot of opportunity for airflow through the bumper vents.
The single air inlet, being on the left, is not in the direct airstream. The holes are definitely so.
To re-install the nose panel, follow the old saying: "Installation is the opposite of removal".
Here is the high-flow nose re-installed.
If you look closely, you can see the holes through the nose panel.
To some degree, the car now has a bit of a ram-air setup.
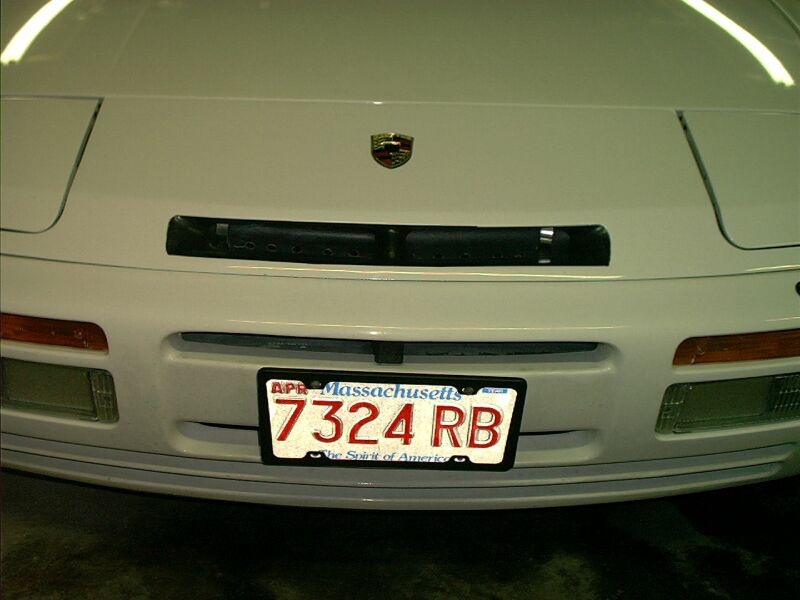
Note the new Porsche hood badge.
The car and the nose looked so plain without one... I just had to add one!!.
As mentioned above, I installed a high-performance AMSOIL panel filter.
However, even with the paper filter, I had noticed a difference. The car seemed to rev a bit easier and faster... and there was a noticeable difference in intake sound.
As well, there seemed to be an increase in the overall "music" that the car produced (i.e. intake, engine, and exhaust).
(I don't call it noise... because intake, engine, and exhaust sounds are "music" to real auto enthusiasts).
All of this was further improved once I installed the AMSOIL high-flow panel air filter.
Overall, I am very happy with these intake improvements. I personally prefer this setup over a cone-type gauze filter.