VizPaint2D's fill tool offers a variety of capabilities. You can use it to add a background color, erase selected areas, transform a color image into a grayscale one, or recolor selected areas of a picture.
To crop out part of an image with the fill tool:
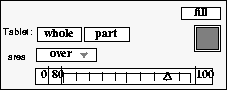
An outline tool appears on the canvas. In the center of it is a special tool called the seed point. The seed point acts as the anchor or starting point for the fill. It also points to a pixel or a color on the canvas that will be used in determining the extent or range of the fill.
Figure 81 Positioning the seed point
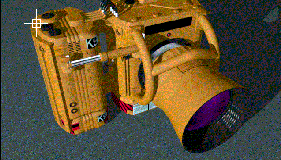
The fill tool erases the background but leaves the camera image untouched.
If the fill operation also erased part of the camera, lower the range and repeat the fill. If not all of the background was erased, reposition the seed point on the remaining background, set the range to 2 and click fill again.
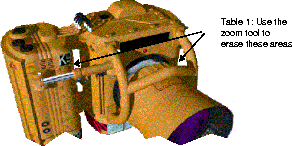
You might want to do additional fill erasures in areas where the background peeks through the camera (see figure 82). Use effects(TM)zoom to enlarge these areas, then erase them with the fill tool as you did before. If scattered pixels of the background remain, use the brush tool in erase mode to carefully clear them.
Tip: When you finish using the zoom tool, click apply to incorporate your changes into the canvas. |
Make sure you have a fairly clean cutout because you will use it in the next section.
Figure 82 Cleaning up the cropped camera
Try experimenting with the fill tool to better understand what it can do. On another canvas, paste several copies of cut_1. Position the outline tool around each copy and note what happens when you:
When you have finished experimenting, use the select tool to display the tutorial canvas with the cropped version of the camera cutout.
 \
\


 20
20