@4x.png)
Best Work Essay - 1
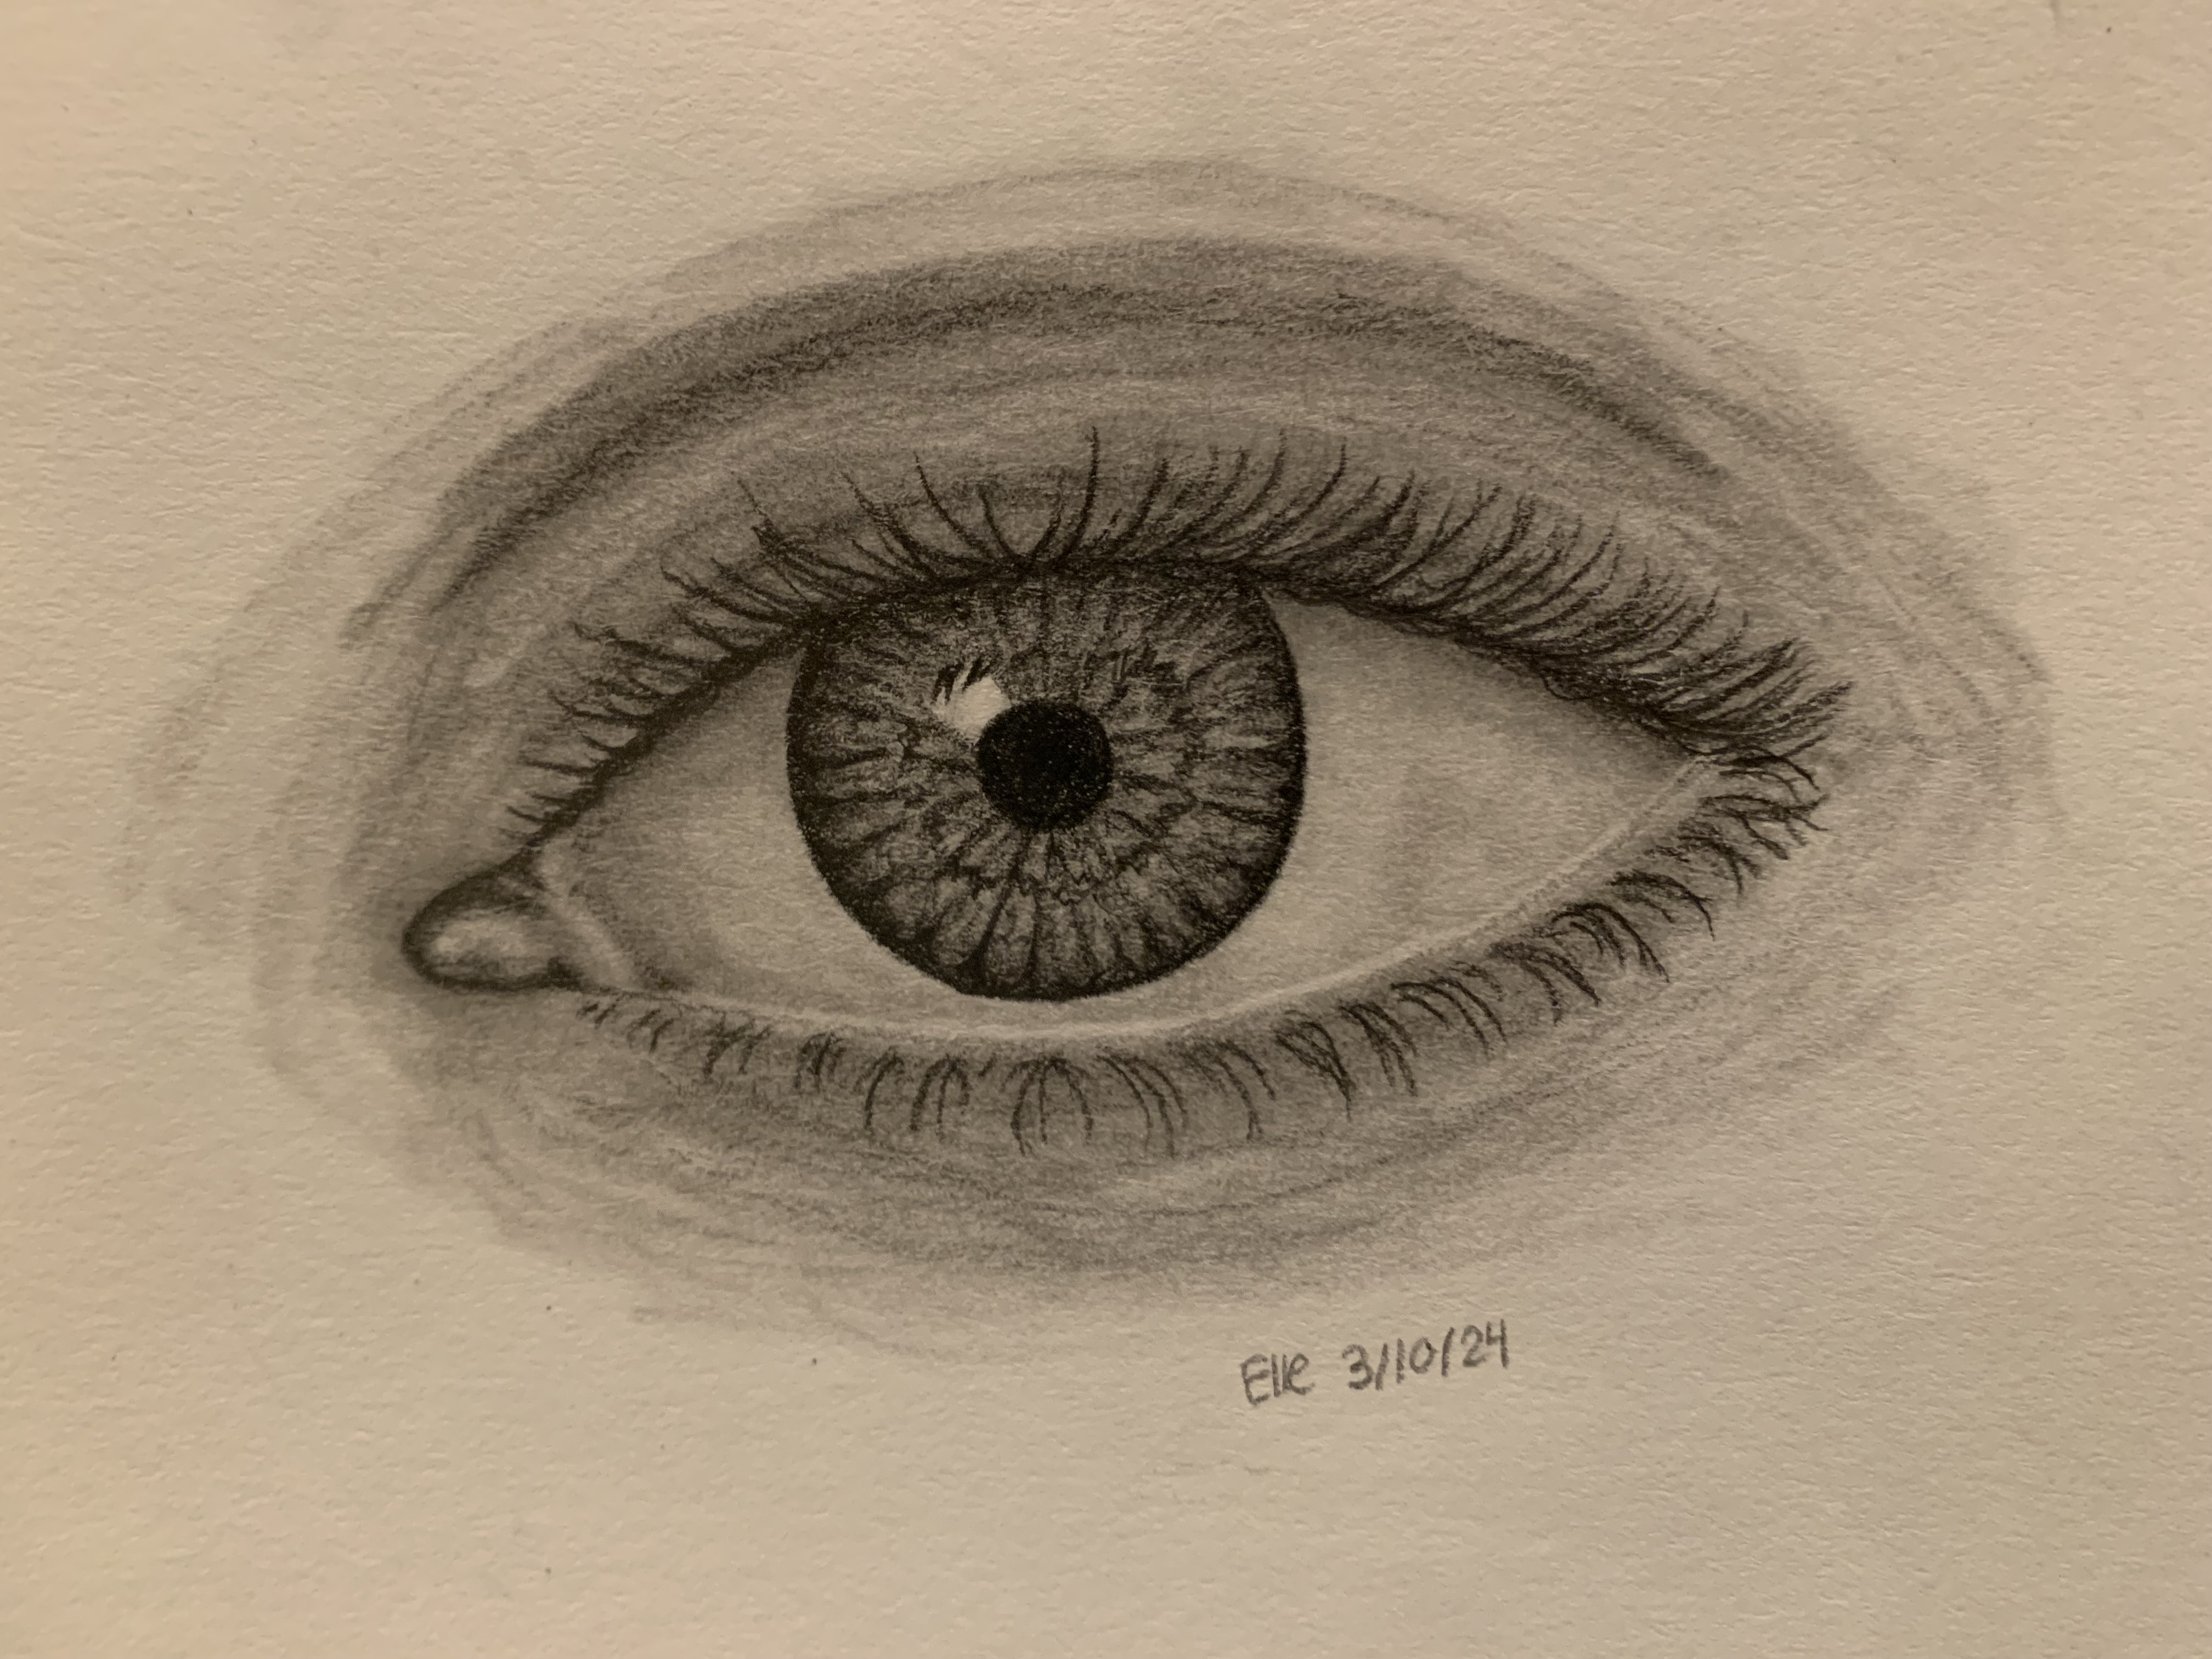
Realistic Eye Drawing
The Process

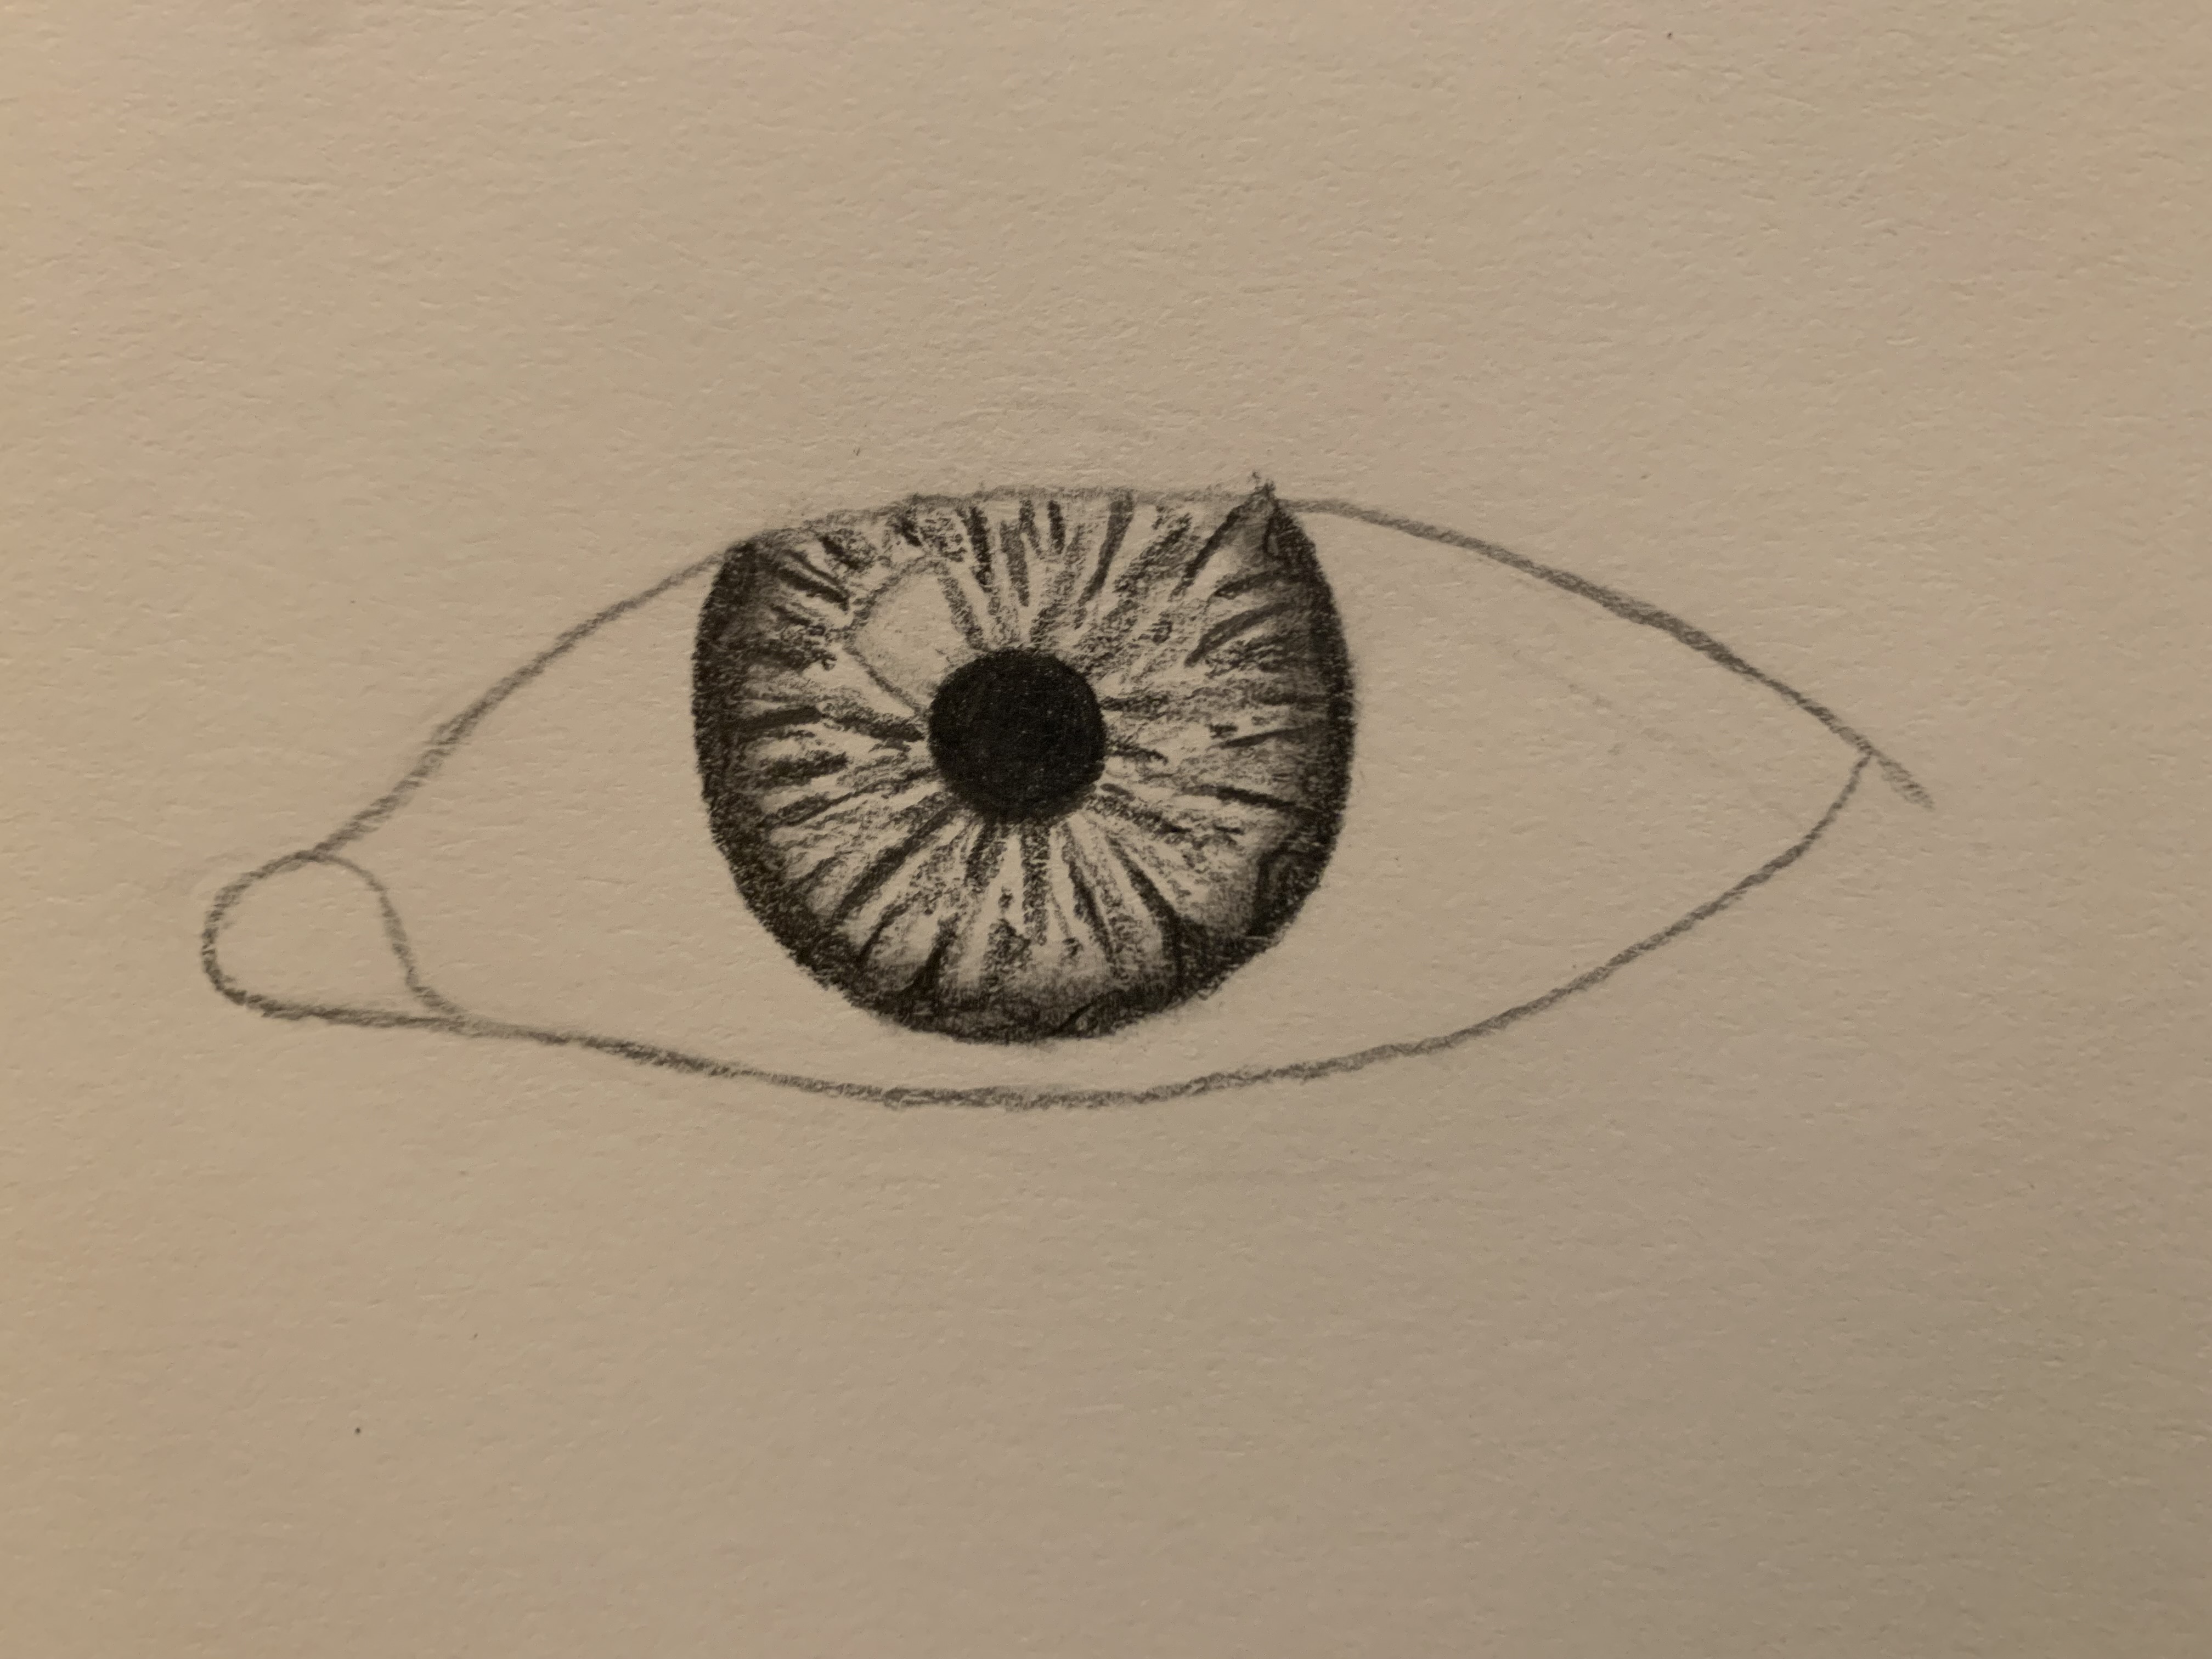

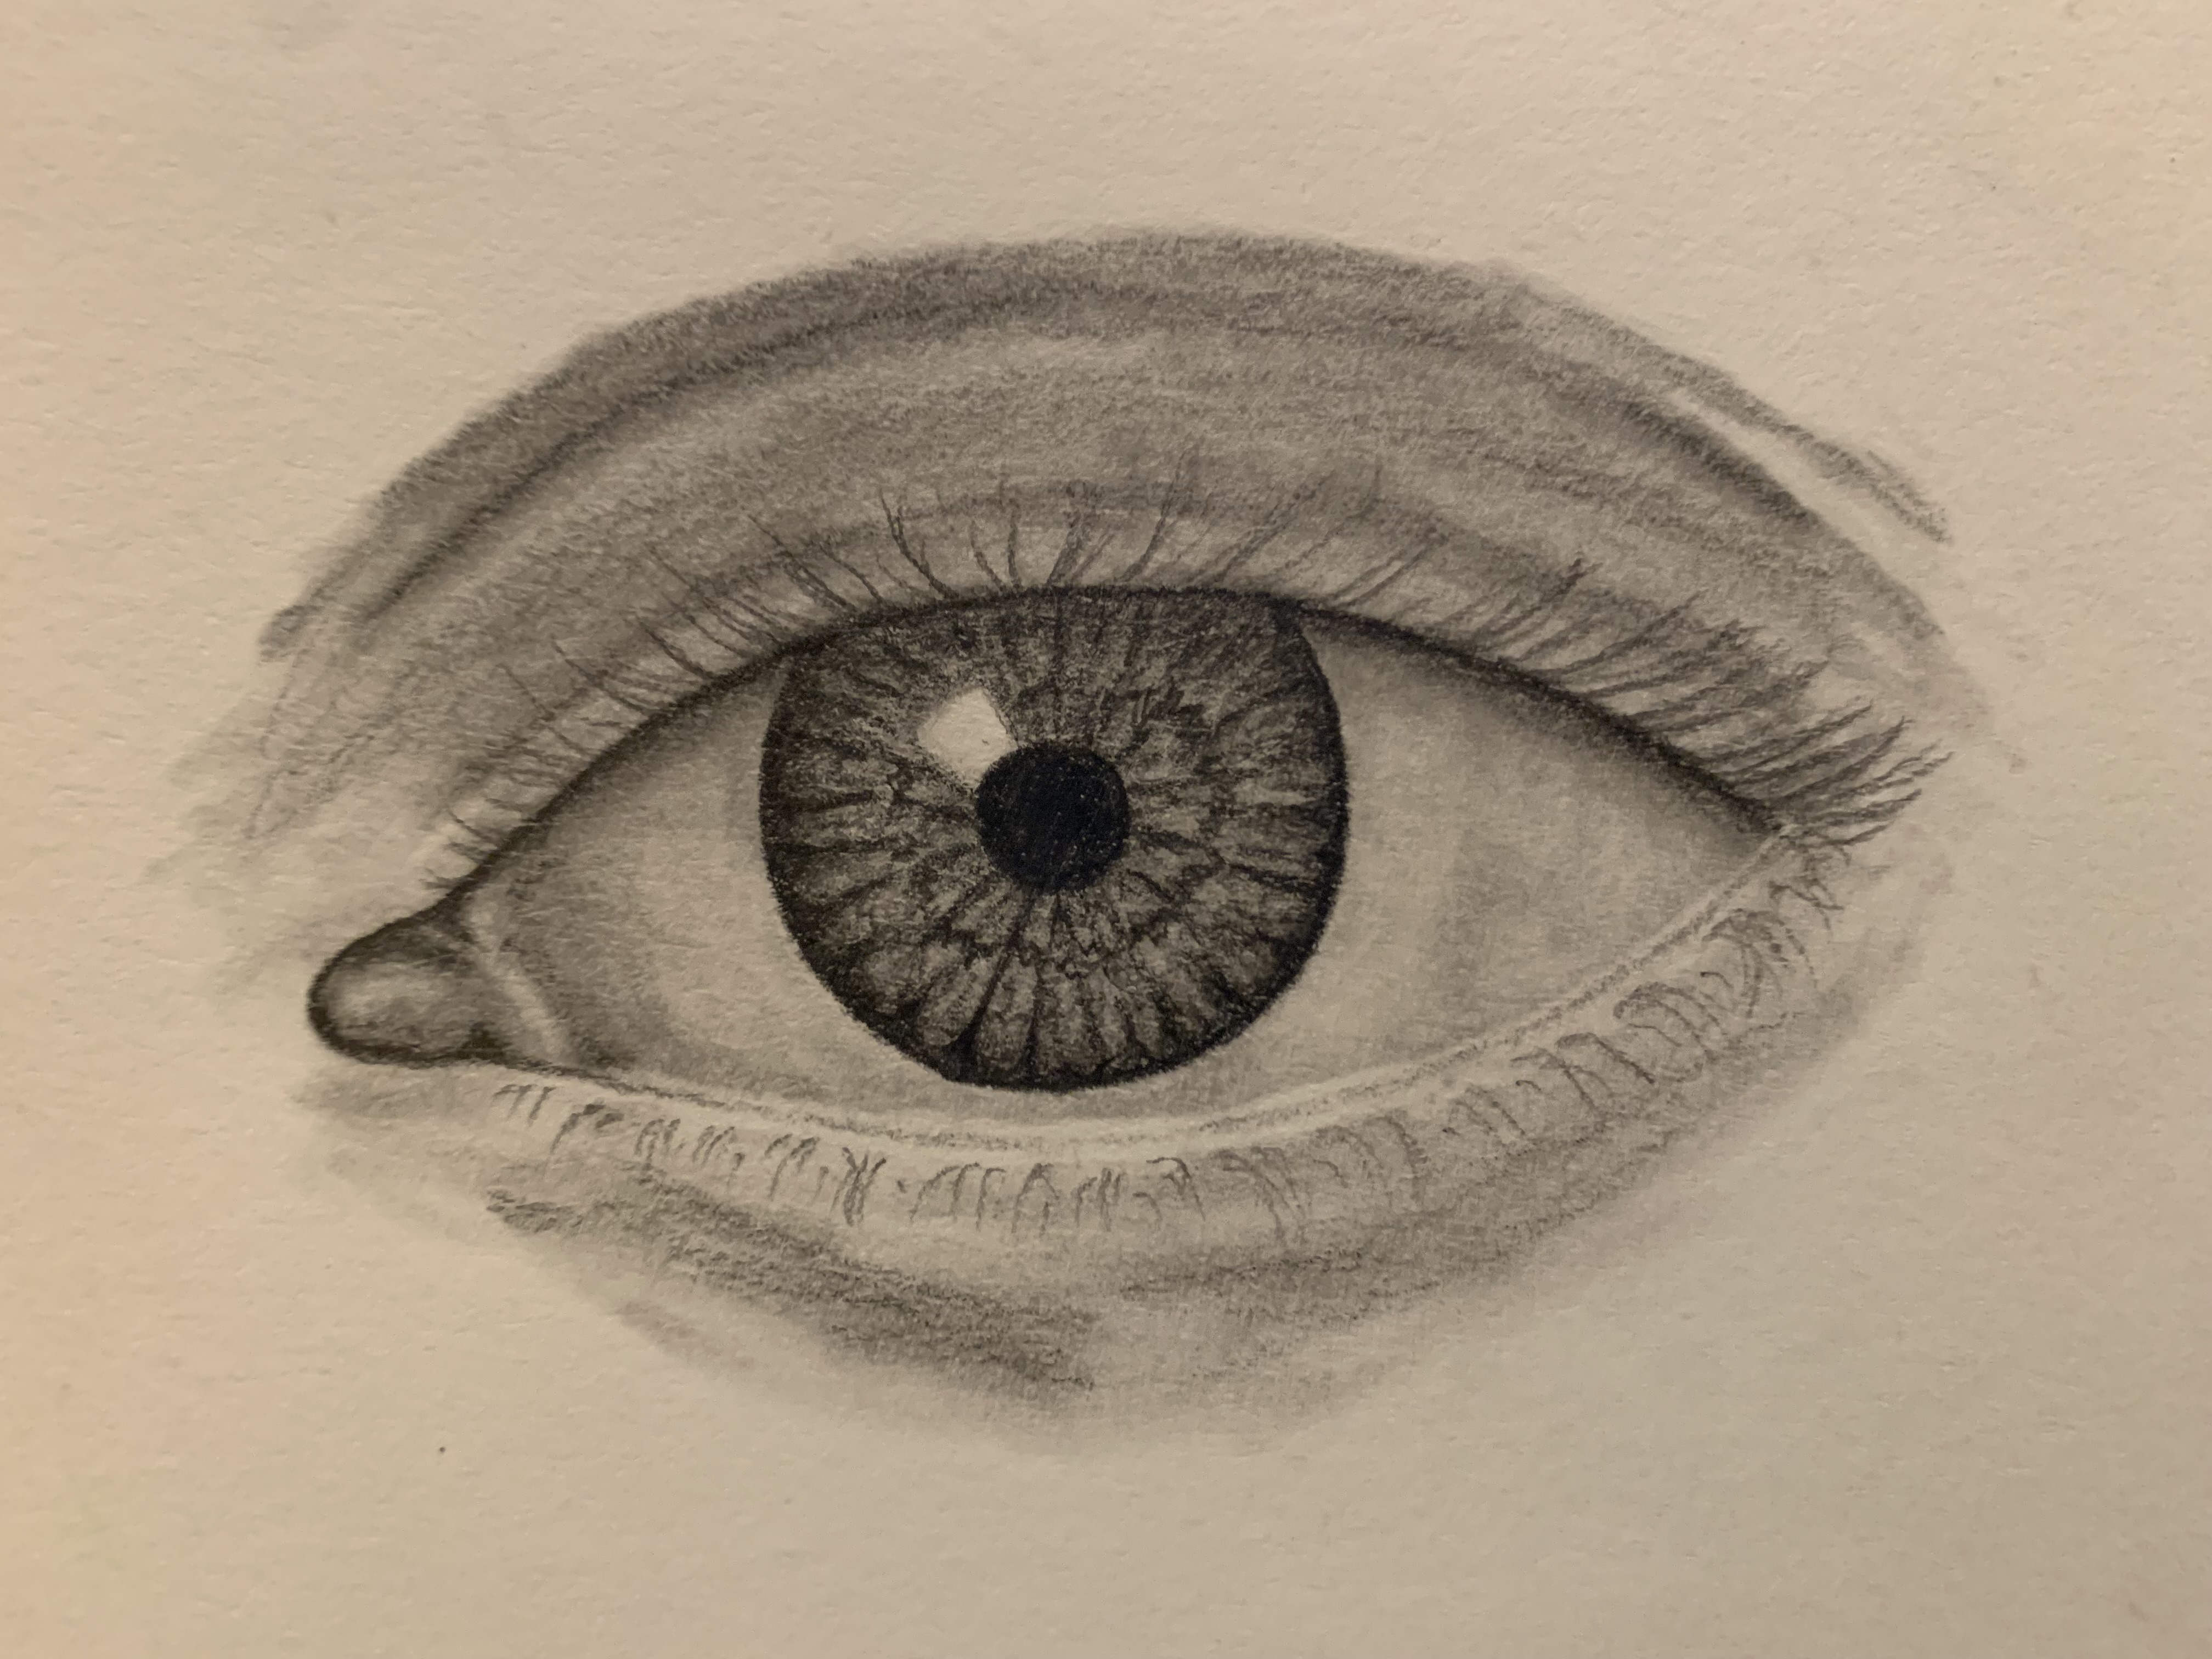
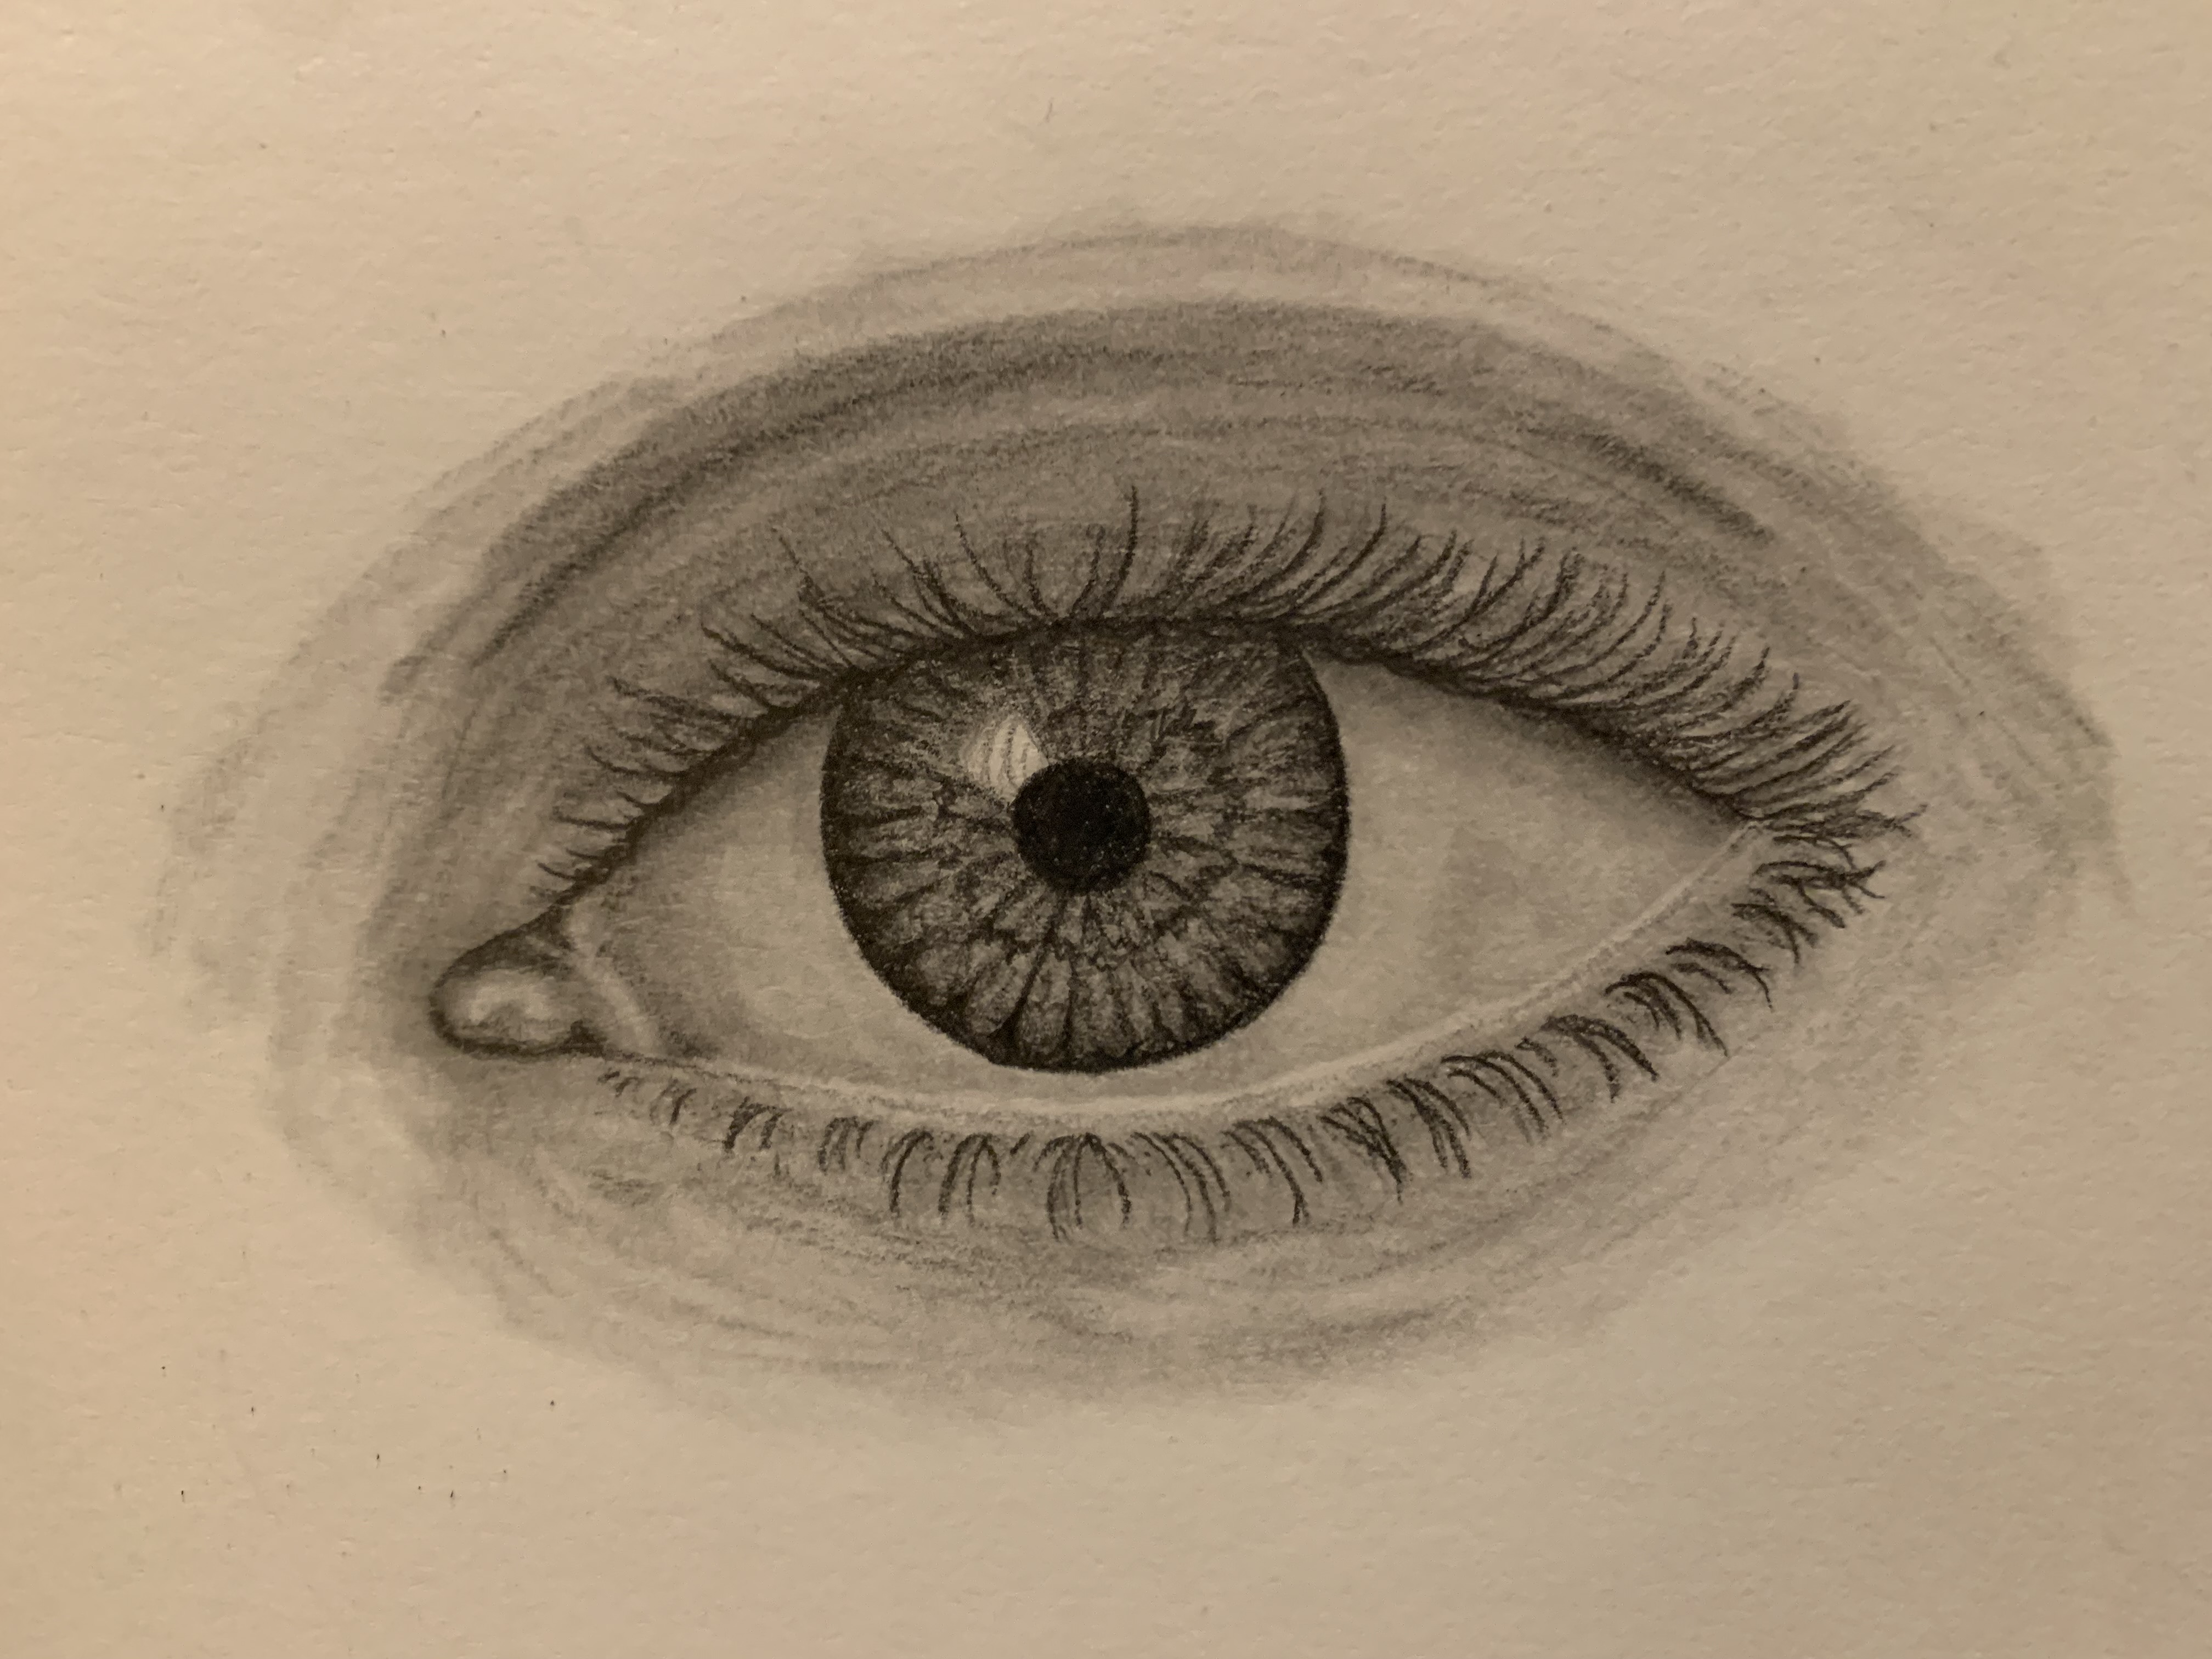
Throughout my life, I’ve always enjoyed drawing eyes. They have always interested me, as everyone's eyes are unique to them, and they can be depicted in many different ways and styles. During my year at CAWD 1, every week we were given agency assignments, where we could choose to create anything that we were interested in learning or practicing. For one of mine, I decided to learn how to make a realistic eye with pencils, instead of the more anime/stylized eyes I was used to drawing. The art piece took me around 6 hours to make from start to finish. I’m proud of how the final piece came out, and being the first time trying to make a realistic art piece with just regular pencils, the process was difficult but a great learning experience.
When I first began this drawing, I started by finding a tutorial online on how to draw a realistic eye. I looked through many tutorials, but most of them would start step by step, and then suddenly jump ahead to a very detailed art piece with no steps or context. I continued searching until I found a time-lapse video of an artist creating their eye, and I slowed down the video to follow along. My drawing doesn’t look like the video I followed, as I didn’t draw the same eye as him; I only used the video to learn similar techniques and applied them to my original drawing instead.
Along with the timelapse video, I also researched images of eyes and used Photoshop to turn them into monochrome/grayscale, so I could see how lighting and shades change from colored images to black and white. When creating this drawing, I used 6B, 2B, HB, and 2H pencils as my mediums, multiple erasers, and 3 different-sized blending stumps to blend and shade. Finally, with all these resources, I started to create my art piece.
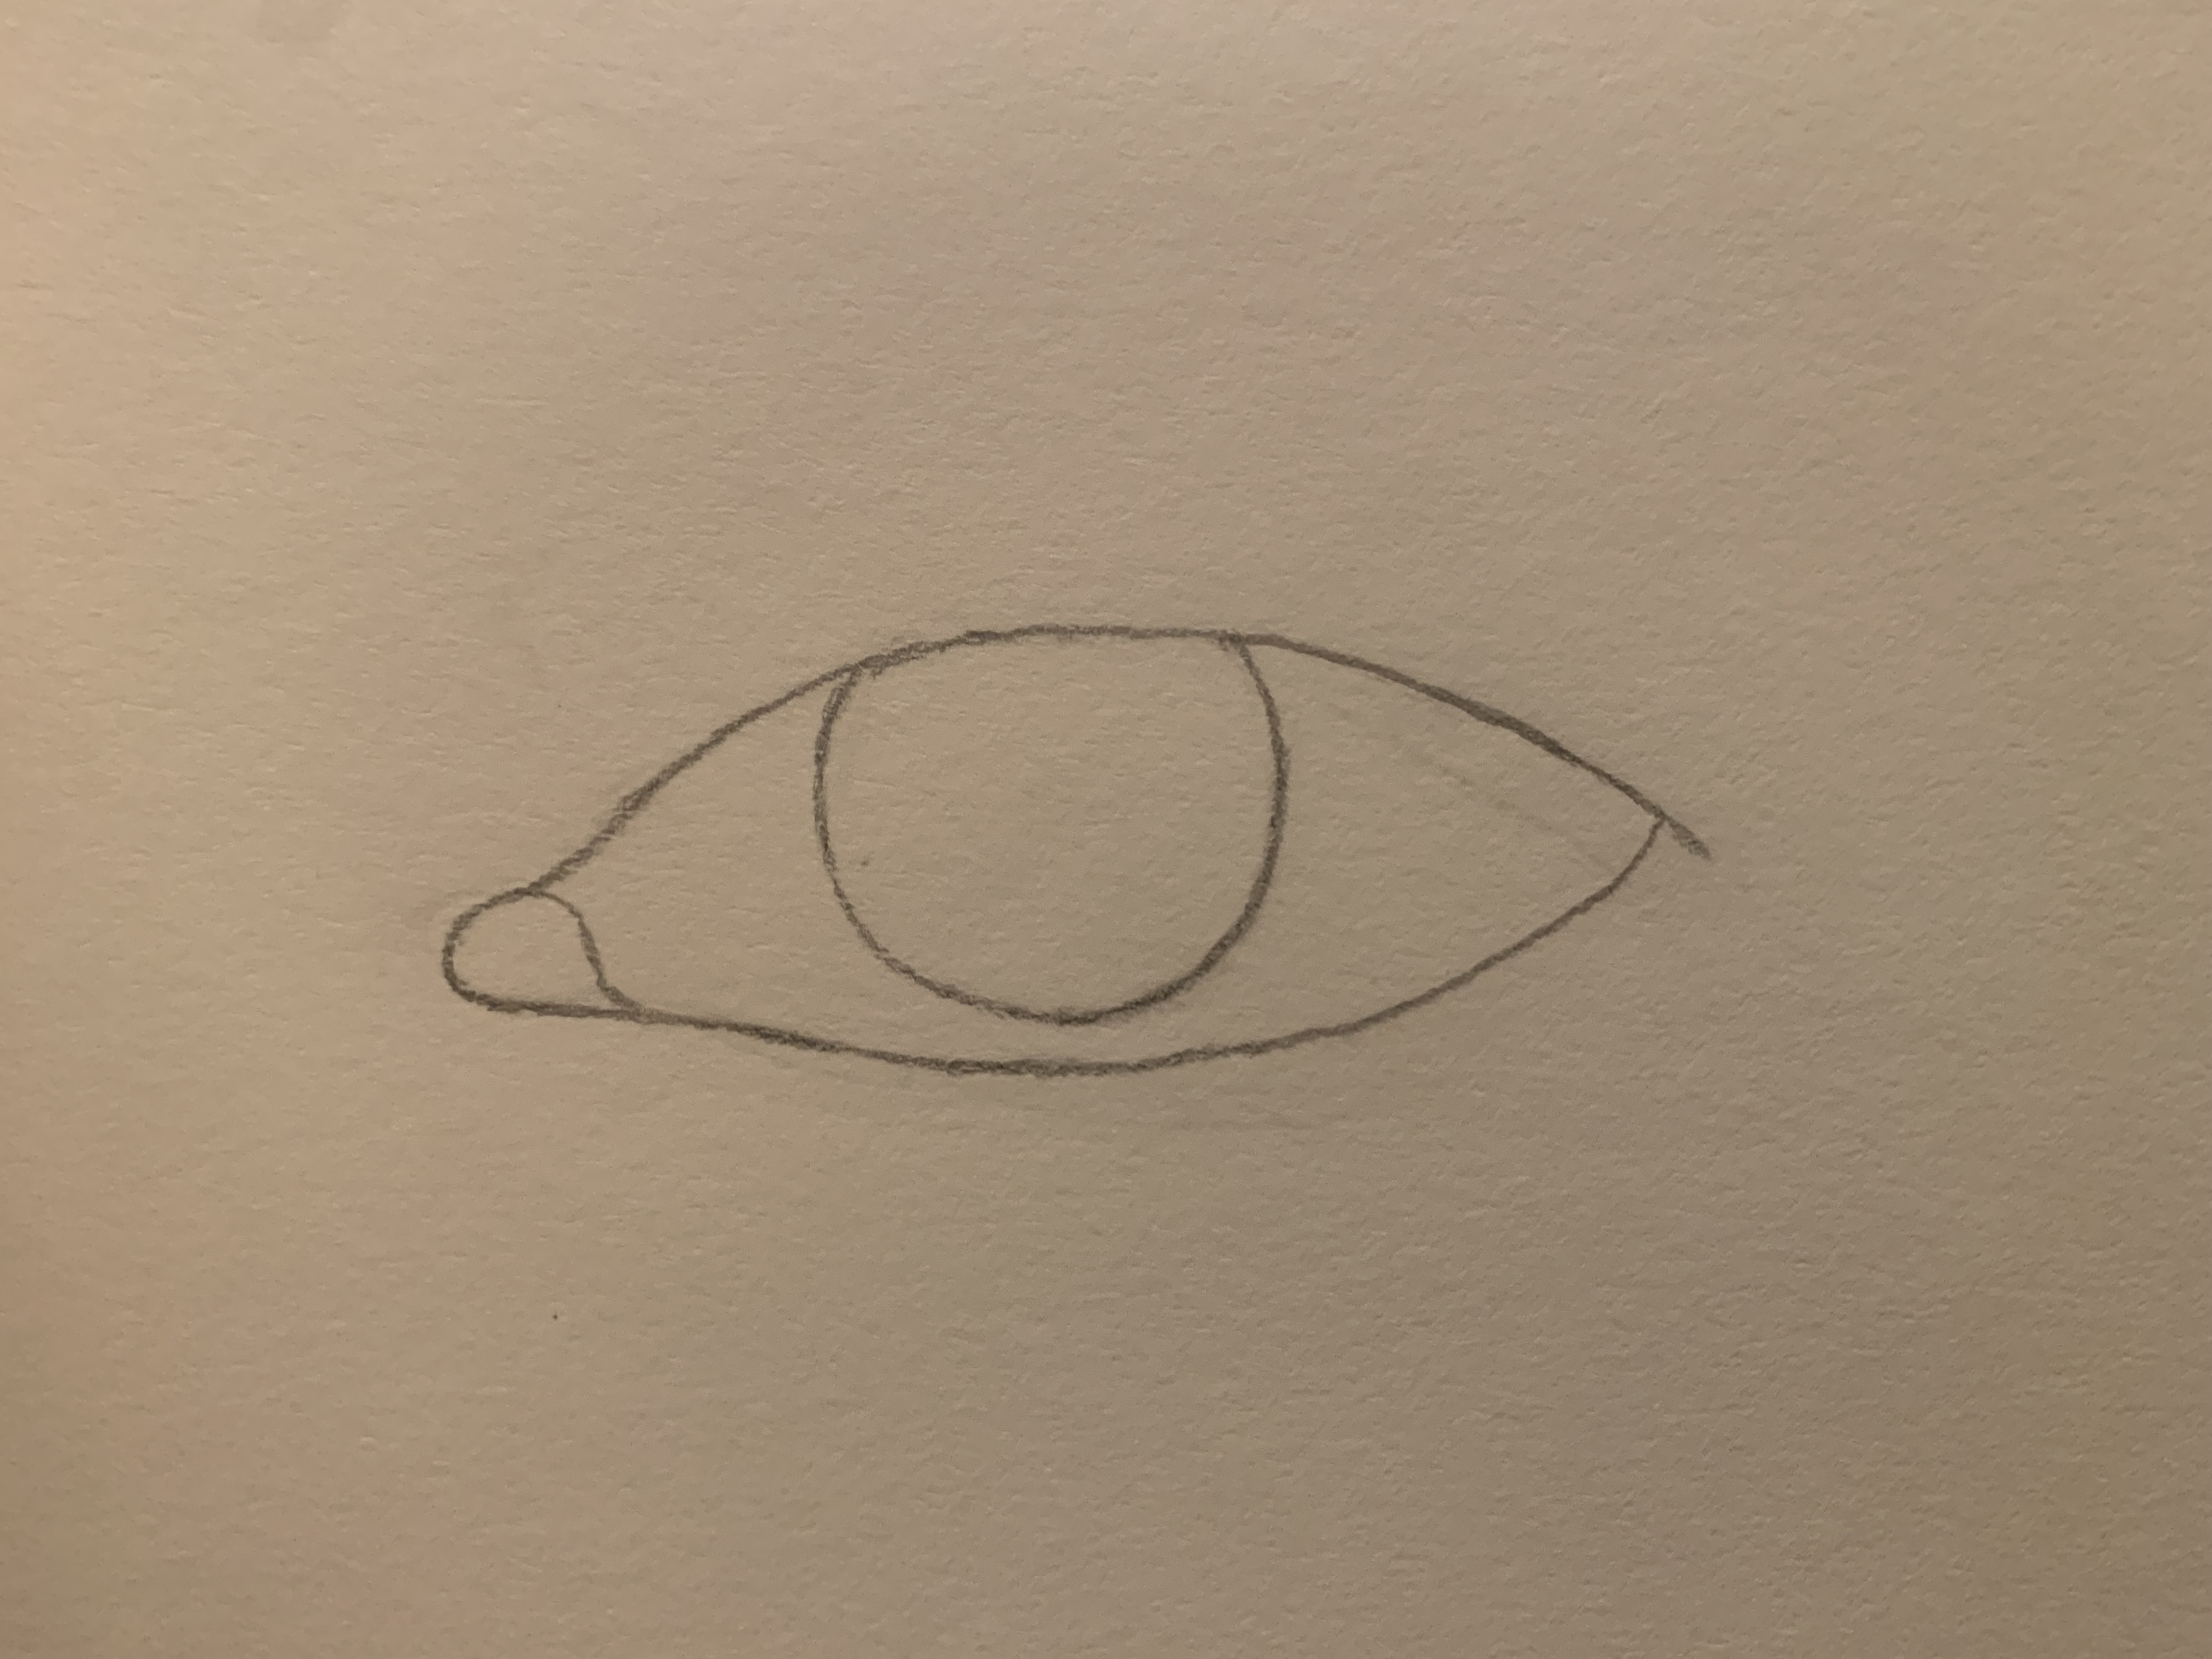
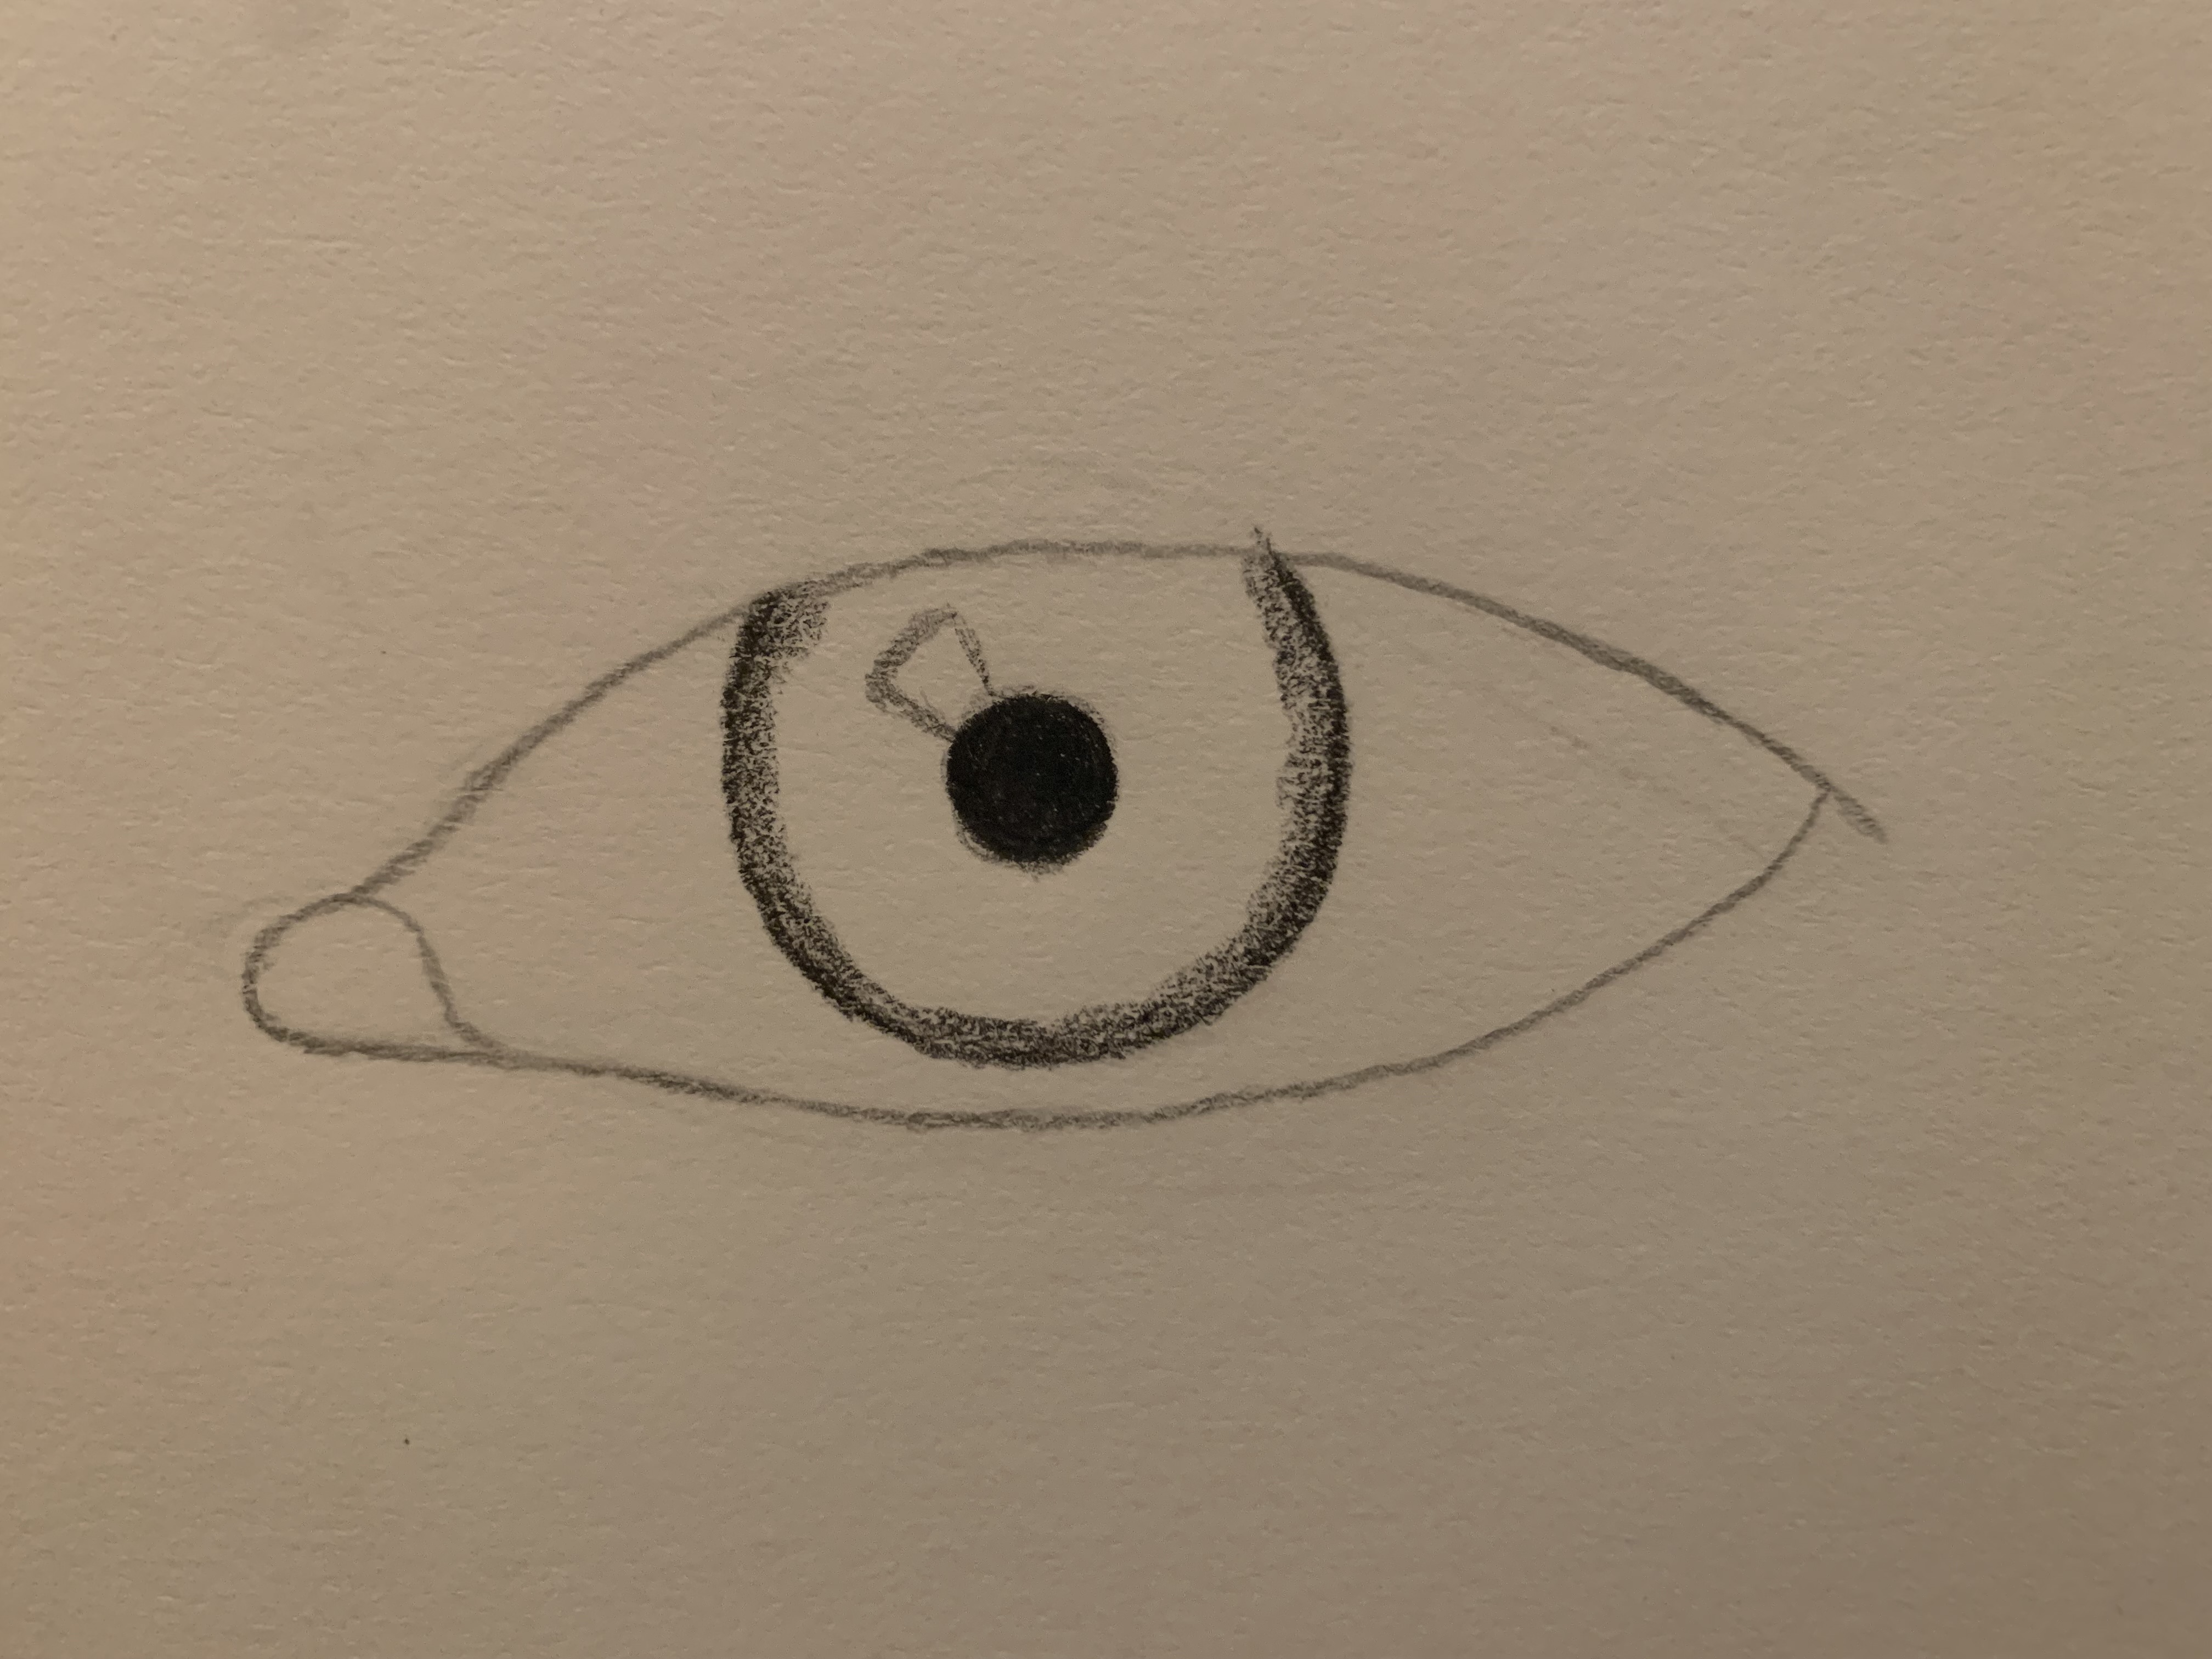
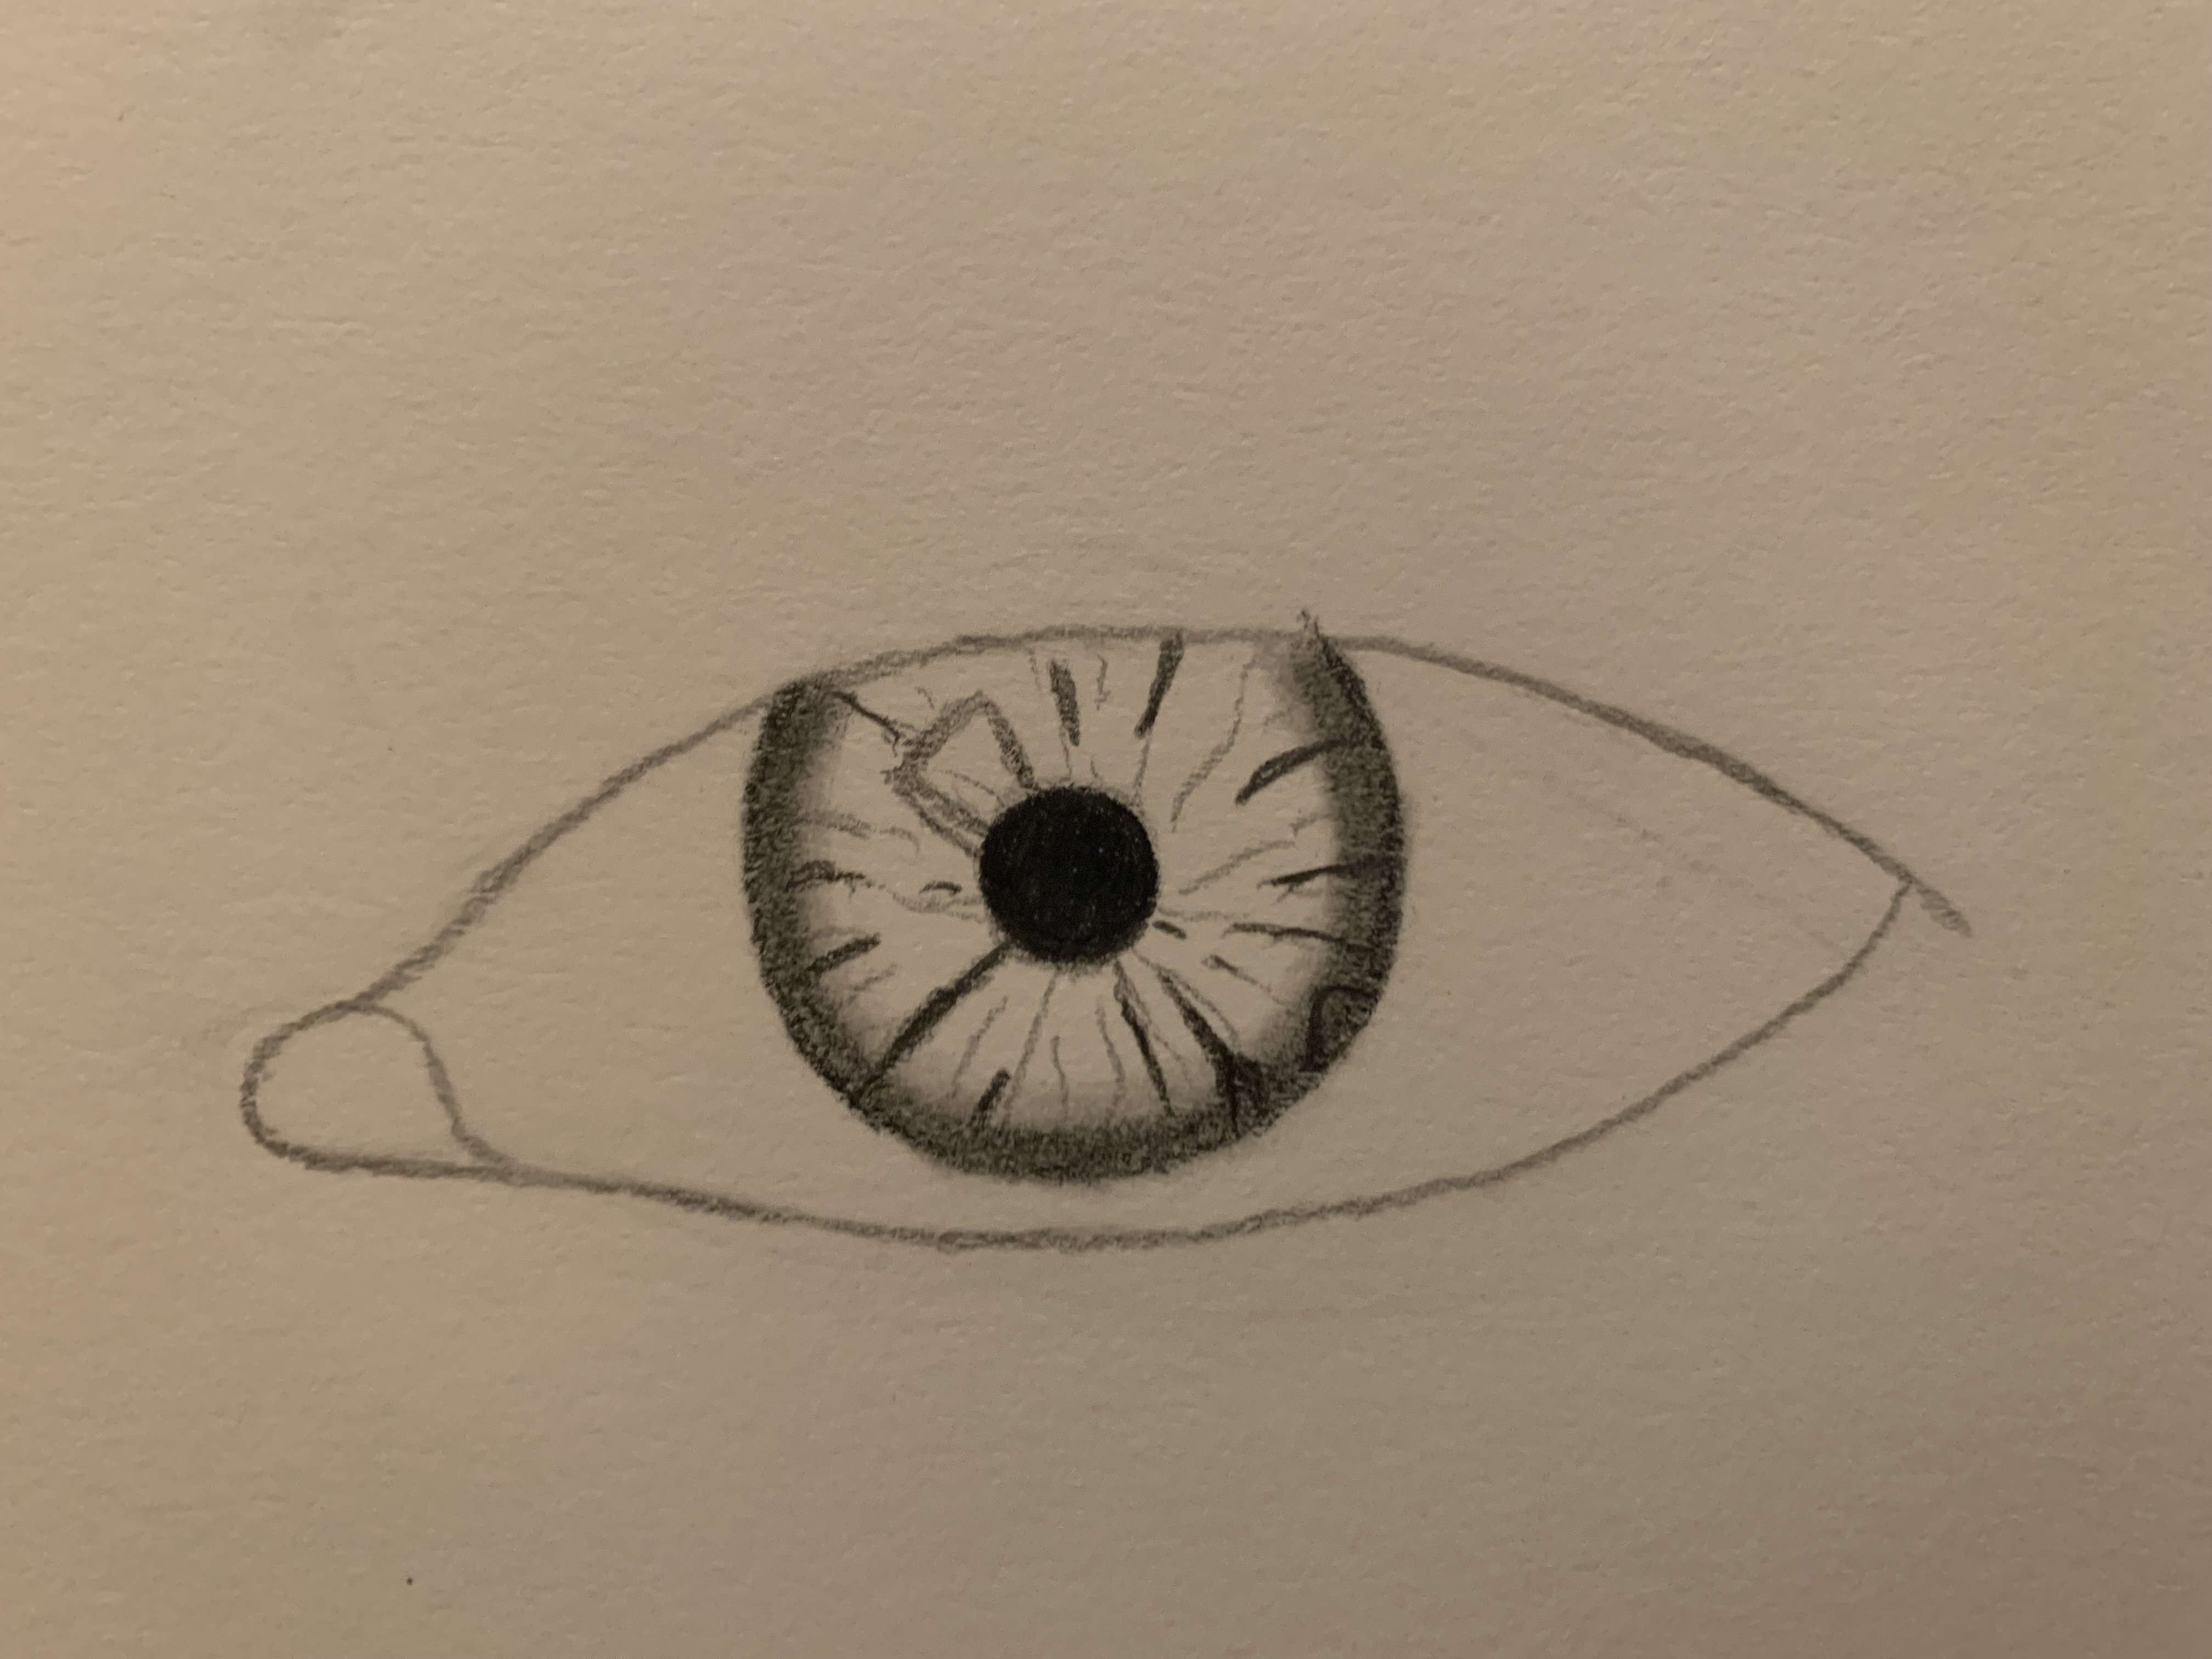
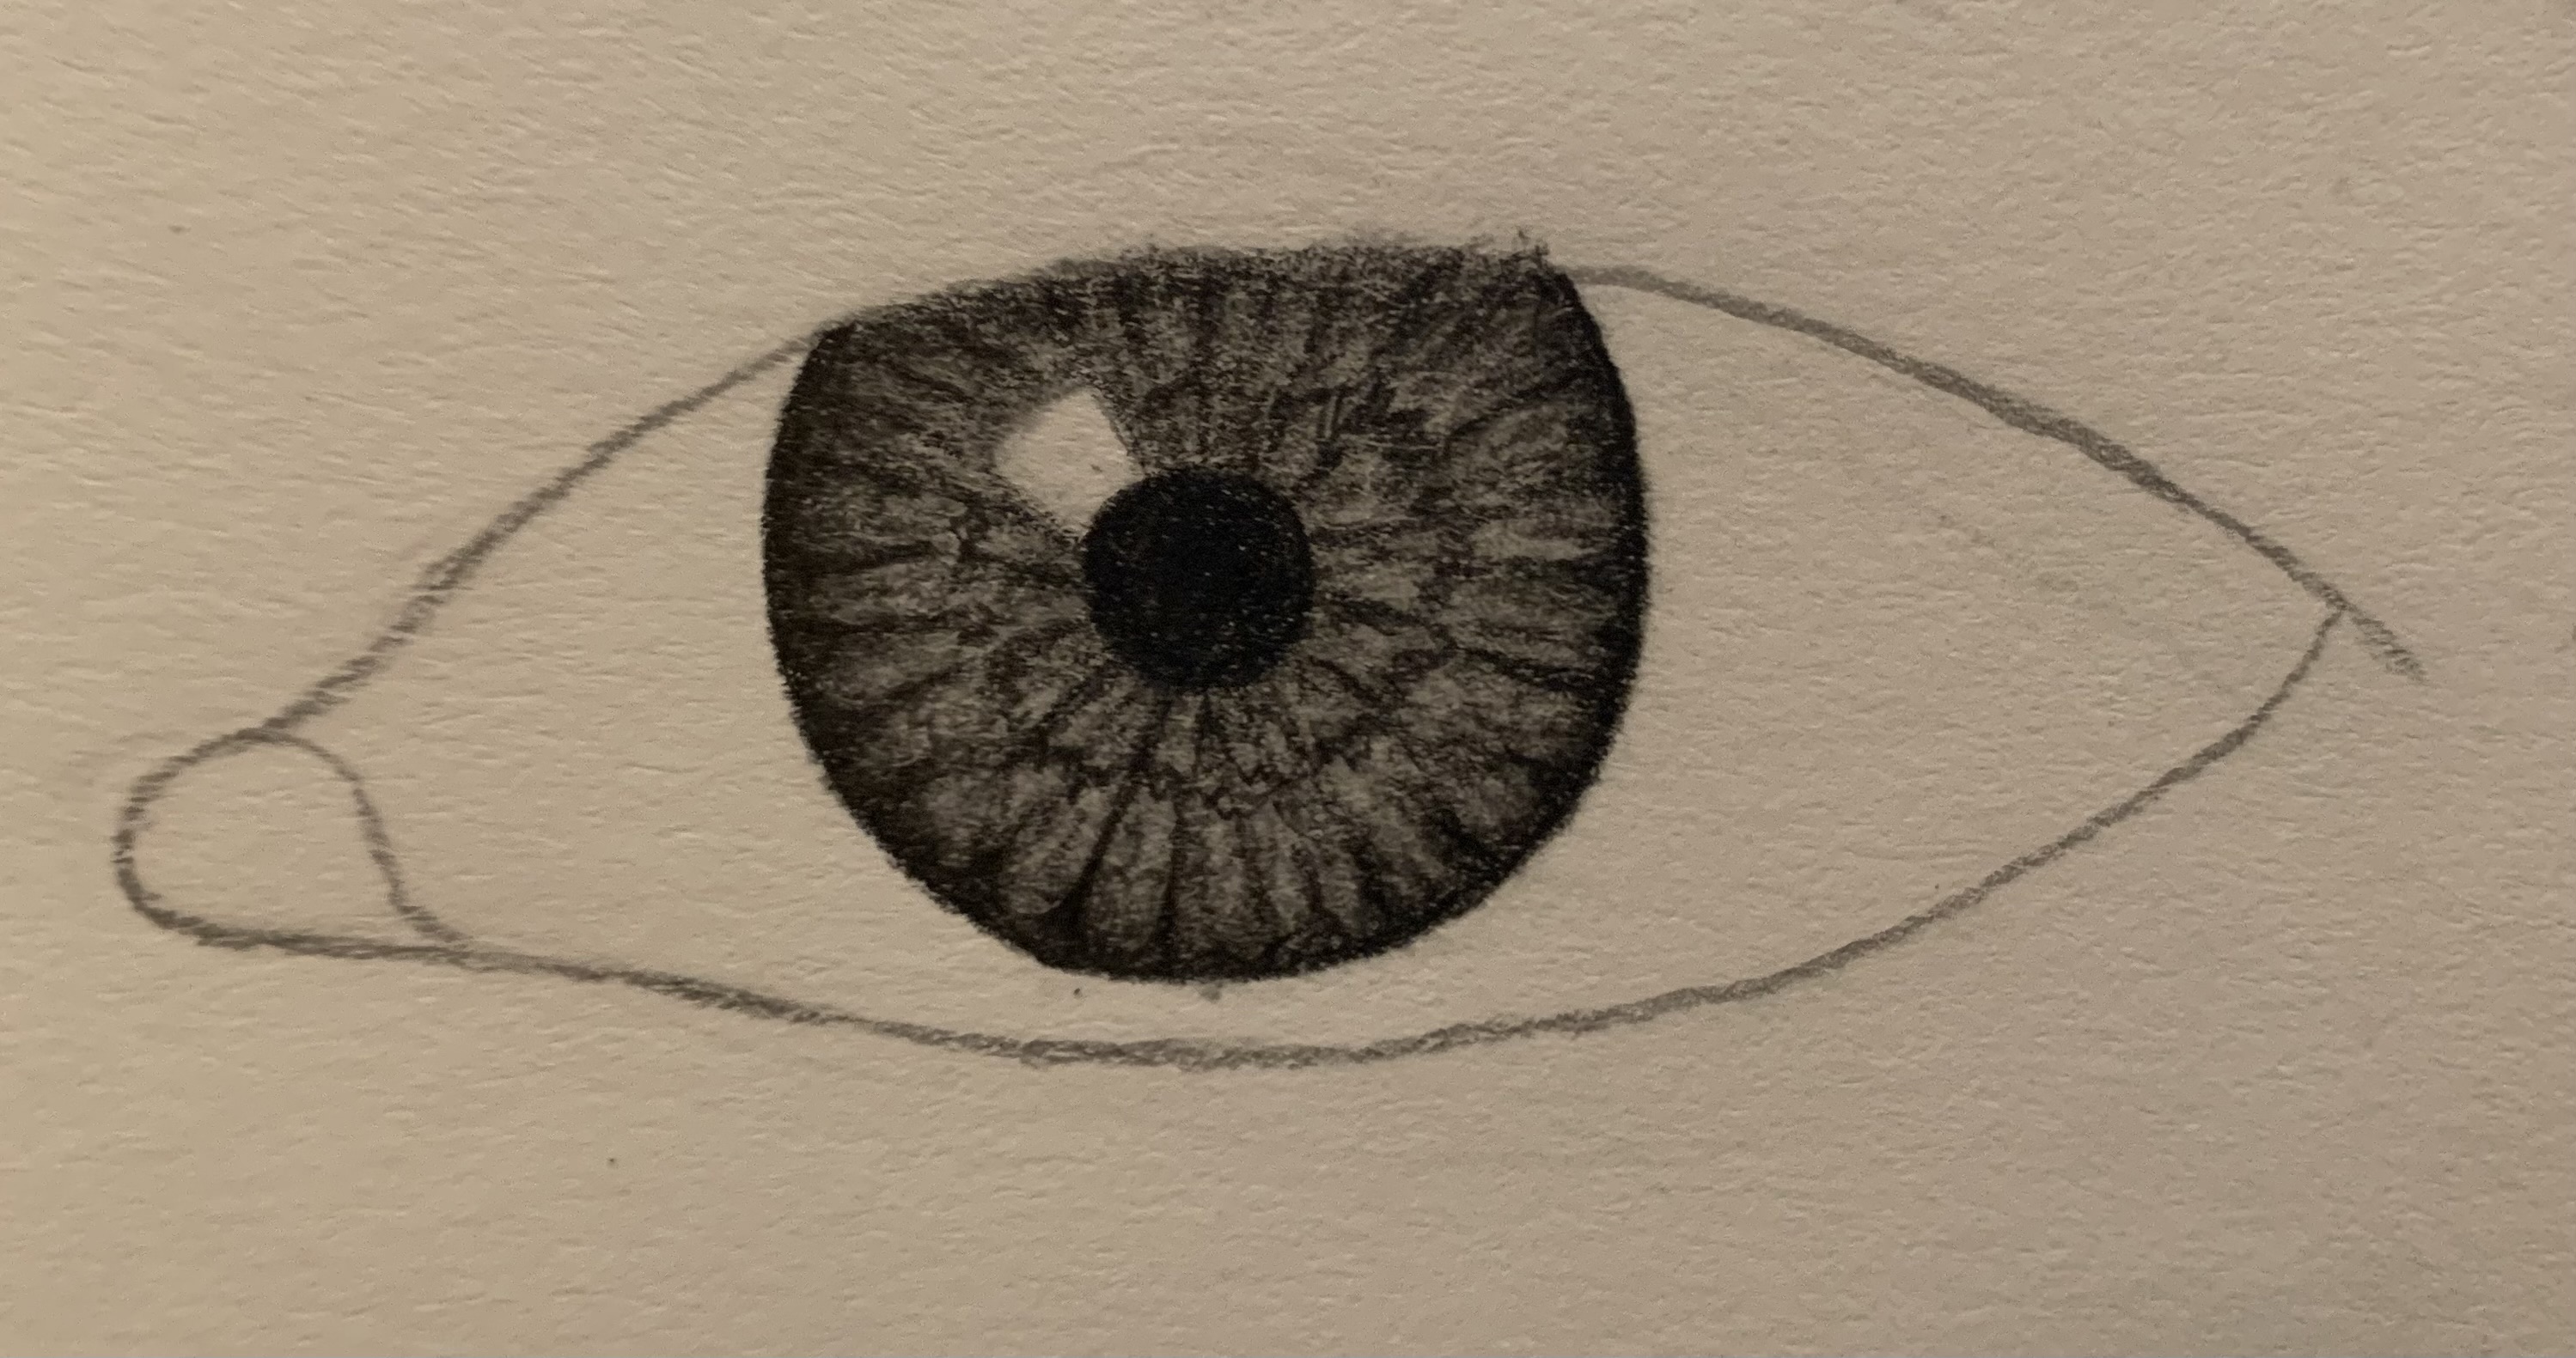
The process of my drawing started with a simple outline of the eye: the iris, caruncle, and eye shape. I slowly expanded this outline by adding the pupil, highlight boxes, and a basic grey shade for the iris. Next, I focused on the iris, adding detail with lines of different sizes and thicknesses, starting from the outer ring and going toward the pupil. I carefully blended the graphite with a blending stump and redefined the lines by lightly going over them. I then added the inner circle to the iris to add more detail and depth. After I added some final shading to the iris, I moved on to shading the white of the eye and the caruncle. I used a blending stump to shade the white of the eye (sclera), using the graphite left on it before lightly going in with a pencil to darken the areas underneath the upper eyelid. For the caruncle (the pink area / the inner corners of the eyes), I started with an HB pencil and a 2B pencil, then used the blending stump for the highlighted areas.
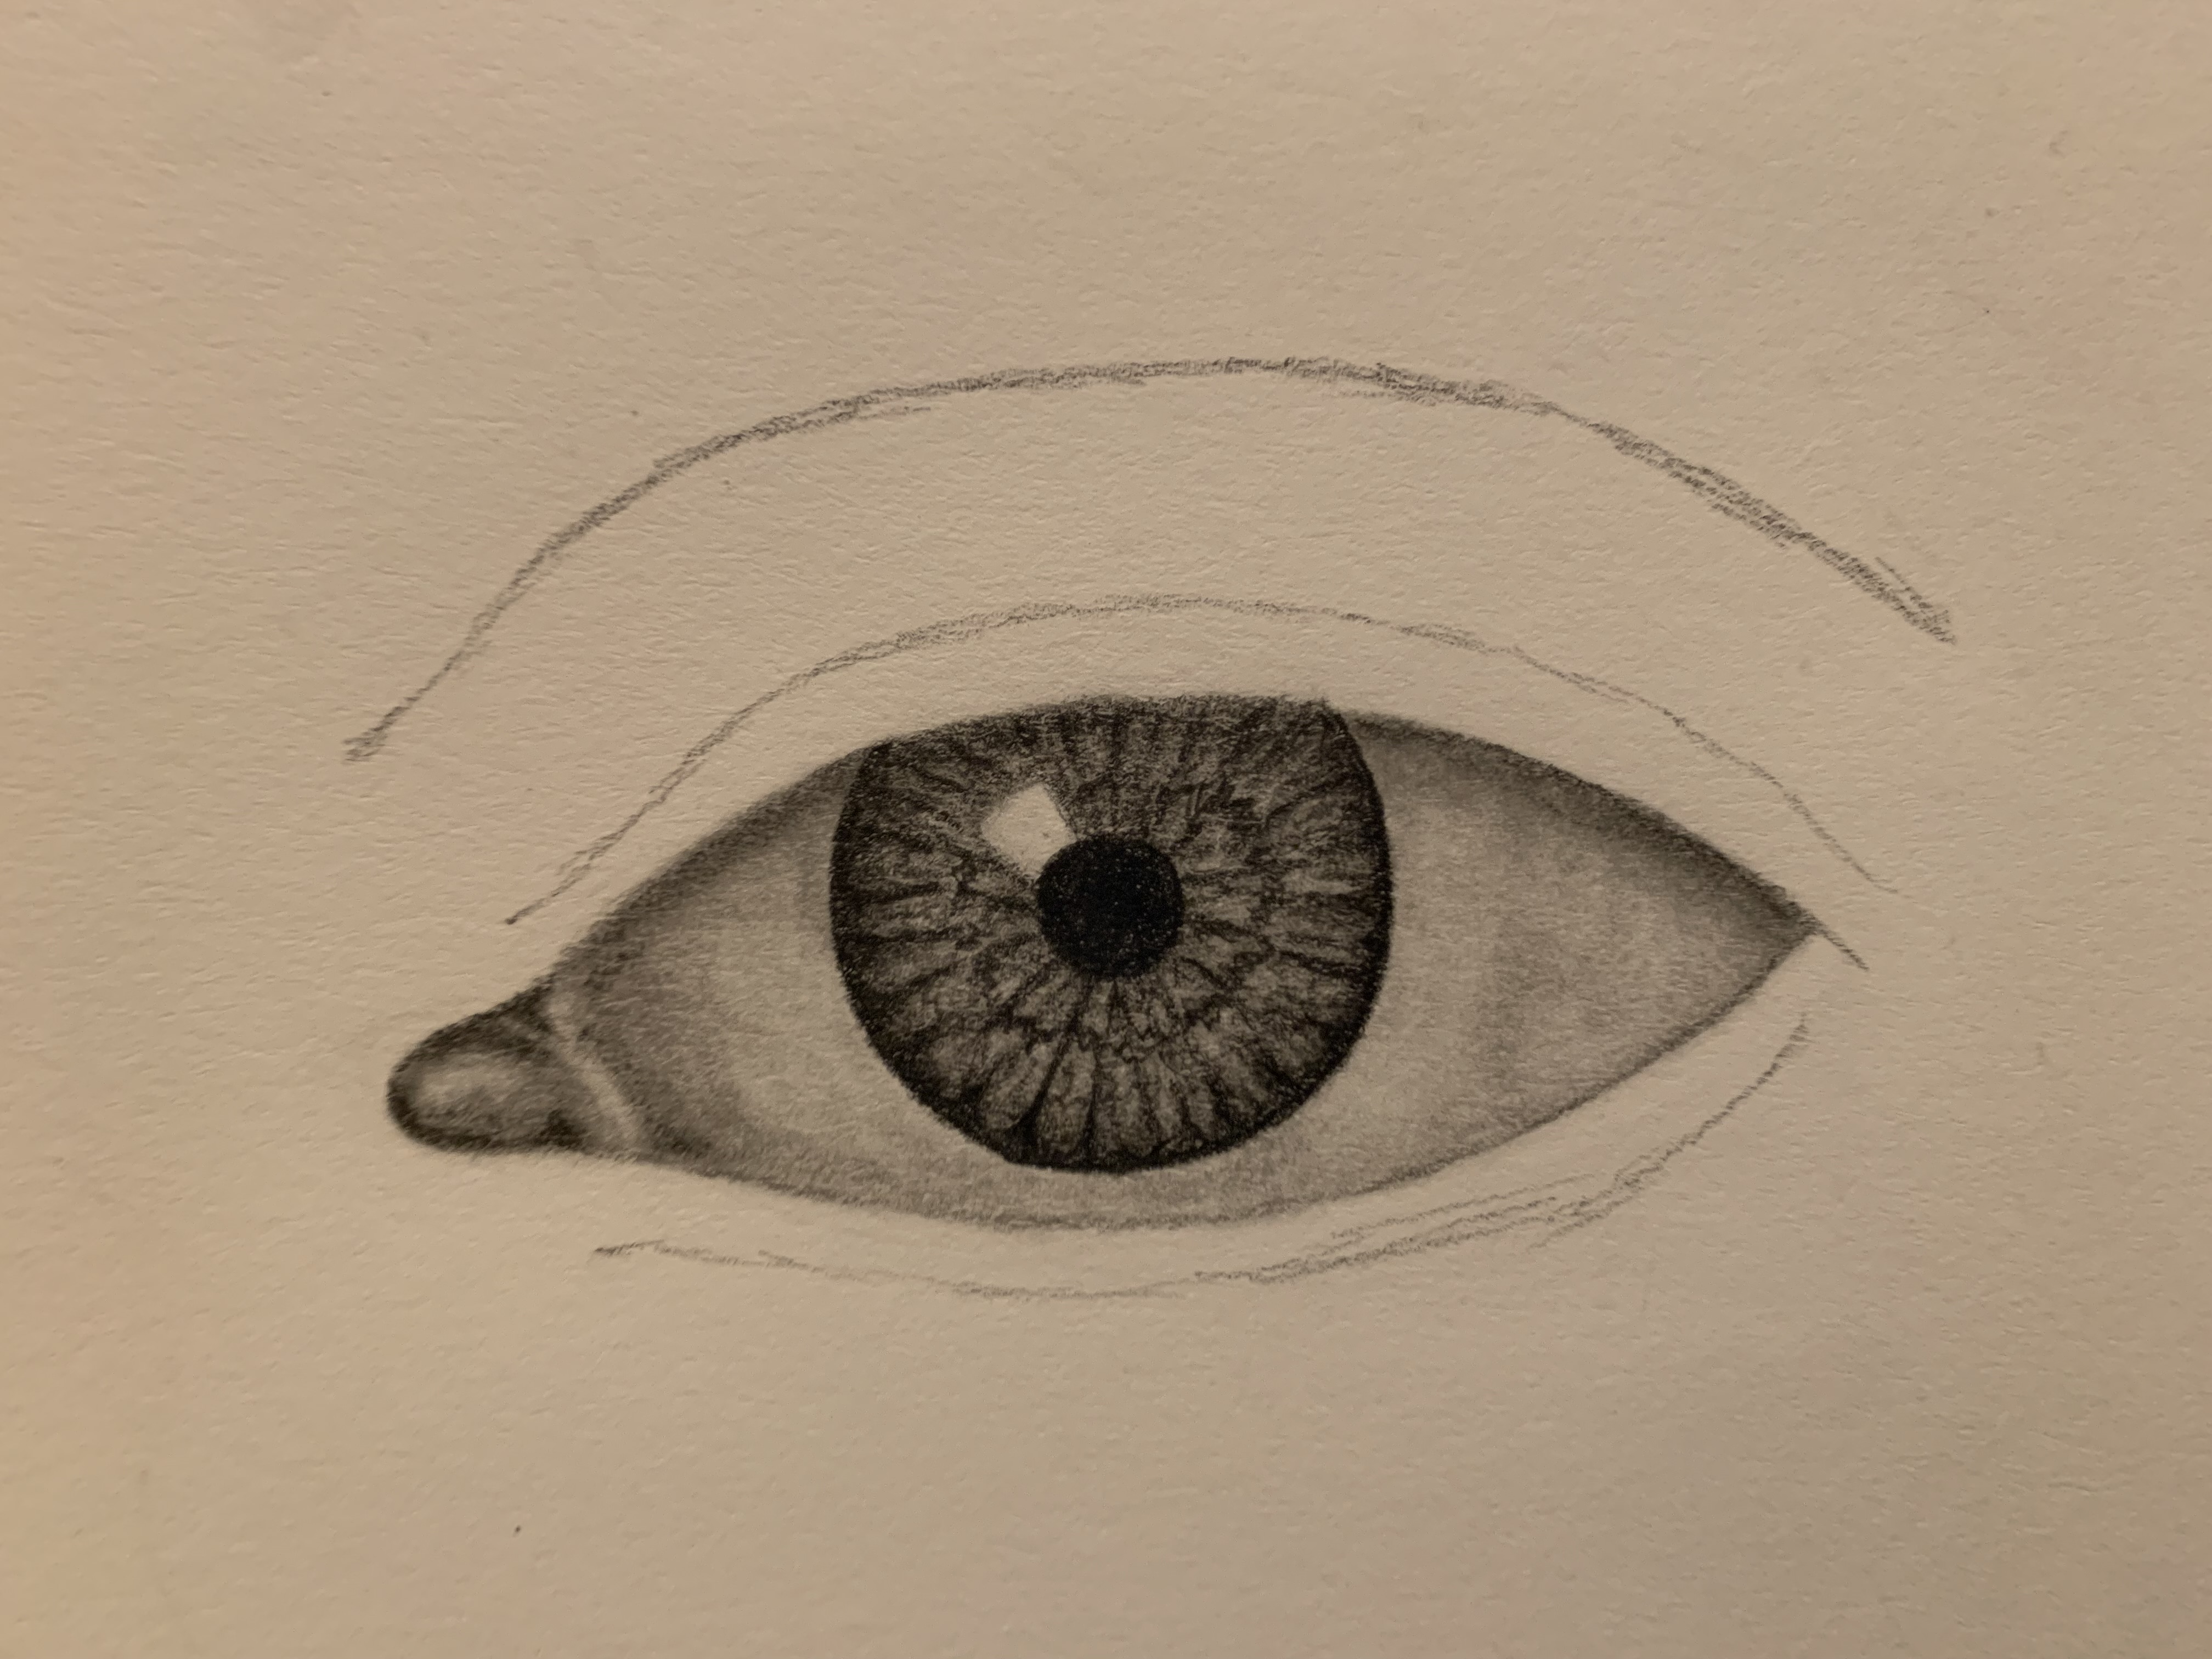
Moving on to the eyelids, I sketched out where I wanted them to sit, and started light shading with a 2b pencil and a blending stump. I added shades and depth with the 2B pencil and blended everything, repeating the process for the lower eyelid. I used the blending stump around the entire eye area to help with contrast against the white paper before finally adding the eyelashes.
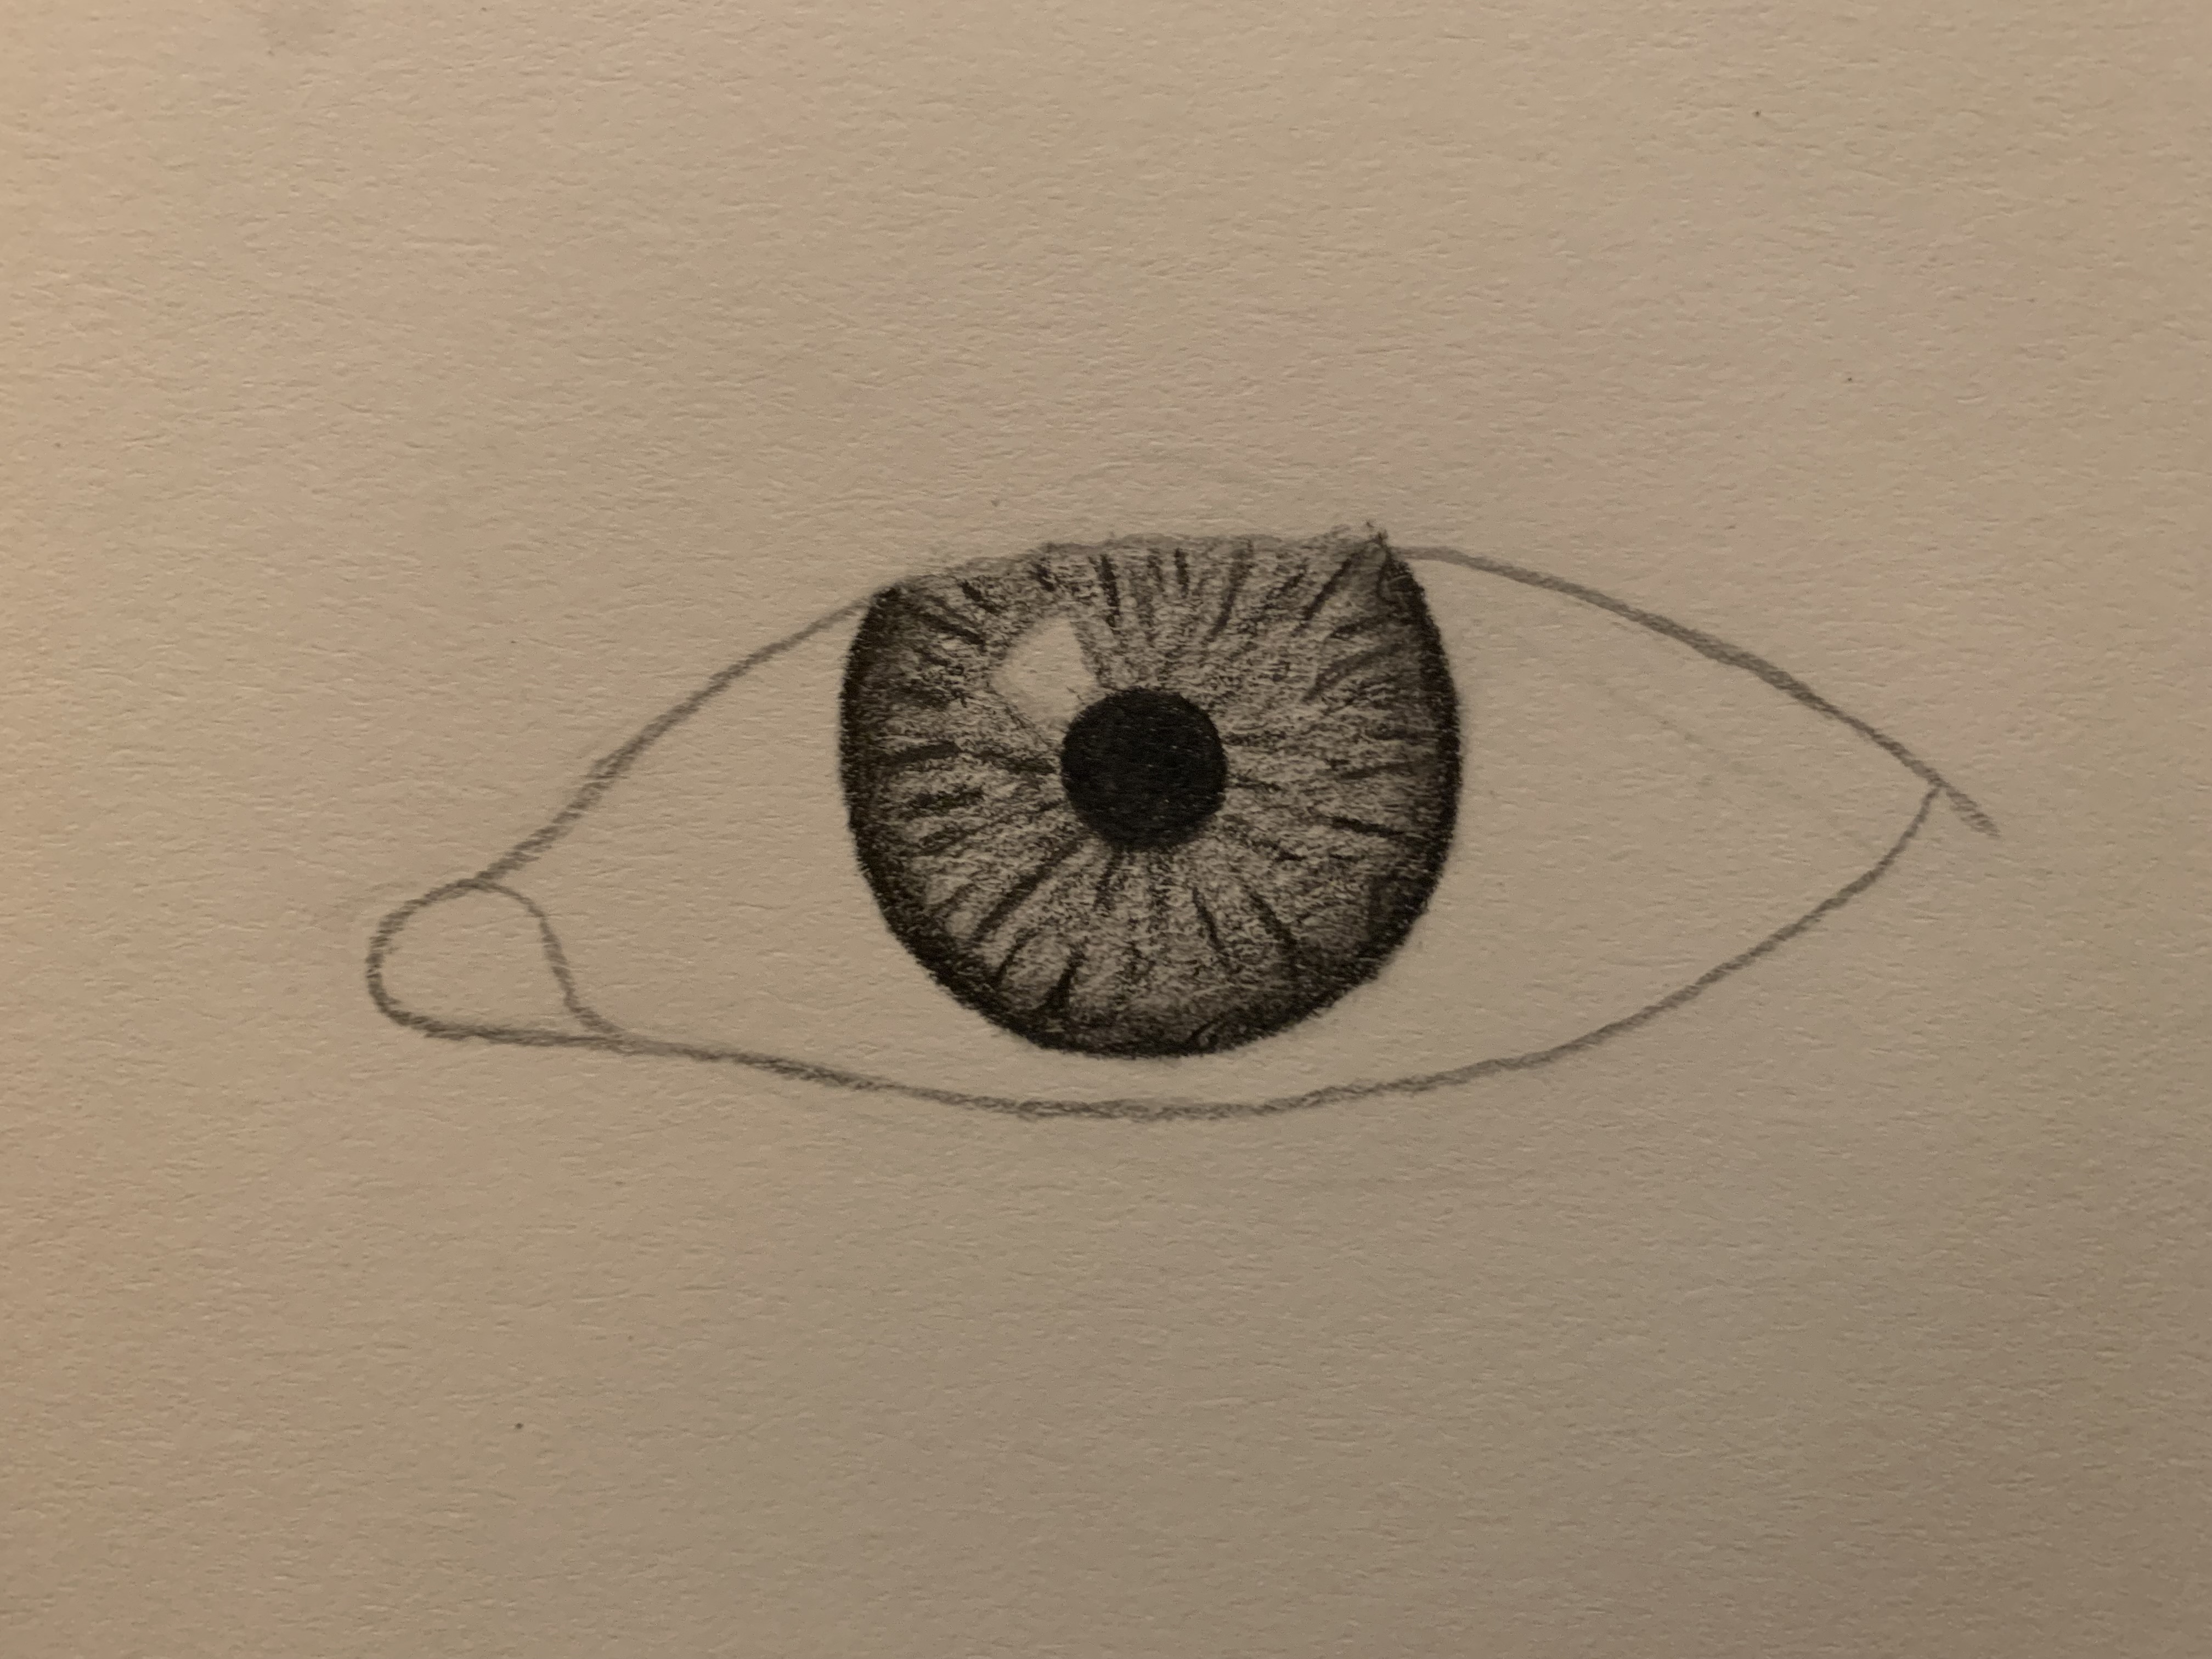
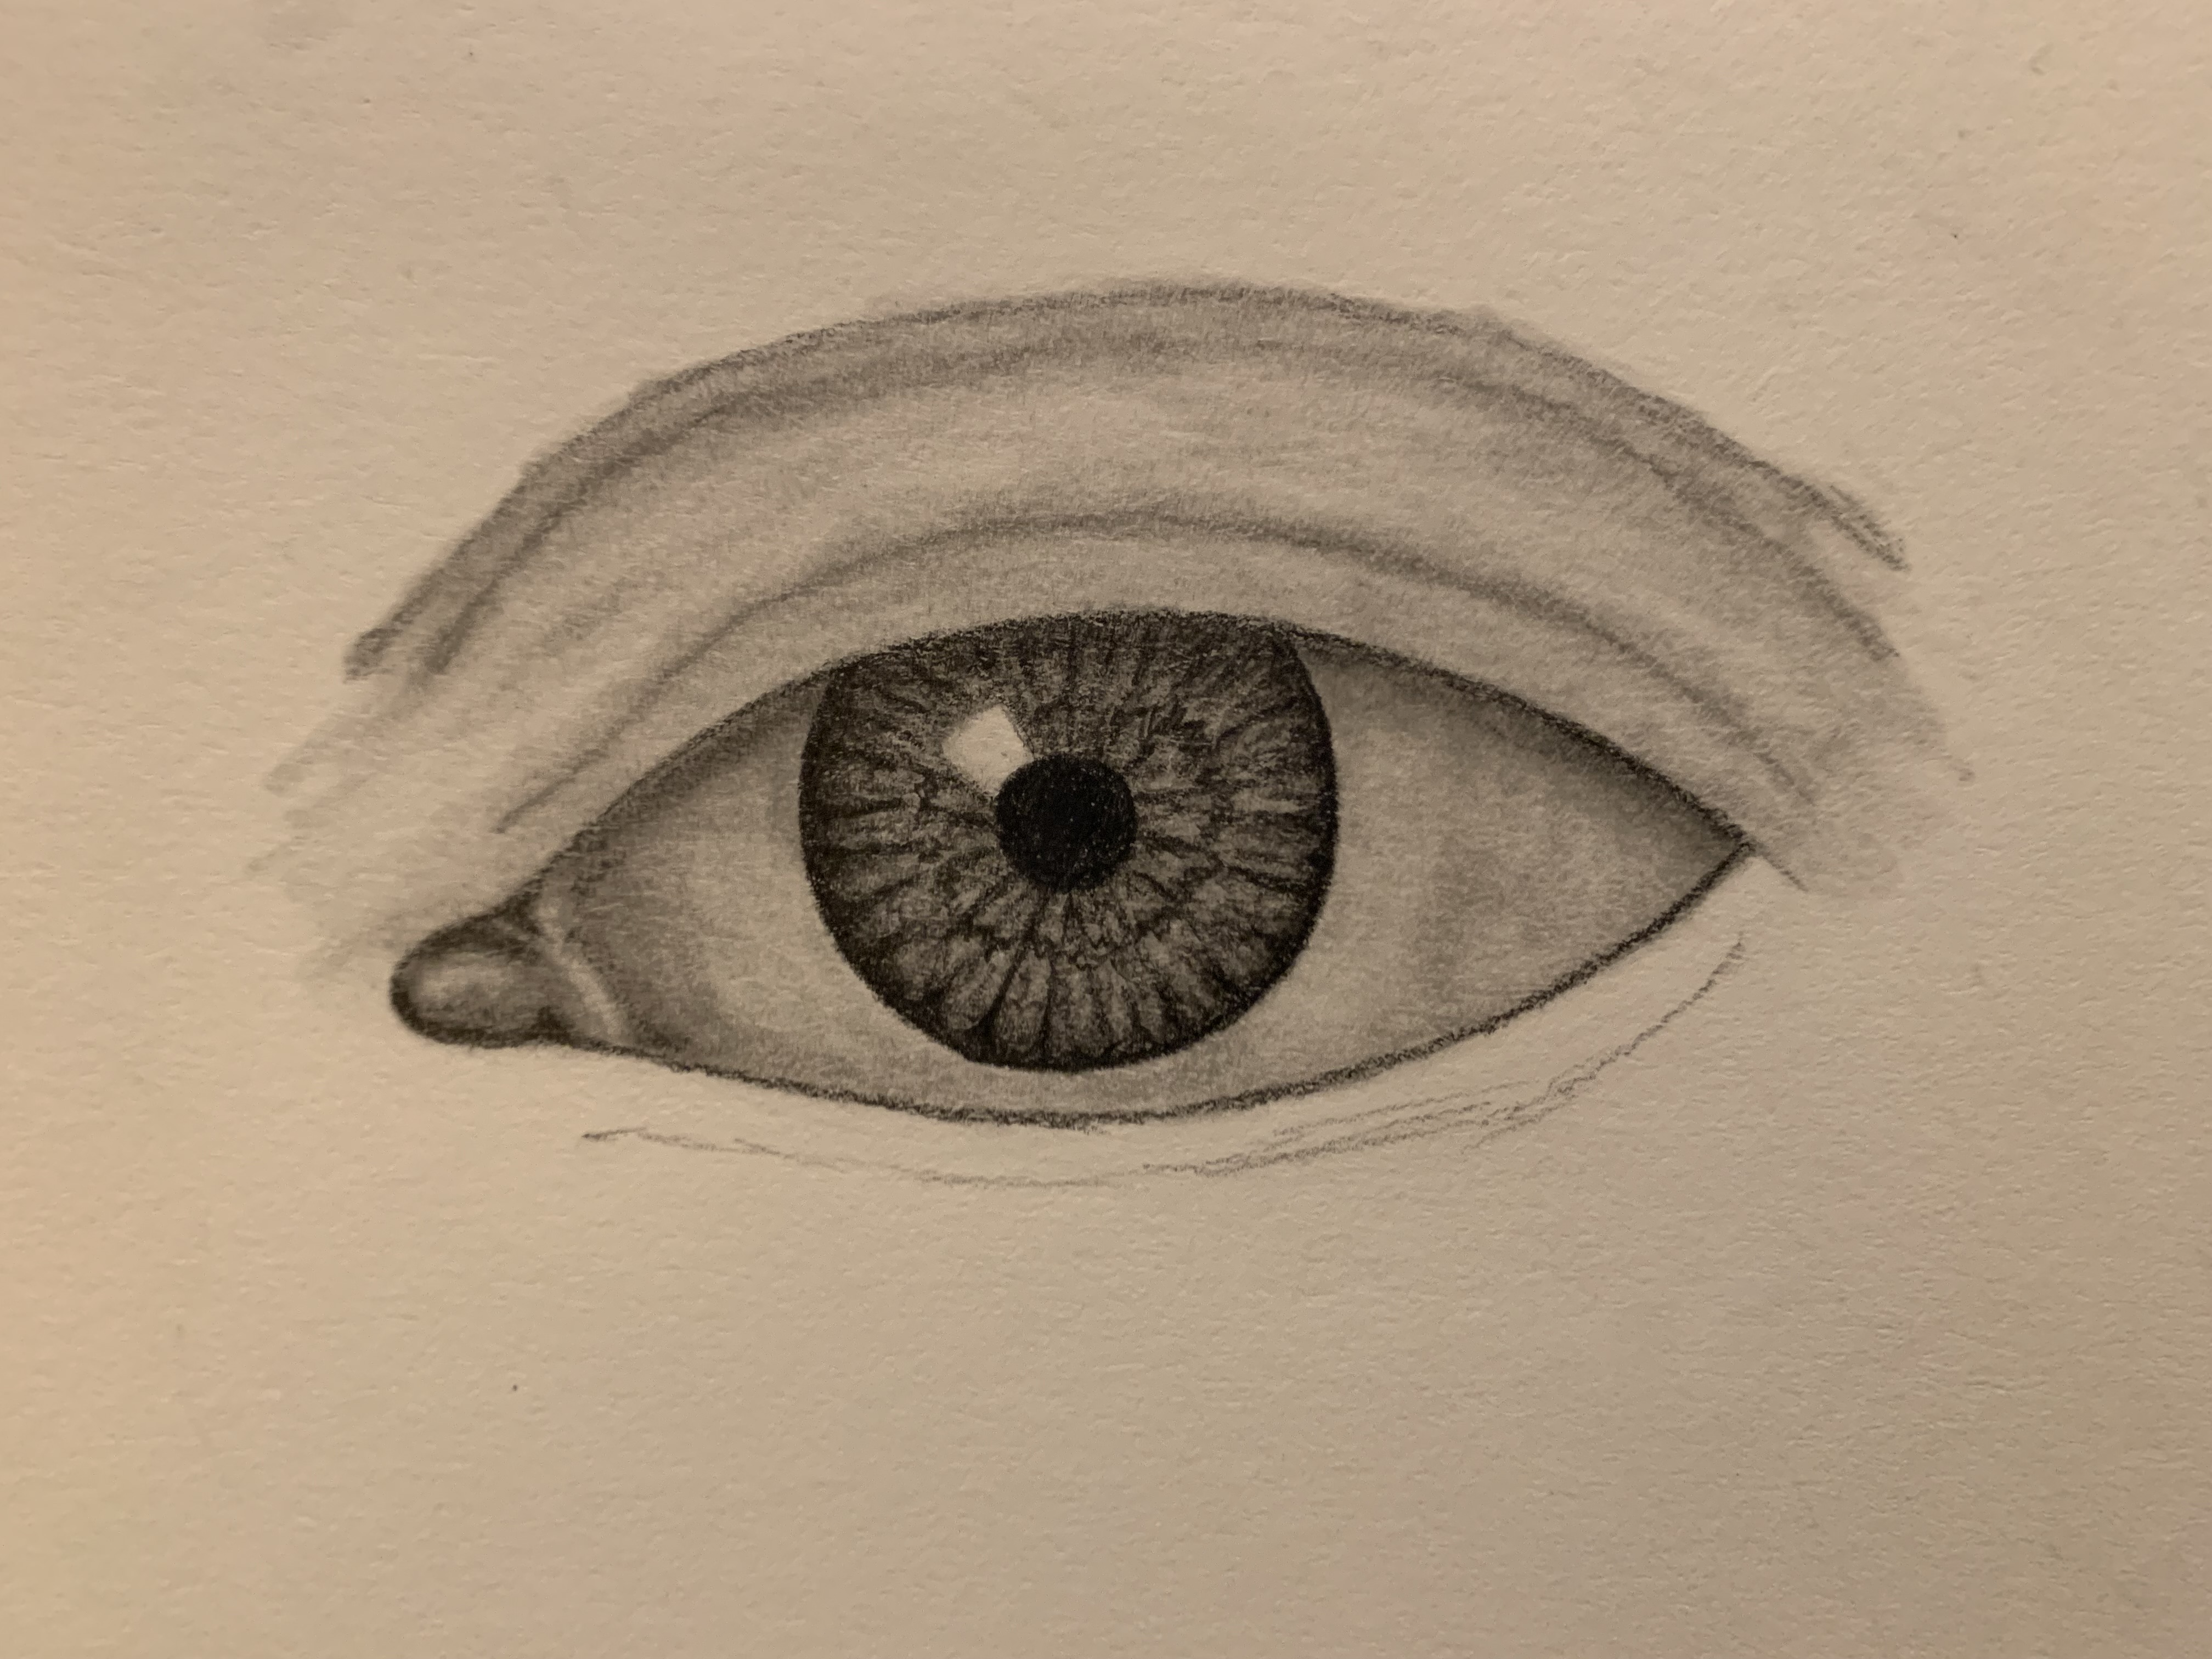
Before adding the eyelashes, I brought up more reference images close to the angle of my eye drawing. Since the images I found weren’t great, I took a picture of my own eye for the eyelash reference. Going back to the project, I had lightly drawn where I wanted the eyelashes to sit before fully committing, and when they were good enough, I pressed down harder with my pencil to darken them. I lightly went over them with the 6B pencil, adding slight hue variations for each eyelash. When I finished, the eyelashes didn’t turn out exactly how I wanted them to. They didn’t look like the references, but they ended up looking more like short eyelash extensions instead of natural eyelashes. Finally, I added small reflections of the eyelashes in the highlight of the iris and added my name and date to finish my piece.
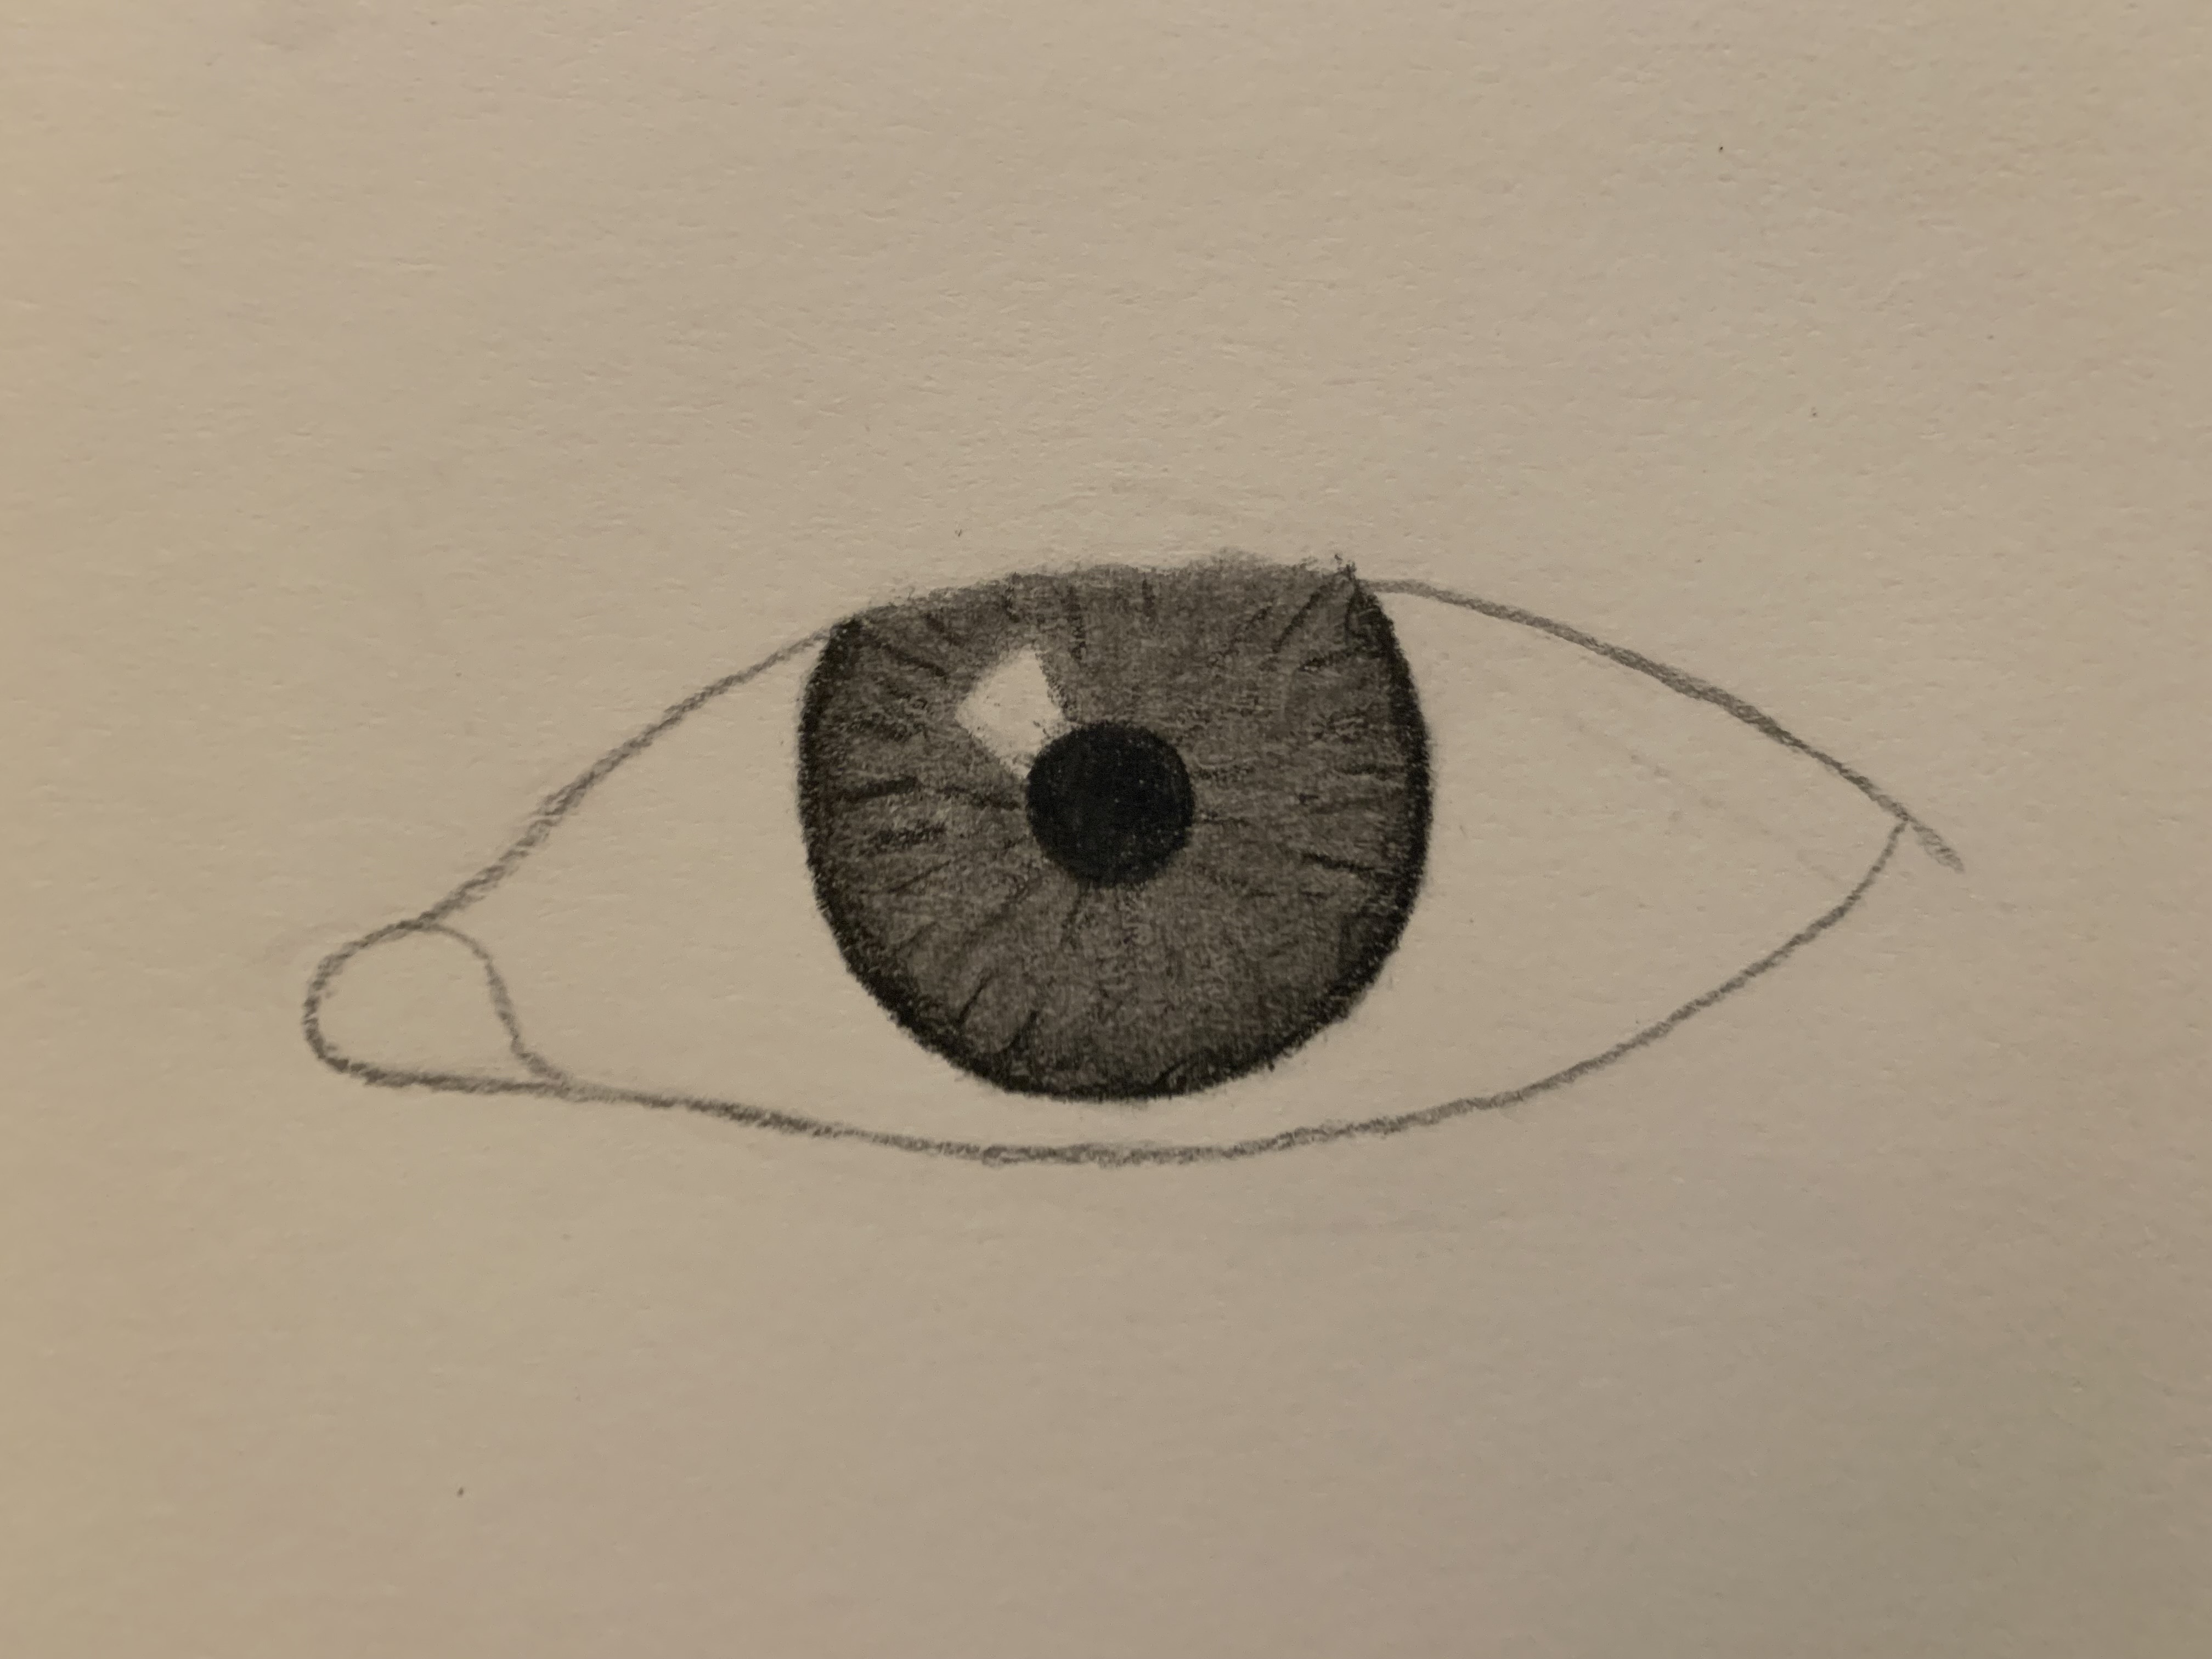
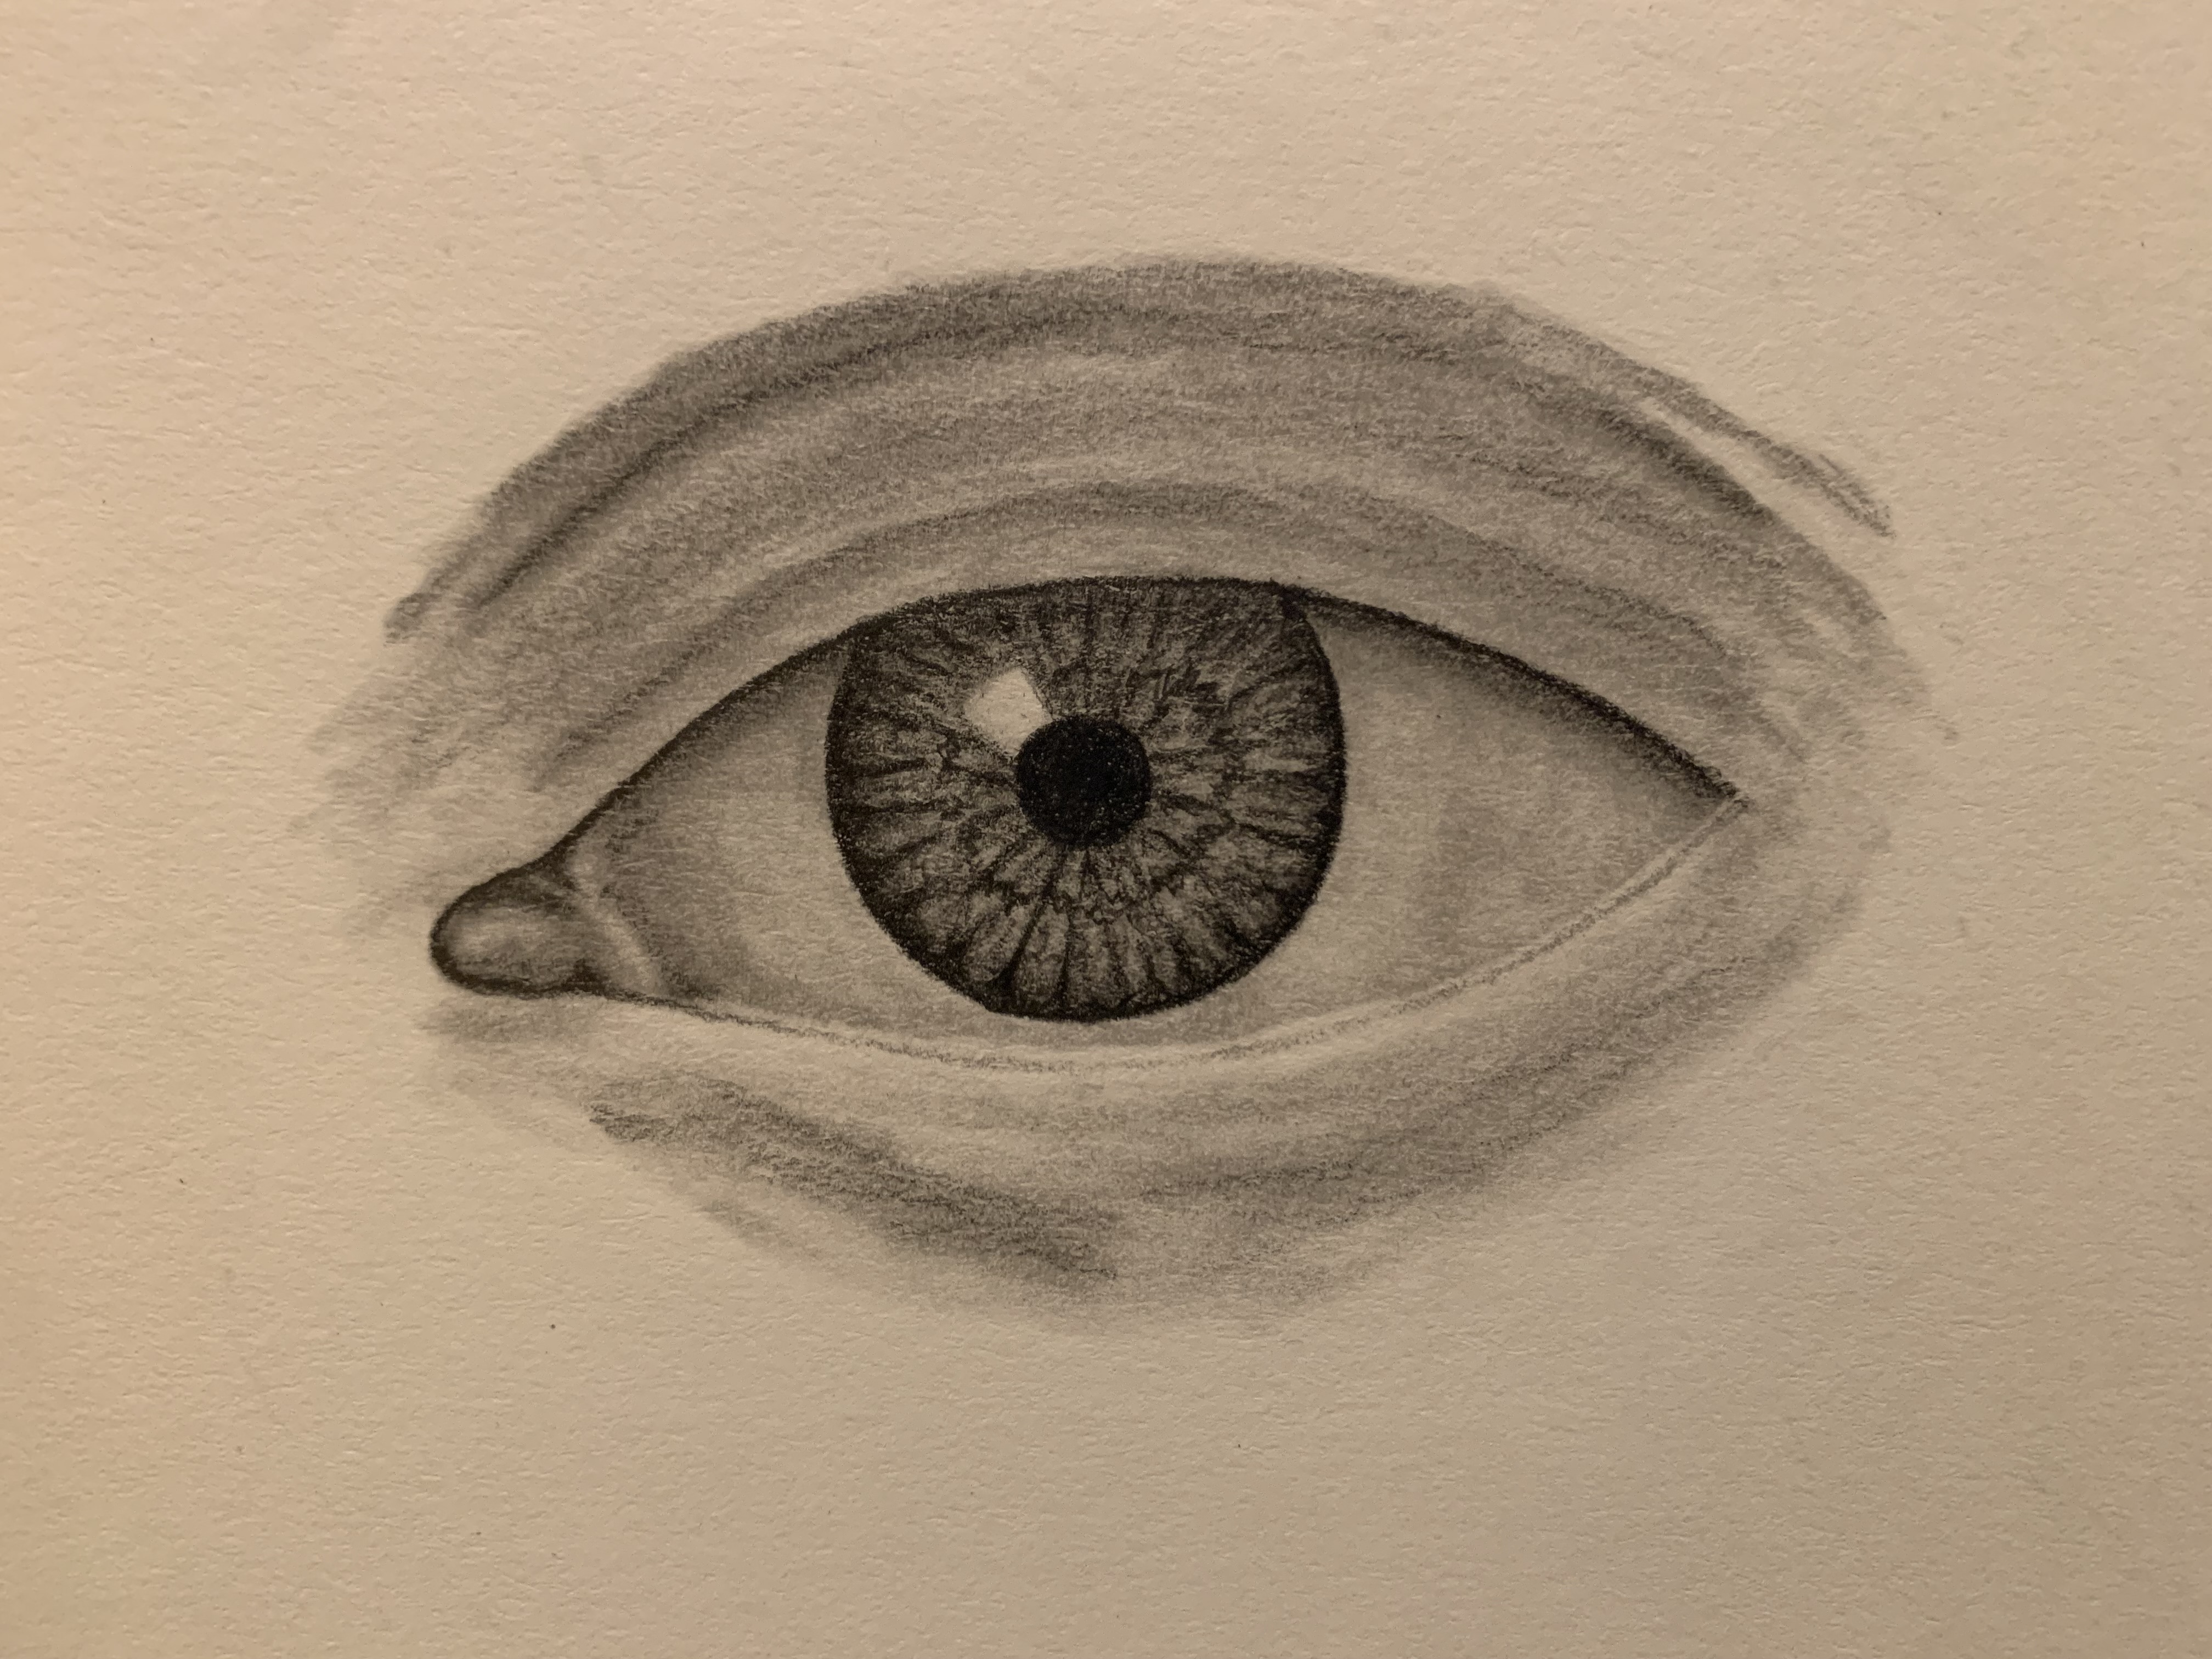
If I were to create this again, I would add more depth and detail to the eyelids. I feel like they don't have enough depth, making them appear more flat. I would also change the eyelashes, as they don’t look natural and they aren’t at the correct angles. Lastly, there are also a lot of extra bottom lashes I would probably remove.
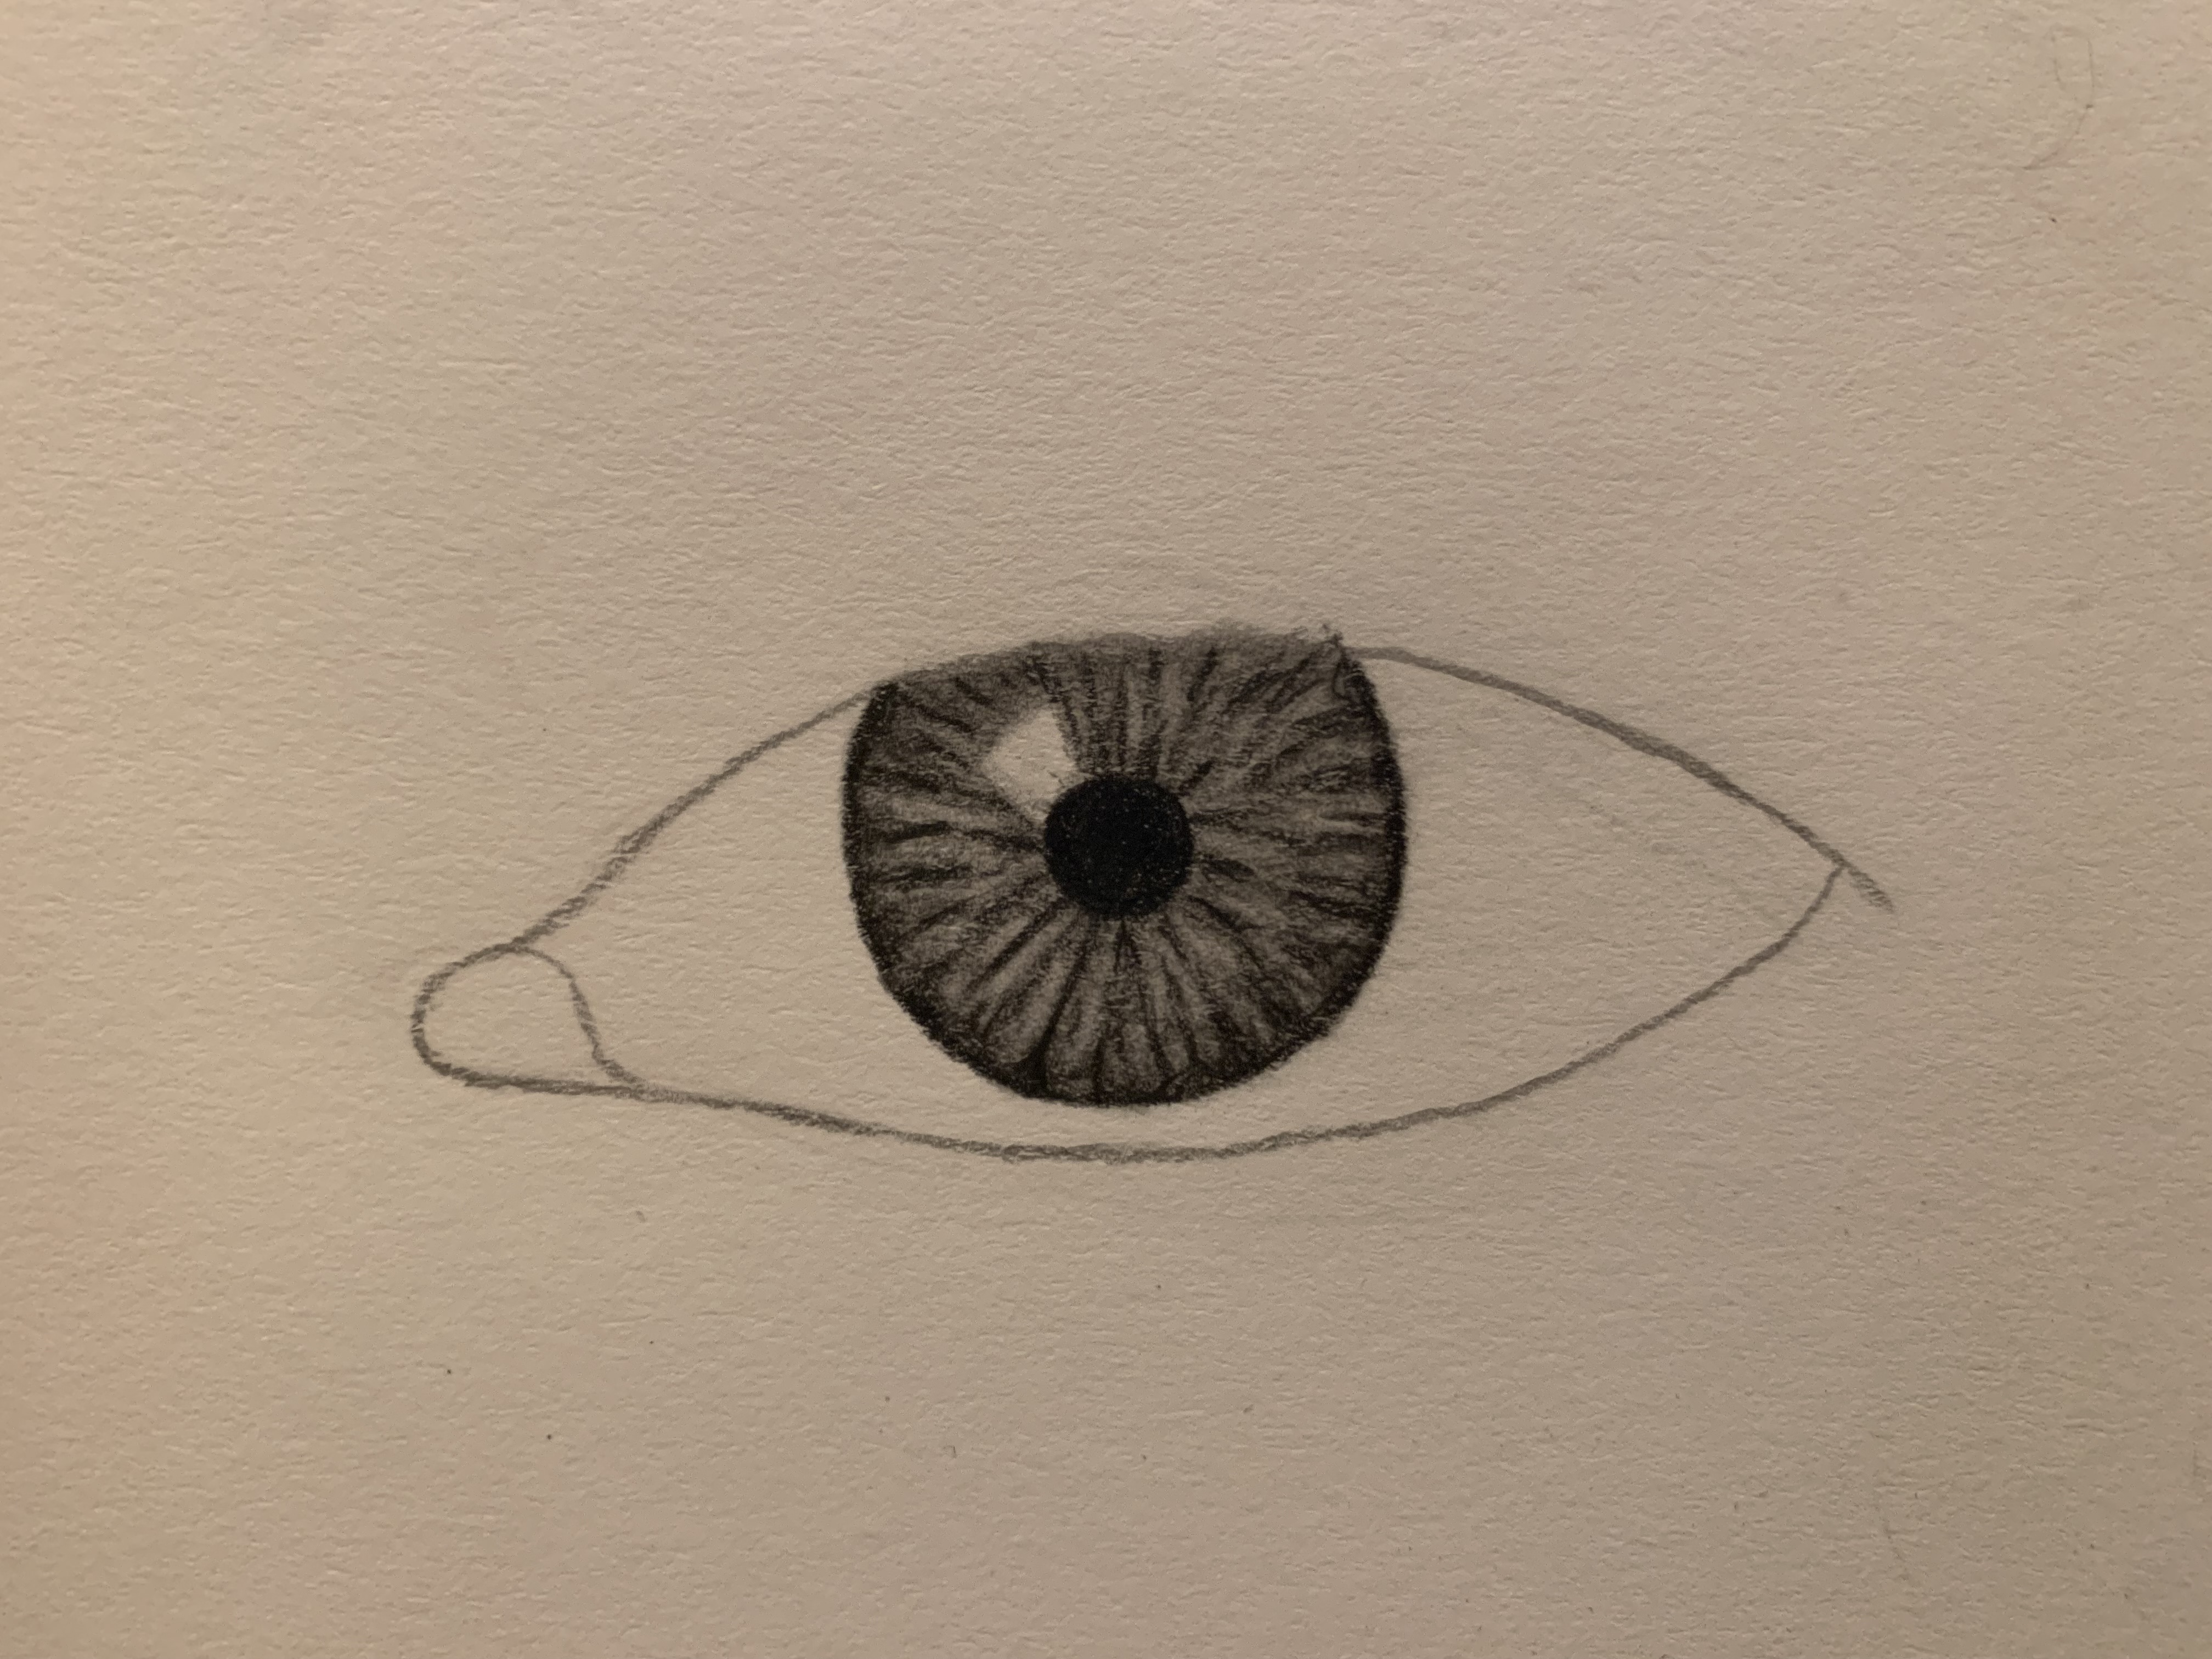
Overall, I love this art piece. It was a very long process to create, but it was a great learning experience. This piece is one of my favorite memories!