Shaken, not stirredQuick Start |
Shaken, not stirred Home Download F. A. Q. Screen Shots Copy Album Art to Player Question/Comment for Author |
Shaken, not stirredQuick Start |
Shaken, not stirred Home Download F. A. Q. Screen Shots Copy Album Art to Player Question/Comment for Author |
This page is copied from the program's Help file, except links to other help topics are omitted here. There are a lot of other topics in the Help file, shown in this screenshot, but you'll probably need few if any of them.
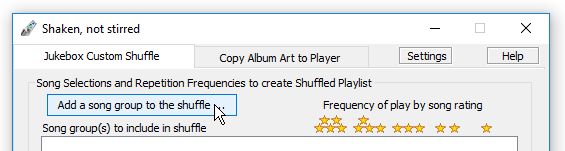
This assumes you have assigned ratings (1 to 5 stars) to your songs in Windows Media Player. If you haven't rated your songs you'll need to do that first.
This is just a "quick start" procedure, and later you may decide to adjust it for your preferences.
After you create the shuffled playlist:
In Windows Media Player (or other synchronization program) include the new
shuffled playlist in the sync to have it copied to your music player or
phone.
Usually syncing with Windows Media Player or your phone's
sync app is the easiest. If there's a problem with that, you can
instead sync your computer's Music folder with your phone's Music
folder, with a program like freeware DirSyncPro; this works with all the Android phones I've tested. (I'd guess iPhones too, but not tested)
The example shown above might do all you want. Or depending on your tastes, you might like a distribution more particular than just playing higher rated songs more often.
To illustrate the possibilities, consider an example where you want a playlist that still includes a random selection like above from all your music with more of your higher rated songs, but has an even higher proportion of songs that you recently added to your collection, and/or songs in particular playlists or genres. And even though you have some classical music in your collection, you don't want any of it in this new playlist.
You can accomplish this by putting multiple song
groups in the shuffle. Right after Step 2 in the Quick Start example above, with "All Songs" already
added to the selection, you would click the "Add song group" button
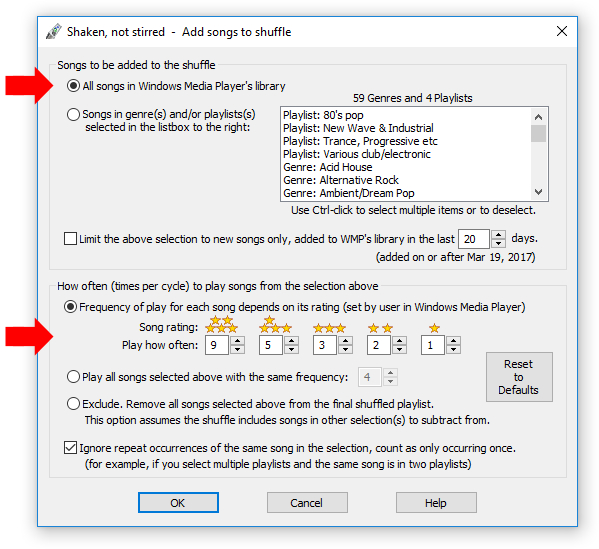
again. In the Add Songs window, select
"All songs" same as before, but this time also check the box to
"Limit the selection to new songs only" (and maybe adjust the age limit to however many days you want).
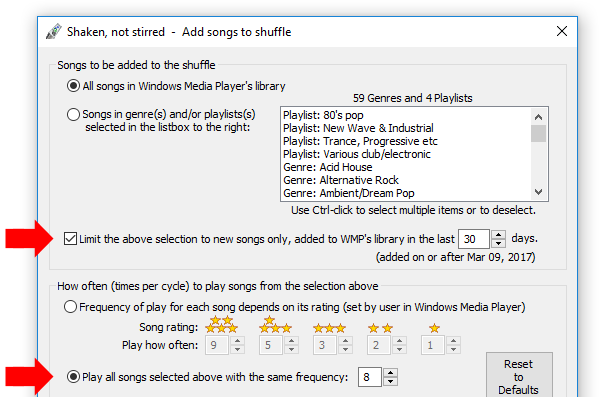
Choose the frequency you want the new songs to play, which will be in addition to how often they already play as part of the first All Songs selection. In the above example, the frequencies of play for all New Songs is increased by 8. That means new songs with the lowest 1-star rating will play as often as other songs rated 5-stars, and even more often for higher rated new songs.
After clicking OK to add the new songs selection, you again click the
"Add song group" button in the main window. This time in the "Add
songs" window you add playlists of songs you want to hear more often
than other songs with the same rating.
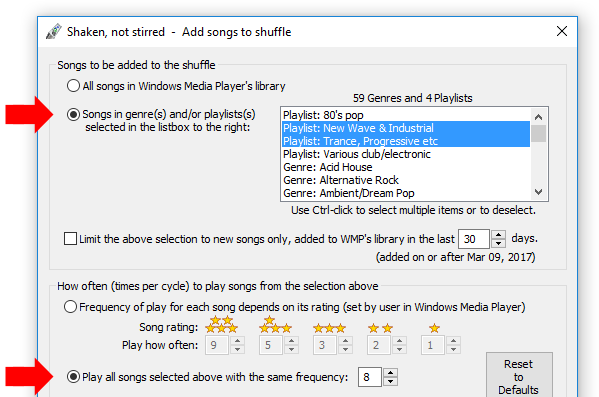
Again 8 is added the the frequency that songs in the selected playlists already have from the original "All songs" selection and/or "New Songs" selection.
Finally you have some classical music you like to listen to sometimes, but
don't want any of it included in this playlist. You select the Classical genre
in the "Add songs" window, and select the option to exclude all those
songs from the final playlist. That filters them out even though they would
otherwise be included as part of the earlier "All Songs" selection.

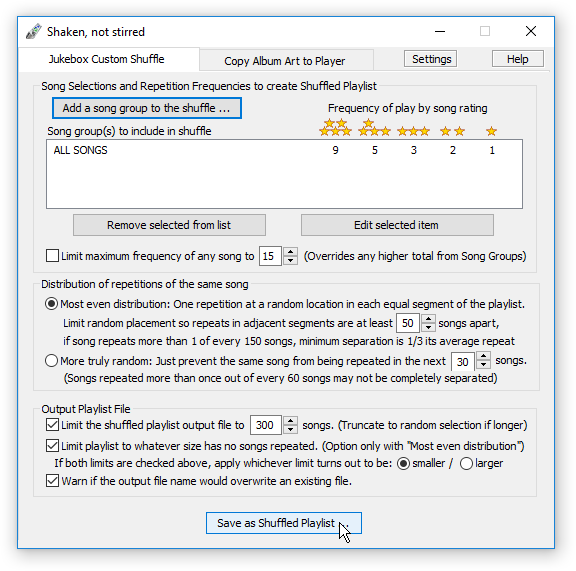
After adding all these song groups to the shuffle, the main window shows the
selection below:

With multiple song groups in the selection, some songs could play more often than you want. A 5-star rated song that's also in both the "New" group and either of the selected playlists would play almost 3 times as often as an ordinary 5-star song. By checking the box to "Limit maximum frequency" to 18 in this example, no song will play more than twice as often as an ordinary 5-star rated song.
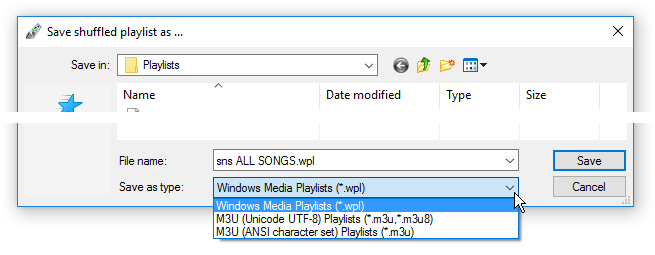
Click the "Save as Shuffled Playlist" button, same as with the simple "Quick Start" example, to create your playlist.