Combustion chamber work
This page will be updated as the work on the heads progresses.
This is what will be done to the combustion chamber area of the heads.
a) Remove the lip around the valves.
b) Remove bump next to the spark plug hole.
c) Remove material around intake valve, closest to the wall. Do not go any bigger than the
gasket. This is a dead air area.
d) Polish the whole combustion chamber area.
e) Roll straight edge of chamber.
These pictures are of the Combustion Chamber before and after work was done to it.

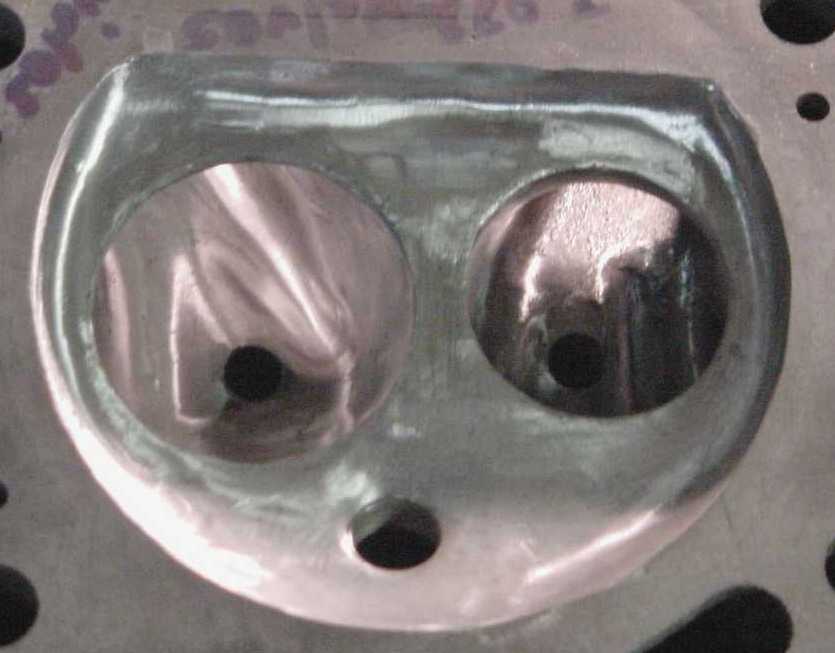
Look at the list above to see what needed to be done to this area.
You can see how different the before and after is.
All the casting bumps are gone, the area around the
spark plug is cleaned up and the indentation across from the Spark plug is smoothed away.
The pictures below are of the stock valves and what sizes I plan to install. The stock size for these heads
are 1.875" and 1.562". I will be putting 2.072" and 1.710" valves in.
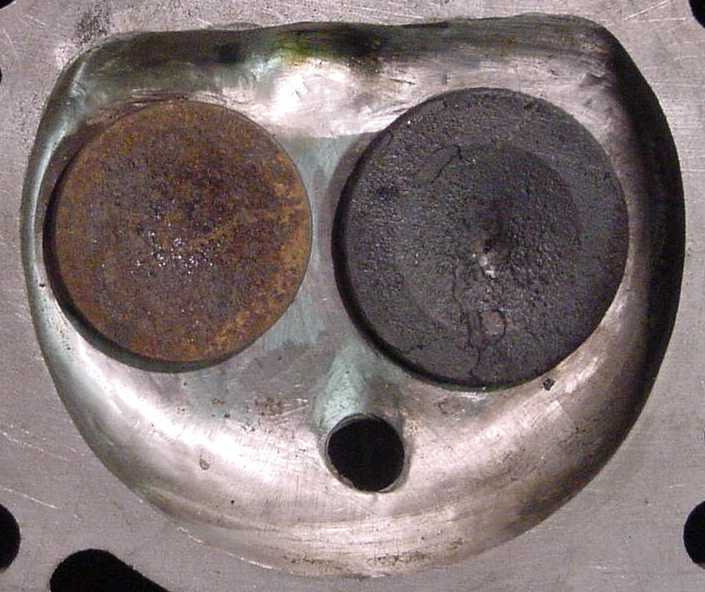
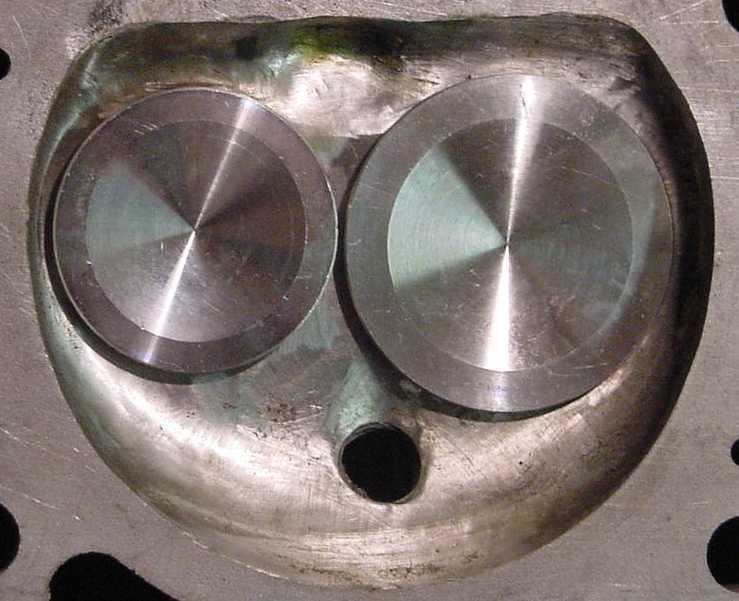
The space between the stock valves was 0.189" and the space between the new valves is 0.040".
*CC's values and final pictures will be part of the updates*
* I would not attempt this work if you are not comfortable with cutting into your heads. The work I did here is just to
show you what I had done. I was lucky I did not break through in any of the areas I was porting.
Click on the links below to go to specific pages of head work being done.
Exhaust side
Intake side
Next steps after porting and polishing
Bryan's Oldsmobile Omega main page
Learn more about my Omega page
Other people's Omegas
Oldsmobile links page
Page updated 8/1/2001
