Intake side work
This page will be updated as the work on the heads progresses.
This is what will be done to the intake side of the heads.
a) Remove top side of port (raising the roof ~.100")
b) Polish bottom side of port
c) Remove material to make inside of port even with opening. Do not make the outside dimension
any bigger than it is. Careful around push rod through holes.
d) Remove rocker arm stud bumps.
e) In the center 2 ports only, reduce head bolt bumps.
f) Tear drop the valve stem posts.
g) Reduce bowl area. Air flow should be perpendicular to back of valve. Careful not to go through in this area.
h) Remove any bumps and make as smooth as possible.
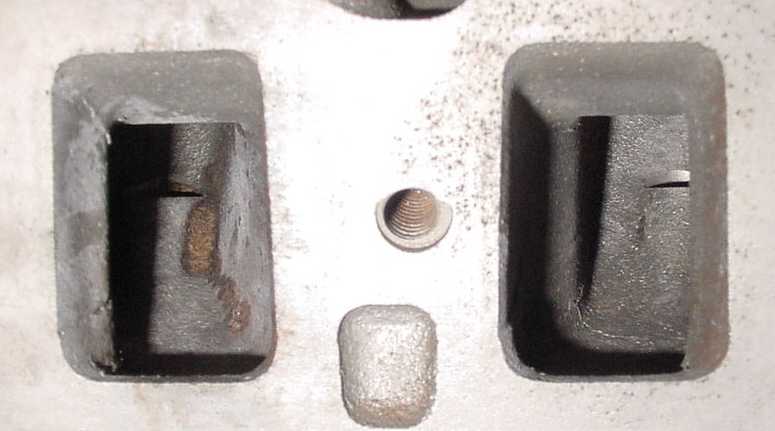
The first 2 pics are before any work has been done.
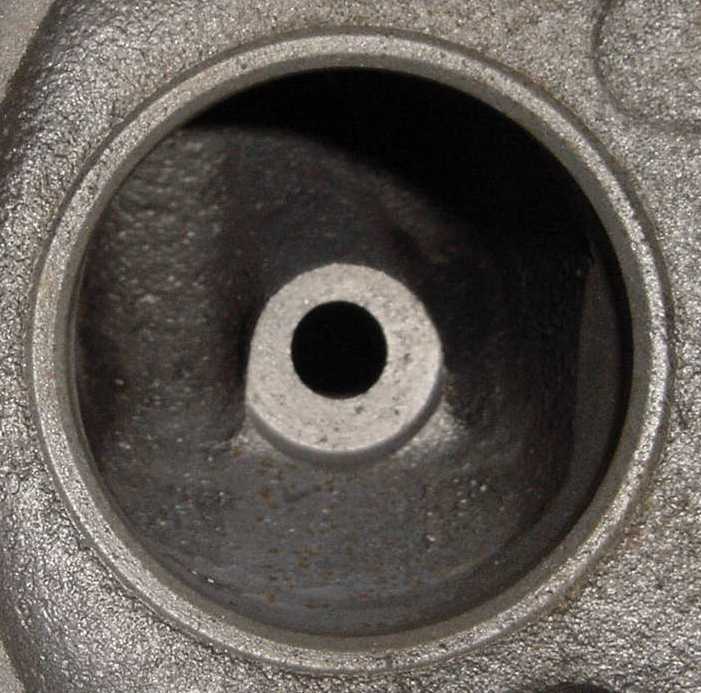
Pic 1 shows the valve area before the tear drop shaping was done.
Pic 2 shows the ports before they are opened up and polished. Notice all the interferences.
The next pic shows the middle 2 ports after all the work noted above is done.
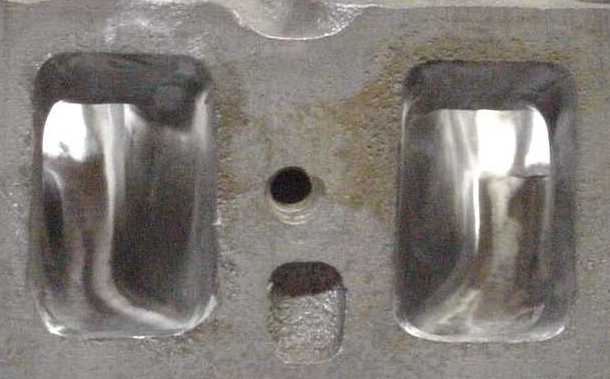
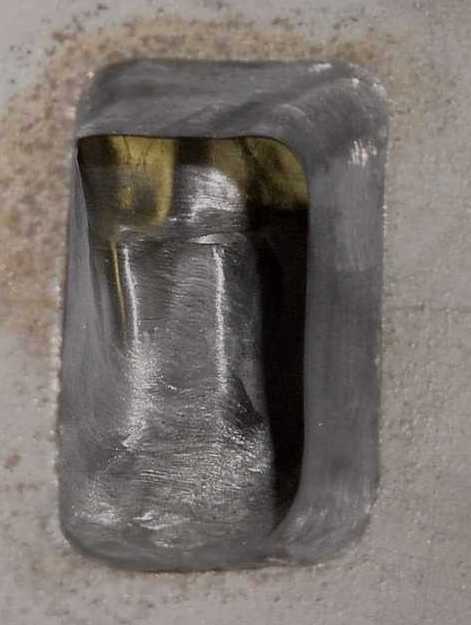
These 2 pics show that the roof was raised .100" and the bottom side was polished.
The sides of the
ports were only made larger on the inside and the pushrod bumps were ground to make the air flow easier.
There is a rocker arm stud bump that was removed (this is hard to take a picture of, but you can feel it
with your finger).
The outer walls of the center 2 ports was reduced around the head bolt bumps. The
pushrod side of the port had a radius put on the wall.
The dangerous parts of these ports are around the
push rod bumps and in the bowl area. The air should flow in the port and right into the back of the
valve.
You can feel, easily with your finger, any bumps or interferences. You should remove/reduce them
as much as you feel comfortable.
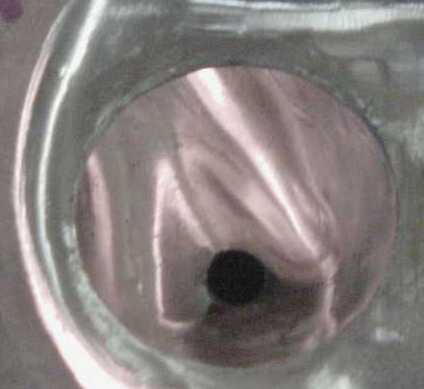
Pic 3 shows the top view of the intake port after the work was done.
You can see the tear drop shaping and that the bowl area is opened up. This is where the most power is
obtained, but it is also the most dangerous area to break through. I could not get the wall straight down
from the seat, I probably would of broken through.
If possible, get another head, same number, and cut it in half to see how much you can cut away.
The size of the intake ports before porting ranged from 155cc's to 159cc's.
After porting/polishing the size of the intake ports ranged from 163cc's to 167cc's.
I increased the size of the intake ports by an average of 8cc's.
I probably could of made them bigger, but was afraid to go through in the bowl area.
*Flow bench numbers will be part of the updates*
* I would not attempt this work if you are not comfortable with cutting into your heads. The work I did here is just to
show you what I had done. I was lucky I did not break through in any of the areas I was porting.
Click on the links below to go to specific pages of head work being done.
Exhaust side
Combustion chamber area
Next steps after porting and polishing
Bryan's Oldsmobile Omega main page
Learn more about my Omega page
Other people's Omegas
Oldsmobile links page
Page updated 8/1/2001
