IN COLOR SEPARATION | CMYK &SPOT COLOR SEPARATION | By: Rodelio D. Balagot
| ARCHIVE DIRECTORY | COLOR SEPARATION | PHOTOSHOP IMAGE COLOR SEP | PORTABLE DOCUMENT FORMAT COLOR SEP |
 |
||
CMYK & SPOT COLOR FILE |
 |
||
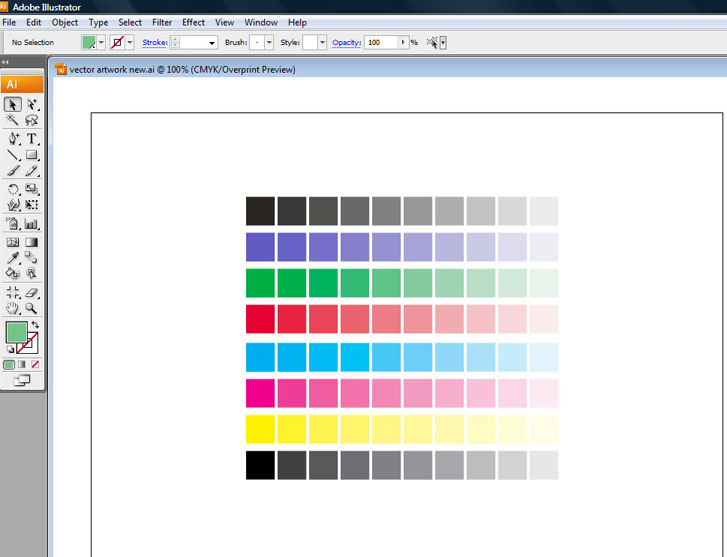
Figure 1: Converting to CMYK |
 |
||
Selecting Overprint preview |
 |
||
Figure 2: Print dialog box |
 |
||
Figure 3: Marks and Bleed tab |
 |
||
Figure 4: Output Tab |
 |
||
Figure 5: Output Tab A. Indicates that the color will print. B. Indicates a spot color. |
 |
||
Figure 6: Color Management Tab |
Illustrator CMYK & Spot Color Separation |
||||||||||||||||||||||||||||||||||||
About Separations: An overviewTo produce high-quality separations, it helps to be familiar with the basics of printing, including line screens, resolution, process colors, and spot colors. If you are using a print service provider to produce separations, you’ll want to work closely with its experts before beginning each job and during the process. To reproduce color and continuous-tone images, printers usually separate artwork into four plates—one plate for each of the cyan (C), yellow (Y), magenta (M), and black (K) portions of the image. When inked with the appropriate color and printed in register with one another, these colors combine to reproduce the original artwork. The process of dividing the image into two or more colors is called color separating, and the films from which the plates are created are called the separations. First Step: Preparing artwork for color separationBefore you print color separations from Illustrator, it’s a good idea to perform the following prepress tasks: First: Copy the Image " Vector Artwork" file onto your computer. Launch Adobe Illustrator application. Then, Open the illustrator file/ [take note file is still in RGB color format] How: File > Open [Shortcut: Ctr+O] search from the place you saved The document is in RGB mode, choose File > Document Color Mode > Select CMYK to convert it to CMYK Mode. (See Figure 1) Second Step: Overprint Preview before color sepYou can preview color separations and overprinting using the Separations Preview panel.
Note: Objects on hidden layers are not included in an on screen preview Third Step: Print color separations
PostScript printers have built-in software that reads and interprets PostScript language into commands for the printer. How to print color separations on a non-PostScript printer?If you want to print color separations from Adobe Illustrator CS3 on a non-PostScript printer, you should use RIP Software for Inkjet Printers (RIP - Raster Image Processor). What is a PPD file and how to select a PPD (PostScript Printer Description) file?
Please note: You can select a PPD file only when you have selected a PostScript printer or RIP Software (Raster Image Processor). Changing Paper Size and OrientationIn the Media section, choose the paper size and orientation (portrait or landscape). Add Registration Marks in your film output
In the Marks and Bleeds tab, add Registration Marks to your document. How to print Halftones
Emulsion and image exposure(See Figure 5) Emulsion refers to the photosensitive layer on a piece of film or paper. Up (Right Reading) means that type in the image is readable (that is, “right reading”) when the photosensitive layer is facing you. Down (Right Reading) means that type is readable when the photosensitive layer is facing away from you. Normally, images printed on paper are printed Up (Right Reading), whereas images printed on film are usually printed Down (Right Reading). Check with your print shop to determine which emulsion direction it prefers. Output mode optionsIllustrator CS3 provides three choices for output mode:
Check the box to the left of Convert all Spot colors to Process.( Figure 5) Now the spot colors will be broken down into the CMYK builds, and would be printed into four separations. Uncheck the Convert Spot Color To Process, and the spot colors are no longer grayed out, and the process icon to the left returns to a spot icon, indicating that they are going to print. To convert Pantone color to a process color, click the spot color icon to the left of its name in the list of colors.
LPI - The number of lines per inch in a halftone screen. The higher the LPI the finer the screen. Please note, that the default values are determined by the PPD file. Tip: Click the Done button in the Print dialog to save your settings and return to your document.
Note: The color separation of 4 color CMYK and 4 spot color layout of your artwork will separate in 8 film output. Your job is done! Congratulations!
|
||||||||||||||||||||||||||||||||||||
BACK TO TOP >