 |
|
|
|
|
|
|
|
|
|
|
|
|
|
|
|
|
|
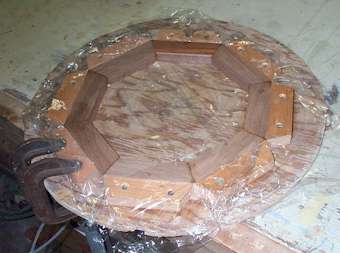
Gluing things together... |
|
|
|
 |
|
|
Note the gluing jig to the right. The outside pieces (pine) are fitted right up against the walnut and then screwed into place -- all except one. The plastic wrap is to keep the the whole thing from gluing itself together! All of the pieces are coated with glue and fitted into the jig (and the fit is very snug), then the last outside piece of pine is clamped into place (see the two C-clamps). Then that last piece is driven inward using a mallet and a piece of wood as a drift. |
|
|
|
|
|
|
Again, this jip is temporary for the proto-type. The finished jig will have threaded clamps on all 8 sides to allow for much greater clamping pressures. However, the rim resulting from the above jig is very tight -- it's fine for a one-off project. |
|
|
|
|
|
 |
|
|
|
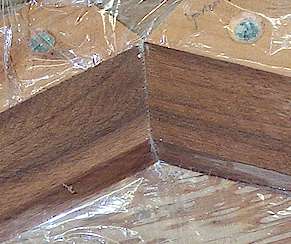
Note the snug glue joint. There should be no gap at the top or the bottom indicating a bad cutting angle or misalignment of the parts. |
|
|
|
On to the next step... -- Back Home |
|
|
|
Planning the cuts -- The cutting jig -- The gluing jig -- Routing the diameter -- Gluing the stack |
|