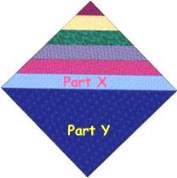
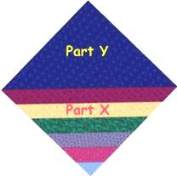
But! If you are doing controlled strips, that is all strips are in a specific order... it is very important that when you cut your first strip, you pick one of your outermost color strips and use it as a guide color strip. In the first cutting of the strips, put that chosen strip color you picked at the top, or away from you, then cut. When you cut the next strip, put that same strip at the bottom, or toward you, and cut.
If you don't do this, you will have less of one colorway block than the other. If you alternate strips, after cutting two strip sets, you will have 10 blocks, 5 of one colorway and 5 of the second colorway. If you don't alternate strips, you will have 6 of one colorway and only four of another... and it you don't pay any attention at all, who knows what you will end up with... ask me how I know that!!
 .......
Another option is to lay two strips on top of each other in opposite directions to cut. It may be a little less accurate of cuts though, but will work.


This is a diagram of the 44" wide fabric, and the five cuts you will get across the fabric. You do have a little waste at the end. ( but the scrap makes a neat second quilt or binding!)
There are quite a few ways to cut that 45 degree angle. I have several here for several types of rulers. Take your choice with what you have to work with.

Find the 45 degree mark on your ruler.If your ruler doesn't have a 45 degree mark, you can use a square ruler.


You should get 5 blocks from each strip.

9) To use a short ruler with a 45 degree angle like this Kaye Woods "Easy Eight" developed for cutting stars, line up the ruler against the bottom edge of the strips, and then snug up your longer ruler to the angle. Move the shorter ruler aside (hang on tight to the long one!) and cut along the long ruler. Flip and flop this across your strip to cut from the bottom and then the top.

10) To use a square ruler, just lay the ruler on the strip with the angle tip of the ruler on the very edge of the strip.
In the wide area where the ruler hits the edge of the fabric, make sure there are the same measurement marks on each side of the ruler where it hits the edge of the fabric. For example, the measure mark may be at 9 1/2" one each side. It has to be the same on each side of the ruler for the angle to be on the 45 degree.

11) Here is a close up of the ruler with the measurement on the seamline. I like to put the measurement on the seam line rather than the edge of the fabric in the event that my seams are crooked... ask me how I know that?

12) With a square ruler, you can just cut on both sides, so if you have one of these, it is best to use it.

13) This is another too short ruler with a 45 degree angle on it. If it is too short, just line up the bottom of the 45 degree angle ruler with the bottom edge of the strip. Lay the long ruler against the 45 and them up. Move the 45 ruler and long ruler together along the fabric strip until the long ruler hits the tip of the cut off angle on the strip. Move the 45, and cut along the edge of the long ruler. Once again, flip and flop this across your strip to cut from the bottom and then the top.

14) The next three pic's are of an "Easy Angle" ruler. It doesn't have any usable lines on it that you can use to line up along the bottom of the strip, so you can just line up one edge of the ruler along the edge of the strip, and cut off the end.

15) For the next cut, line up the ruler with the top edge of the strip again. Make sure the point of ruler touches to the point of cut off angle on fabric. Cut along the 45 for your first block.

16) For the next cut, line up the ruler against the top edge again and line up with the tip of the bottom cut off angle of the fabric. Cut for your next block. Do this across your strip for your five blocks.

17) When you cut your blocks you will get some stitching over the very tip of the block. Generally just a gentle pull will get it out. If not, put a pin under one of the stitches and pull them out.