  |
| |
|
|
The following is based on talks I have given to a number of orchid societies.
It is intended to give an introduction to orchid photography and to encourage people to photography their favourite flowers.
|
There are a lot of flower photographs on this site, including the following pages: PHOTOGRAPHIC SLIDE SHOWS A number of slide shows are included on this site. These show examples of my photography. NEW NEW NEW
On Geocities site: Photographic
slide show = dendrobiums First uploaded 14 July 1999 15 photographs Many flower photographs are also found Oncidium |
Paphiopedilum concolor
|
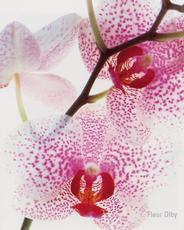
We all enjoy looking at pictures. We are exposed to them every day, in the newspapers, magazines, and on TV. You cannot escape them. We not only look at them, but many of us take them, photos of family, pets, holidays and hobbies. When you see a photo that 'stands out' do you ask the question why? Often the best photographs do stand out for a few simple reasons. I hope the following discussion will throw some light on this subject. Many people think that it is the use of the best equipment that ensures the best photo. - or the best film - or spending a lot of money setting up the shot. In fact it is usually none of those. Certainly a good camera can help, and you must have the right film and equipment, but more importantly it is the person behind the camera that is of the most importance. It is always the question of HOW, WHEN and WHERE the photograph is taken that is the most important. It is largely about technique. I will be talking about cameras and film and so on, but do not forget that it is how these are used that will have the major effect on the final product. It is useful to start talking about photography by looking at the camera. We have all seen the advertisements for the new cameras, and the salesman will always try to convince you that you must have the latest gear. Certainly, if you have unlimited money then get the best, but most of use do not have the luxury of t he key to the Bank of England. If you are selecting a camera, it is worth looking at 'why do you need a camera?'. If all you are going to do is take family groups and the dog, and some holiday snapshots, then one of the fully automatic 'point and shoot' cameras will probably suit you - especially if you don not want to get involved in the details of the technology. There are literally thousands of such cameras on the market today varying in price from a few dollars to a thousand dollars. Such cameras are successful for what they are designed to do, but for those of us interested in good flower photography, the use of automatic cameras may not give the best results. Consider, this situation. You have a white or highly coloured flower There are many orchids like this. You want to make the photo stand out, so you use a black background. Most automatic cameras calculate the exposure by averaging over the entire image. They measure the white flower, and then also try and measure the exposure of the black background. The result generally will be that the white flower will be seriously overexposed, all detail of the flower will be lost and the result will be disappointing. Some sophisticated cameras do have the ability to take a spot exposure measurement - just of the flower - but such cameras with this capability generally are only of the upper price range. Incidentally, if you do get a spot measuring camera, ensure that the camera also has the facility to remember the exposure because usually the measurement is taken at a very precise point and for composition reasons you may not want to place the position of the flower at that point. To overcome this problem with the majority of such cameras, you need to ensure that you can control the exposure and aperture manually. Most of the modern automatic cameras with their computer chips do allow for this, but their exposure measuring modes may not be suitable as noted above.  The choice of lens is also important. For ordinary photography and whole plant photos you can use most general purpose lenses, but with flower photography which you will generally want to do you will require an ability to take close up photographs of just a single flower. For this you will require a macro lens which is designed for close up work, you can also utilise extension tubes/bellows, and in some cases close up supplementary 'filters' are available. What you finally choice will depend on how serious you are and the size of your wallet. Let me emphasise some points regarding cameras for orchid or any flower photography- You will need a camera
You now have your camera. The following are critical to achieve good photos:
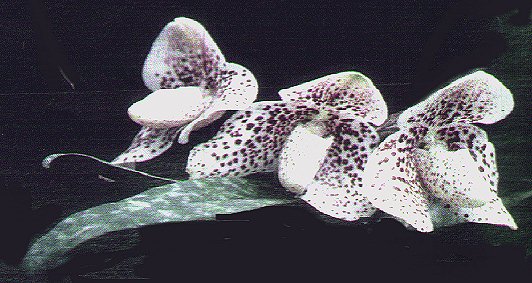
Let us discuss each of these in turn  I have already discussed some of the issues of exposure with reference to the camera. The same issue of measuring exposure with a white flower on a dark background with automatic cameras applies to manual measurement. There are, however, some things you can do. In some cases you can get in close and take an exposure reading where the flower takes up most of the image, and will give a correct exposure for the flower. You can then go back and compose the picture, taking the shot with the already measured exposure reading. You can also use a 'grey card' to measure the exposure. This card is designed to show the reading from an average photograph, and will produce a good photograph for most shots. Once you know the correct exposure - you must take the reading under the same lighting conditions of the flower - you can make any specific exposure adjustments that may be necessary. For example, the white flower on the black background, would probably benefit from the exposure reduced 1 aperture stop to ensure the detail of the white flower is not 'burnt out' by being over exposed. Likewise, for a very dark flower, increase the exposure 1 to 2 aperture stops to ensure the details of the dark flower are reproduced in the photo. The use of a grey card is highly recommended - you will get better exposure, and will save yourself a lot of film loss through poorly exposed shots. The grey cards are available from most good photographic shops. If you are able to borrow a grey card, you can calibrate the palm of your hand or some other object as the reference point. If your camera has spot metering capability, then you can correctly measure the exposure of the main subject - the flower. 2. BACKGROUNDS The use of the correct backgrounds is important. The backgrounds should enhance the subject matter. If you are taking a photo of a plant in its natural habitat, then you may well wish to include details of the background to show the habitat. If, however, it is the flower you want to take, then choose a background that shows the subject to best advantage. Apart from the first example quoted, almost without question, the best background is black - it brings out the image dramatically without any background distraction. If you are going to publish the photograph, almost without exception the black background will give the best effect. Plain grey or dark blue. for example, can be used, but I believe they are not as good as plain black. If a background of black backcloth is placed somewhat behind the subject, you will not have the problem of shadows which plague most other backdrops, especially light coloured ones. Cloth such as velvet is ideal, as it tends to reduce shadows, smooth cloth tents lo show them to a greater extent. 3. LIGHTING Almost without exception, the best photographs are made with natural light. However, with close up photography, and the need to ensure the subject is all in focus, you need good light to ensure the maximum depth of field. For this reason, the use of flash photography will often be best. Again we have the problem of automatic exposure - generally you will need to use manual settings for individual plants and flowers. Most flash guns will be too powerful for individual flowers, even those with power settings. You may wish to consider the use of a ring flash - specifically designed for a flash range of 300 mm to 1 metre typically. These allow very accurate flash control. Some people consider flash photography to be unnatural, principally because of the unnatural highlights often produced, and this is so - but many printers like to print flowers photographed in this way because of the clarity of detail and sting, if unnatural, highlights. 4. FOCUS With all photography, you must ensure all parts of the main subject are in focus. With close up photography this can be difficult to achieve. With natural light photography, you may need to use long exposures as in this way you can optimise the depth of field (that is keeling all parts of the flower in focus), and the use of a firm tripod may prove essential. Also, with very small close up photography, you may need fine control over the camera to ensure all parts of the flower remain in focus while you physically take the photograph. Sometimes only small movements in the position of the camera can cause problems. The use of the preview option found on many cameras allows the depth of field to be seen, and adjusted if necessary.  When you are looking at books or magazines and you see a photo that appeals to you, take a few moments and have a good look at it, and try and ascertain what makes that photo stand out. Consider issues like exposure, focus, backgrounds and lighting - often these aspects can be seen in the finished product and you may even learn from your experience. When you take photographs, do not be afraid to occasionally experiment. In this way you learn. Always be critical of your own work, - always ask "how could I have improved that shot". I have not covered all the aspects, and topics such as films, for example are also important, but if you are to be successful, you need to consider the above aspects first. One last thing - never be afraid to ask advice. Most photographers are like orchid growers - once you ask them a question they do not know when to shut up!!!
PHOTOGRAPHIC SLIDE SHOWS A number of slide shows are included on this site. These show examples of my photography. On Geocities site: Photographic slide show = dendrobiums First uploaded 14 July 1999 15 photographs Photographic slide show = paphiopedilums First uploaded 20 July 1999 14 photographs Photographic slide show = oncidium First uploaded 21 July 1999 18 photographs Photographic slide show = cattleya alliance First uploaded 15 July 1999 18 photographs Photographic slide show = NZ Orchid Shows First uploaded 14 July 1999 18 photographs Photographic slide show = Cymbidiums. First uploaded 19 July 1999 27 photographs Photographic slide show = Miscellaneous orchids First uploaded 19 July 1999 19 photographs On Homestead site Photographic slide show = New Zealand Native Orchids First uploaded 29 July 1999 17 photographs  CAPITAL CITY ORCHID SOCIETY OTHER ORCHID RELATED SITES |
|
This site is provided and managed by P C Tomlinson as part of his web site Site established 9th May 1998 Page specific counter started 1.6.99 |