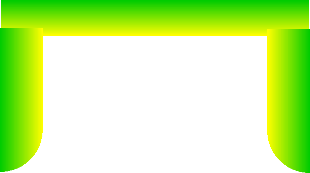

Navigation Bar Tutorial #4, Page 2:

To make the image above, I started
with the INSERT SHAPE ![]() icon and made the shapes you see below. I'm doing these examples in a reduced
size to speed up the loading of this page. By the way, if the quality of the image
above doesn't look so good on your monitor, it's because it's been reduced in
size from the original.
icon and made the shapes you see below. I'm doing these examples in a reduced
size to speed up the loading of this page. By the way, if the quality of the image
above doesn't look so good on your monitor, it's because it's been reduced in
size from the original.

The shape on the left is from the BUTTON SHAPES. I just stretched it out vertically. Now, select that shape on the left and copy it. Paste its twin then, with that new object still selected, choose FORMAT > CHANGE SHAPE TO... and select the button shape that looks like this:

Of course, when you change the shape of the object, it will still have the proportions of the original, so now, in addition to the rectangle, you'll have two mirror images, like this:

Now we'll apply the FADE effect to all three of these objects. I chose a green and yellow combination. However, the direction of the fade is different for each object, as you can see by looking at my example at the top of the page. The rectangle at the top fades from a green to yellow, top-to-bottom while the two vertical columns retain that mirror image concept. Now you can put them all together to get this:

With the colors and the fade that I've chosen, you get the illusion that there is a light source contained within the frame. Now we have to be able to get these three objects to blend smoothly into one another, and for that we'll use the FADE TO TRANSPARENT feature.

Check the next page to see how it's done.


![]()
Home Navigation Bars Buttons Backgrounds Cool Tricks Next Page