Navigation Bar Tutorial #3, Page 2:
Next, click on the VERTICAL BUTTON BAR ![]() icon to get this:
icon to get this:
As you pass the cursor over the button bar in NetStudio, you'll notice the individual button components being highlighted. Select one of the buttons within the bar and right-click (for Windows users) or choose FORMAT from the menu. Select FILL. Click the Last Used menu and choose the color combination that you had with the previous object .
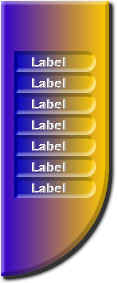
NetStudio then applies that same blue-to-yellow fade that we previously had selected. Do this for the rest of the buttons until you have this:
Now go back into each of those individual buttons and apply the
ENGRAVE ![]() effect, so it looks like the
button below.
effect, so it looks like the
button below.
![]()
In my example at the top of the previous page, you may have noticed that my buttons are slightly different shaped than the buttons in the button bar immediately above. You can now change the shape of the buttons by highlighting one of them, then selecting FORMAT > CHANGE SHAPE TO... and selecting an appropriate shape. In my example, I liked this shape...
![]()
...so go ahead and change the shapes of all your buttons to whatever you want, then move the button bar into place on top of the first image we created. You'll notice that, because we created it as a button bar, that the text is linked with it so that when you move the button bar, the text moves with it. You can click in the text of each button to change the text to whatever font or color you want, engrave or emboss it, etc. Modifying the text is something I covered in a previous tutorial.
If you want to add more buttons to the bar, there's the icon
that looks like this: ![]() which will allow you
to do just that. You may have to change the shape of the new button you've added
to make it fit in with the others.
which will allow you
to do just that. You may have to change the shape of the new button you've added
to make it fit in with the others.
 Go
ahead and add a shadow to the image, either by using the shadow icon or by
selecting FORMAT > SHADOW. Now you have something like the image to the left.
Go
ahead and add a shadow to the image, either by using the shadow icon or by
selecting FORMAT > SHADOW. Now you have something like the image to the left.
Next, by using the INSERT SHAPE ![]() icon again, I've created an oval, like the one below right. I then changed the
color to the same as my background, which in this case is white, then added the ENGRAVE
effect to it to get something like the oval just below it.
icon again, I've created an oval, like the one below right. I then changed the
color to the same as my background, which in this case is white, then added the ENGRAVE
effect to it to get something like the oval just below it.
![]() Then slide the
oval into place on top of the image you've already created and you'll have
something like the image below left.
Then slide the
oval into place on top of the image you've already created and you'll have
something like the image below left.
![]()

By making the oval the same color as the background, I've created the illusion that the oval is cut out of the image, when it's actually just pasted on top of it. You've already learned how to create text and move it around, so now you can paste some text into the oval.
Next, well create a little button to stick on the image, just for the heck of it.
Click on the INSERT BULLET ![]() icon to get this:
icon to get this: ![]()
Apply FORMAT > SHADOW to it, but move both the horizontal and vertical slider bars to the exact middle. Turn up the BLUR a little bit, and pick some bright color for the shadow.
Now you'll have a button that looks
similar to this: ![]() Move it
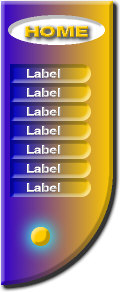
into position on top of your image. Your image should now look like
the one below. Click the NEXT button to see how we'll finish it off.
Move it
into position on top of your image. Your image should now look like
the one below. Click the NEXT button to see how we'll finish it off.


![]()
![]()
Home Navigation Bars Buttons Backgrounds Cool Tricks Next Page