Navigation Bar Tutorial #3, Page 3:
The next part of this project consists of the two images below.
You already know how to create the white engraved oval, because we did it on the previous page. The object below it was created from the... you guessed it, the INSERT SHAPE icon. I just found a shape I liked, then resized it until it looked like the one above. As you can see, I've also added a shadow. By moving the oval into place above the other object, we create the illusion that the object has had a piece carved out of it like this:

Like I showed you in a previous tutorial, if one object is below the other one, and you want it on top, or vice versa, you'll use TOOLS > BRING FORWARD or SEND BACKWARD from the menu. Now you can add some text to get this:
Now, just take what you've created on this page and stick it together with what you made on the previous page, and you'll have the finished product:
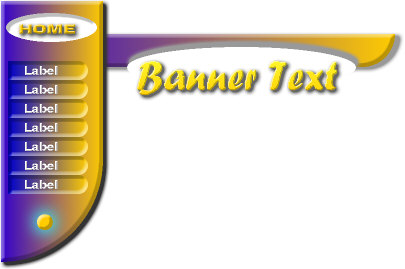
You may have noticed a problem when it comes time to use this image on a web page, however. The image is actually recognized on a web page as one large rectangle (albeit with several elements within it) so if you try to insert text immediately underneath the words "Banner Text", you'll find you can't do it just by typing in the text within your HTML code. Your text will simply wrap down to the next line after the image, and not on top of the image, as you would need to do if you wanted text directly under the words "Banner Text". The solution? You can either type your introductory text within the image in NetStudio, just like we did with the words "Banner Text", or you can use an HTML editor that will allow you to place text on top of an image. Or, you can use the white space to paste another image. Maybe something like this:
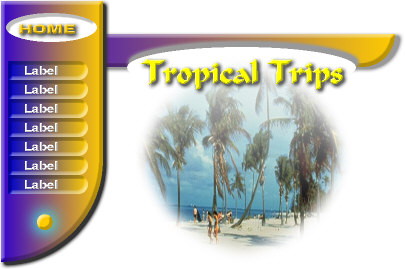
By using the INSERT PICTURE ![]() icon and choosing a photo from the NetStudio CD, I came up with the image above.
I changed the shape to a circle, then applied the FORMAT > SOFTEN EDGES
effect, then the FADE TO TRANSPARENT effect, so the top part of the photo
is fades out where the text is.
icon and choosing a photo from the NetStudio CD, I came up with the image above.
I changed the shape to a circle, then applied the FORMAT > SOFTEN EDGES
effect, then the FADE TO TRANSPARENT effect, so the top part of the photo
is fades out where the text is.
Okay, one more Navigation Bar tutorial...


![]()
![]()
Home Navigation Bars Buttons Backgrounds Cool Tricks Next Page