| You can also create your own backgrounds from scratch using NetStudio. Create a rectangle and make it 1095 pixels wide by 57 pixels high, like the one we had on the previous page. The size of the image will be shown at the bottom of your screen. Don't worry if you're a few pixels off, it doesn't have to be exact. Now you can apply a fade or use the FADE TO TRANSPARENT feature to play with the colors. I call this one Tequila Sunrise. |
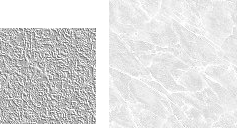
You can make a left-border background like the one on the previous page using an image for the right portion, without having the image get distorted by the width, but there's a trick to it. Let's say you want a background with the image below left for the left border and the marble looking one on the right for the main portion of the page.

You could resize the one on the right so it's the same height as the one on the left, join them together, then stretch out the one on the right to 1000 pixels or so. Doing so would give you something like what you see below. Not quite what we wanted, since stretching out the marble looking image changes it completely, as you can see here.
To get the look you want, you need to start with two images of the same height. Since my left side image was 96 pixels high, I reduced the size of the right image to the same height. Resizing objects is something I've covered in other tutorials on this site. Select each object individually and pay attention to the bottom of your screen where it shows you the size of the object. Make sure you've made them both the exact same height. Now, join the two together. This is where you'll need to use your arrow keys to move the object one pixel at a time, because clicking and dragging is not accurate enough. You need to get them precisely aligned, like this:

Now, select the object on the right and copy it. Then paste it. Align the new pasted image up with the previous two, and you'll have this:

Can you see where I'm going with this? You guessed it. Keep pasting images and lining them up with the previous ones until you have something that's 1000 pixels wide or so (but still the same height). Then you're done and you have a background like the one below. I also gave the image at left a shadow to help define the edge.
You can also take advantage of the CHANGE COLORS ![]() feature to... change the color of your background images... to something like
this perhaps:
feature to... change the color of your background images... to something like
this perhaps:
Okay, one more thing I want to show you about backgrounds...


![]()
Home Navigation Bars Buttons Backgrounds Cool Tricks Next Page