| Making Subwoofer Rings I actually made my rings before doing any fiberglass. They were done in preparation for the rest of the project. You can make them whenever you want, however. To make the rings, the first thing I did was to sandwich the �� and �� MDF together making a 1�� thick piece. Wood glue works just fine for this � simply brush on a nice layer of glue (be sure to get it everywhere for best adhesion), clamp the pieces together, and let dry. Overnight is best, and I just put a TV on top of the sandwich as a �clamp� Using the manufacturer�s specs, determine the size of your ring. If you are using a 10� subwoofer, for example, you will want a ring about 12� in diameter. This will give 1� extra around the woofer. You can go larger if you want, but smaller than 1� might be tough later on. |
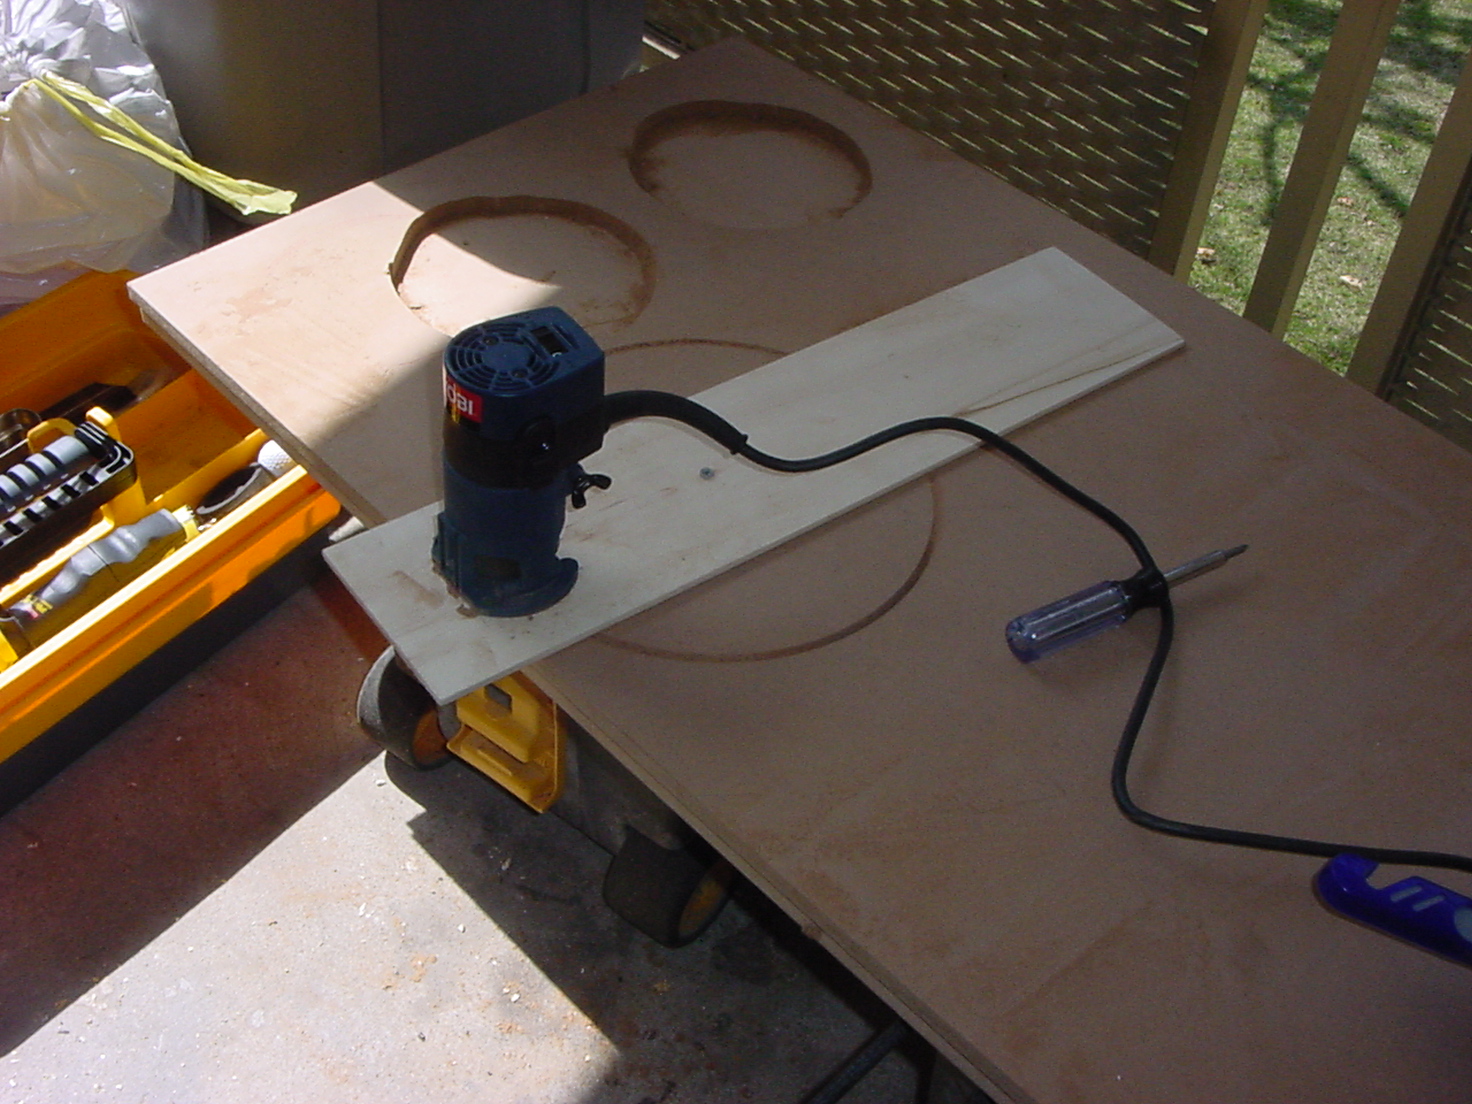 |
| The first step is to attach the circle jig to the router. I said earlier that I made my own � all I did was replace the standard router base with a 20� long, 4� wide piece of 1/8� thick balsa wood, with the router at one end. To make circles, simply measure from the bit and drill a hole in the balsa. Screw the router assembly to the MDF through this hole, and when you rotate the router around the screw, you get a perfect circle � something like this: |
| It is important to cut the largest part of the ring first � if you cut out the center first, for example, you will have nowhere to screw your circle jig to anymore. Start from the outermost cut, and work inward. |
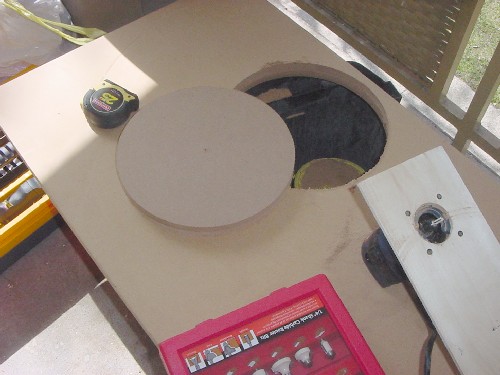 |
| After the first cut, I now had a �disk� that was 12� in diameter, and 1�� thick. |
| After the first cut, I now had a �disk� that was 12� in diameter, and 1�� thick. |
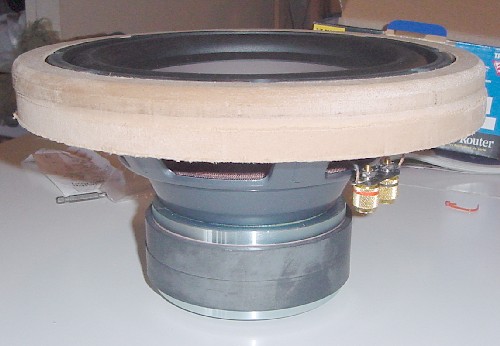
| My next step was to rout out the �flange� that the sub would eventually mount to. Since I was using a 10� subwoofer, the outer edge of this groove (also called a rabbet) needed to be 10� in diameter. I used a larger router bit for this, to make a nice wide rabbet, and it was milled approximately �� deep: |
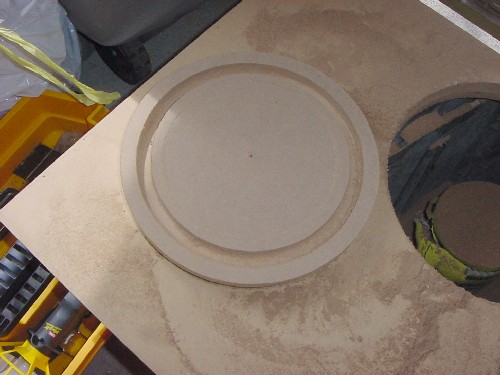 |
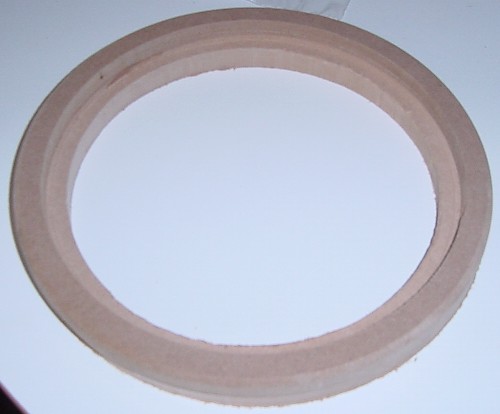
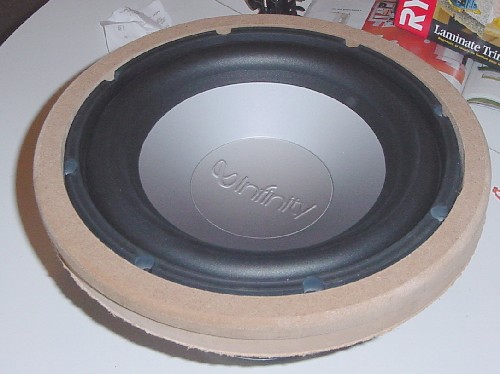
| The cutout diameter for this subwoofer is approximately 9�� � the cutout is the hole that the sub needs to fit through. The last step was to cut out the middle, leaving a 9�� hole. As a final �dressing� to the ring, I used a round-over bit to �ease� the outside edge of the ring, removing the sharp corner and leaving a nice soft radius. The final sub ring: |
 |
 |
 |
| **IMPORTANT NOTE about using the router: When making measurements for your circles, it is important to remember which �side� of the circle you want to keep. For example: When cutting out the �disk�, you need to measure from the INSIDE of the router bit to determine where to screw through your circle jig. I used a �� straight cutting bit for this. Now, had I measured from the OUTSIDE of the bit, the outside of the circle that was cut would have been 12�, but the disk itself would have been �� less in diameter, and useless. Similarly, when I made the rabbet and the cutout hole, I needed the OUTSIDE measurement to be the accurate one. Use your head, and remember what part of the bit to measure from. Much of this can be avoided by buying a commercially-available circle jig, on which the measurements are already pre-marked and indexed. But you can go the cheapo route like me if you think before you rout. |
 |
|
|
|
|
|
|
|
|
|
| home |
| materials |
| taping & molding |
| ring making |
| ring mounting |
| fleecing |
| subwoofer mounting |
| finishing |
| misc info |
| email me |
  |