| Miscellaneous Important Stuff Here I will detail a few specific things that were not covered in the rest of this how-to. First will be wiring � where do the speaker wires come into the enclosure? |
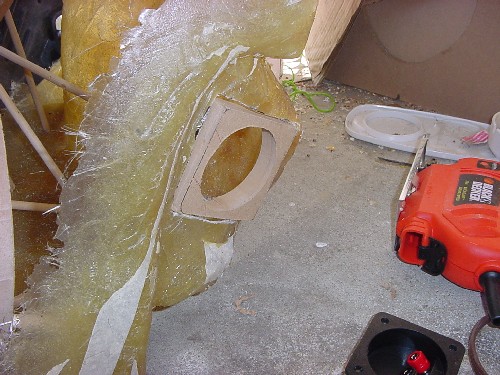 |
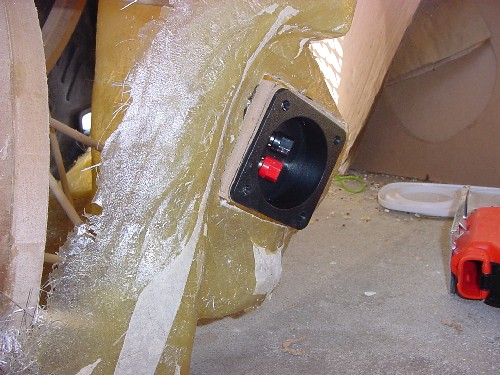
| To accomplish this, I used a common terminal cup. I first cut a piece of MDF to secure the cup to. This particular cup has a circular cutout, and a square flange, so my piece of MDF was cut to match. Then, using the MDF as a template, I cut out a portion of the back of the enclosure, in a space I knew would work in my application. |
 |
| I used the hot glue to tack the MDF into the hole, and then fiberglassed the MDF in place during the reinforcement stage of the mold. |
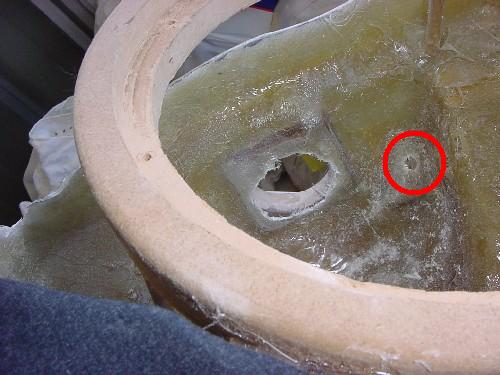 |
| This picture shows the MDF glassed in place. The red circle is a hole drilled in the mold, which lines up with the jack mount in the side of my car. All it takes is a bolt through this hole and into the jack mount to secure the enclosure to the car, along with a rubber washer to keep the enclosure airtight. |
 |
| Next - that fancy grille work |
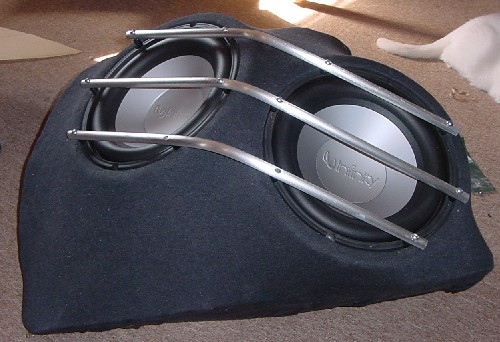
| I always knew I wanted a �different� looking grille. It also had to be sturdy and protective, as my hatchback carries various tools and boxes that can occasionally get knocked around. I had the idea for this grille in mind from the beginning, and it is one reason the subs were lined up the way they were � I paid careful attention to where the mounting holes were, in order to place them inline with each other, so the grill would cover both subs in at once. This alignment is another reason I was forced to place my tee nuts in at that late stage of construction. |
 |
 |
 |
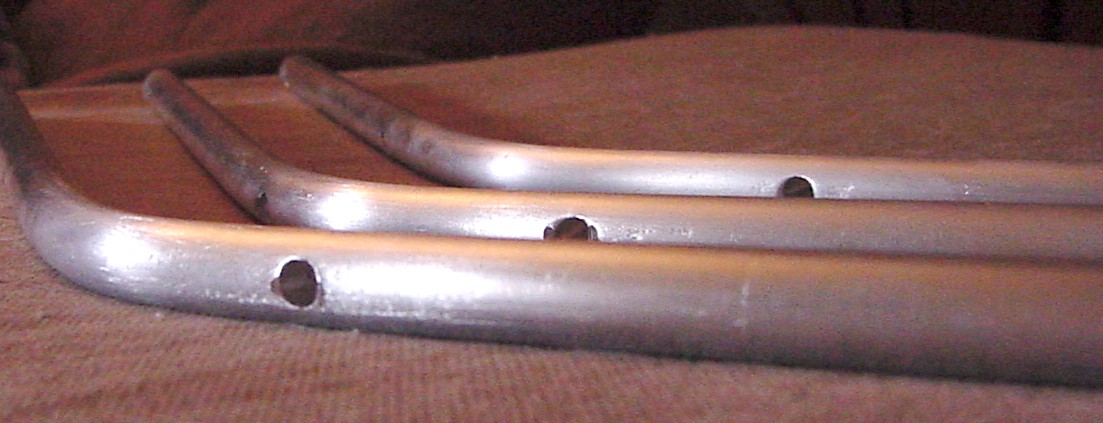
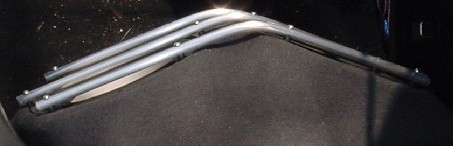
| To make the grille, I used �� thick solid aluminum rod � purchased from Home Depot. Aluminum is fairly easy to bend, and I actually used two pipes I had laying around the house for leverage. I inserted one pipe over each end of the rod, stood on top of one, and pulled up on the other to bend the aluminum evenly. After some trial and error, I came up with the correct angle for my application. I then carefully bent the other two rods to match, lined them up on the enclosure, and drilled the mounting holes. The rods were also sanded and brushed with steel wool. The rods actually are an integral part of the project, as they share mounting points with the subwoofers. They are also �propped up� on small pieces of copper pipe (painted black) so as not to interfere with or touch the subwoofer surround during play. So each of the screws goes through the aluminum rod, through the small copper pipe piece, through the sub, through the MDF sub ring, and into the tee nut. The grille must be installed along with the subs. It�s not as complicated as it sounds, I suppose � the grille simply shares it�s screws with the subwoofers themselves. |
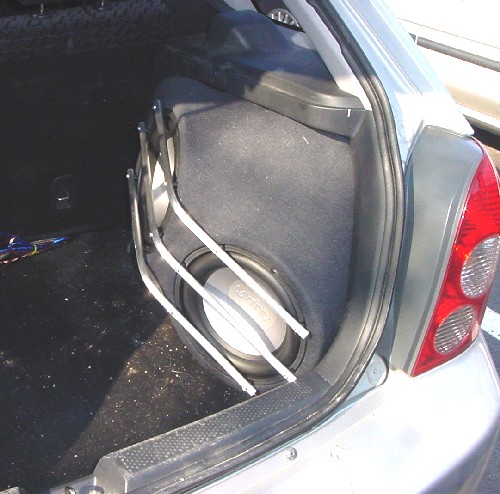
| And that�s about all there is. This was a fun project � difficult at times, especially for a first-timer like me, but very rewarding. I am very pleased with the final outcome. As of the time of this writing, I do not yet have my amp for the subs, so I haven�t even heard the thing yet!! But I have every expectation that it will sound great, and function perfectly. |
| Free distribution of this writeup is encouraged. Any commercial use is strictly prohibited. Either give this information for free, or don�t distribute it at all. Selling of this document, or any other for-profit use, in part or in whole, without the express written consent of the author is completely prohibited. |
| If you have any questions or comments, feel free to email me at [email protected] . I would also like to thank any and all who helped me to get this project done � your knowledge and experience was well received and appreciated. Here I have done my part to �give something back�. |
| Now get out there and GET MESSY! |
 |
|
|
|
|
| home |
| taping & molding |
| ring mounting |
| ring making |
|
| fleecing |
|
| materials |
| subwoofer mounting |
|
| finishing |
|
| misc. info |
|
| email me |
  |