I wanted to try to scratch building a bigger wagon than the ones I used in my Laager camp when designing this one. I knew using two wagons of this size on a 40x80mm base was out of the question, so came up with the idea of placing pavises on either side of the wagon. I was shooting for a generic Medieval look.
The construction method was identical to the Laager wagons. I cut the floorboard rectangle from bass wood, then glued Craft Stix across it as rear and front axles. Then I flipped it over, and built up the wooden sides of the wagon using more stix pre-cut to the correct length. On the second layer, I substitued another small rectangle of bass wood to act as the driver's seatboard. Once satisfied with the height of the sides, I glued on the tiny wooden wheels which I'd purchased at hobby lobby (useful product line, "Wood Shoppe Turnings").
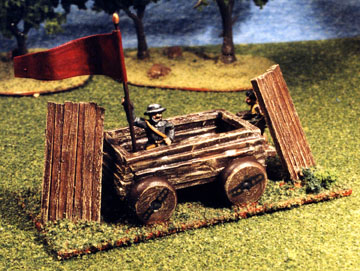
The banner pole was cut from brass wire and physically driven into the bass wood floor board, in addition to epoxying it. The banner material itself is an address label shaped with scissors. The soldier holding the banner is a Rank & File pikeman, while the barely glimped guy behind the shield is a crewman from one of their artillery packs.
The pavises turned out great and were simple to make. I squeezed together a row of Craft Stix and epoxied them together by use of another stix as a crossbar. Another stix was used to prop them at the angle shown, with both its attachment to the pavise and ground being expoxied.
I felt this camp turned out magnificent, and when I took it down to the DBA Tournament area at Cold Wars on Friday, it was the first one snatched up. Ron Giampappa bought it for $25 and said he might even use it as a war-wagon. I hadn't thought of that use, but hey! There you go...in addition to being a guide to how to make a nice, generic Medieval camp, this is a How To Scratch-Build a War-wagon!