|
Catalogue:
Design:
Feedback:
|
Photoshop
This section concerns how I prepared the photos for this site, and will be mainly of interest to anyone who wants to do a similar thing with their own family photos.
I am just finishing up a course in Web Design with Dun Laoire Senior College, and this web site is, amoungst other things, part of my course assessment. The course covered a number of areas of web design: HTML, cascading style sheets, usability theory, and use of graphical elements. As part of this we covered using Adobe Photoshop, one of the leading commercial graphics applications.
When I was creating this web site I began by scanning in the photos. I did this at a high resolution - 300 dpi (dots per inch), and at 200% the original image size. The file format was .tiff - an uncompressed format useful for editing images before compressing them into jpegs or gifs. So the images were high quality, very large in area and very large in size (on average 4 - 5 Megabytes in size).
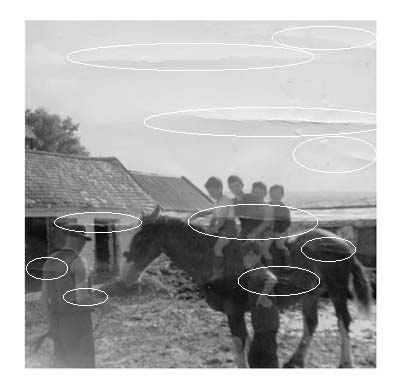
Some of the photos I scanned in had some scratches or damage that showed up in the scans. I have here an example of such a photo:
The first thing I did in this case was to open up this image in MS Paint, resize the image to be more managable and save it as "imagename_analysis" so as not to overwrite the original image. I then highlighted the main problem areas in the scan by circling them using the circle tool. I then re-saved the image.
The next step was to open the original image in Photoshop. I was then able to iron out the main problems in the image using the tools in the Toolbox, like the Rubber Stamp, the Paintbrush, and the Paint Bucket. Once I had finished I was able resize the image and save it as a jpeg. You can see a larger version of the finished image below by clicking on it, or by clicking here.
|