The nut was glued in place with liquid superglue, without cutting slots in it.. They will come later.
The plan was to finish the guitar with clear acrylic lacquer.

previous page INDEX
| Attaching fretboard and Logos and lacquering keith gregg - first time guitar builder | ||||||||||||||||||||||||||||||||||
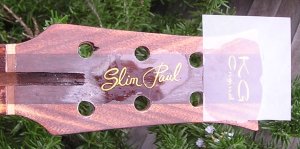
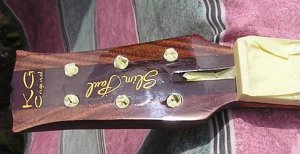
| The decorations for the headstock were done the same way as the lettering on the switch surround (Hardware page) printing them backwards as outlined letters on clear film, filling the spaces with gold acrylic paint, then gluing the film to the wood with a very thin application of clear, colourless epoxy glue. | ||||||||||||||||||||||||||||||||||
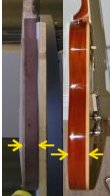
| Because this is a guitar made of unusual materials and with some unusual design features, I wasn't comfortable putting a "Les Paul" signature on it (not to mention infringing copyright). But because this guitar had to be made a lot thinner than a normal Les Paul (see the comparison, right -->), I decided to call it a "Slim Paul". Using the "Paul" from a genuine signature, I tried to mimic the style of handwriting in making this design. | ||||||||||||||||||||||||||||||||||
|
||||||||||||||||||||||||||||||||||
|
||||||||||||||||||||||||||||||||||
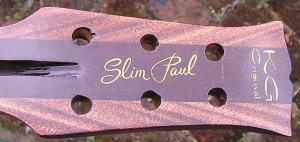
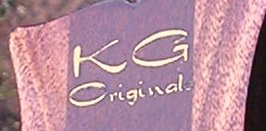
| It took two attempts to get the Slim Paul logo right, but the other one turned out okay first time. Both were given a couple of coats of clear acrylic lacquer. | ||||||||||||||||||||||||||||||||||
|
||||||||||||||||||||||||||||||||||
|
||||||||||||||||||||||||||||||||||
| Fret markers on the side of the fretboard were made by drilling shallow holes and filling them with epoxy coloured with black powder pigment. Because there were not going to be fretmarkers on the front of the board, I decided to make the side markers quite large, so that my ageing eyes could see the locations at a glance | ||||||||||||||||||||||||||||||||||
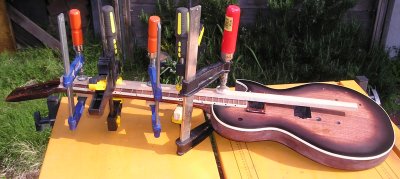
| And with that done, I could finally glue the fretboard to the neck. First the truss rod was wrapped in the absolute minimum amount of aluminium foil required to make sure that the glue would not interfere with truss rod movement if some crept into the slot. Making sure that no foil overlapped the gluing surfaces, a thin layer of glue was spread over the neck surface, and the fretboard placed on top | ||||||||||||||||||||||||||||||||||
|
||||||||||||||||||||||||||||||||||
| and clamped, making sure as each clamp was tightened, that the sides of the board remained flush with the sides of the neck. One pickup ring was screwed into place before attaching the fretboard, because this helped to get the alignment right. | ||||||||||||||||||||||||||||||||||
|
||||||||||||||||||||||||||||||||||
| After unclamping, just the installation of the nut and tidying up the surface a little needed to be done before the final finishing with lacquer. The nut was glued in place with liquid superglue, without cutting slots in it.. They will come later. The plan was to finish the guitar with clear acrylic lacquer. |
||||||||||||||||||||||||||||||||||
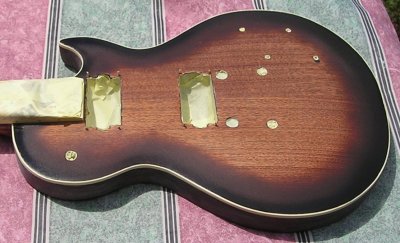
| First thing was to mask the fretboard, the holes for electronic controls and for the pickups, bridge and tail-stop. | ||||||||||||||||||||||||||||||||||
|
||||||||||||||||||||||||||||||||||
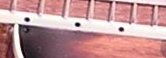
| I even remembered to mask the opening of the truss-rod. To stop paint going into the screw holes, I plugged them with the pointed end cut off a toothpick. Small hooks were screwed into the strap button holes and the guitar suspended from a wooden bar by two wires. This allows the guitar to be carried around and turned, without touching. The hooks are visible on the back-view, with the guitar suspended in a makeshift spray-booth when this picture was taken. Painting was started at two coats each day, with a | ||||||||||||||||||||||||||||||||||
| quick wipe over with a tack cloth (available from any auto painting shop). The mark on the back of the body is a resin gap which I left in place to remind me of the lowly origins of the jarrah wood (page 1) | ||||||||||||||||||||||||||||||||||
|
||||||||||||||||||||||||||||||||||
|
||||||||||||||||||||||||||||||||||
| Some minor setbacks with painting: Page 15 previous page INDEX |
||||||||||||||||||||||||||||||||||