 |
|
|
|
|
|
|
|
|
|
|
|
|
|
|
|
|
|
|
|
|
|
"FINAL" FINISHING first-time guitar builder - keith gregg |
|
|
|
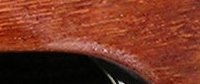
Two problems arose using pressure pack clear lacquer. First, even on a warm sunny day, in a normally very |
|
|
|
 |
|
|
|
dry Perth spring, a trace of humidity caused water to condense in the rapidly evaporating solvent. The picture on the left shows the cloudy residue that resulted when the lacquer dried. |
|
 |
|
|
|
|
|
|
|
This only occurred where the paint went on fairly heavily, but it still had to be sanded back and resprayed. The unusually damp spring has delayed the final finishing for over two months (grits teeth and tries to look philosophical about this). Now it's a case of waiting for warm days with a dry easterly wind, before doing the final coats. Second problem, was the little flecks of white material that came from the most recent spray-can of clear lacquer. I'm hoping that this was just from failure to shake the can sufficiently. something else to sand off and respray....(sigh)
Mostly because of my lack of expertise with a spray-can (I never was a graffiti vandal) the lacquering process turned out to be a gradual, "build up coats - sand off imperfections" process. This is pretty frustrating, but again a reminder that patience is the main requirement for an amateur guitar builder. You can't let the gremlins win! |
|
|
|
|
|
 |
|
|
|
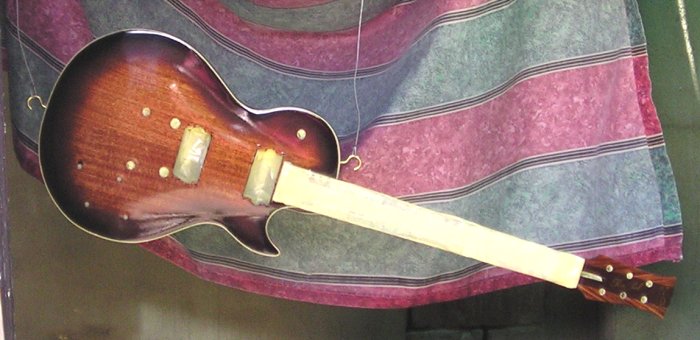
Taking advantage of a dry day (relatively low humidity) I sprayed another 6 light coats. Until then I had limited it to 2 coats per day, so that each layer had plenty of time to harden, but the weather man was predicting a humid change. This now looks as though I can let it cure for a while, and get into the fine sanding and buffing. The body looks a bit strange, because of the multiple reflections. |
|
|
|
 |
|
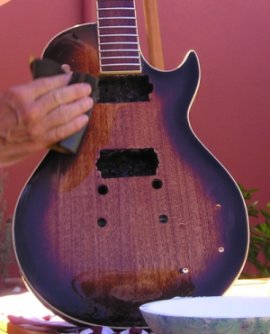
After removing the masking, the lacquer had a brilliant shine, but also had a wavy finish. So the next step was to sand it, starting with 800 grade, the front, headstock and sides were wet-sanded to an even finish. The neck was also sanded lightly to take the shine off the lacquer. Then the sanding went through grades 1000, 1200, 1500, and 2000, keeping the surface and the sandpaper wet. Finally, the finish was a kind of satin shine, and ready for buffing. |
|
|
|
|
|
 |
|
|
|
|
The next step was buffing the finish to a shine. This was almost as daunting as the wet sanding process, because I had visions of ruining the work done so far.
Finally, after looking at expensive buffing compounds in the auto-paint shop, I had a browse around SuperCheapAuto. They had Kitten brand cutting compound, and No 1 Cream Polishing Wax, so I decided to give these a try.
The result? next page
INDEX |
|
|
|
|