 |
|
|
|
|
|
|
|
|
|
|
|
|
|
|
|
|
|
|
|
|
|
|
|
|
|
|
|
|
|
|
|
|
|
|
|
|
|
|
|
Hardware continued... keith gregg's guitar building site |
|
|
|
 |
|
|
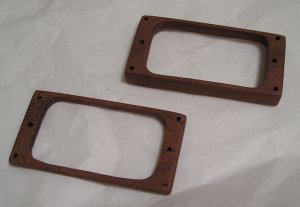
The pickup rings were finished off by chiselling away the surplus wood on the inside, then sanding, using the mini-rotary tool for the inside parts.
Sanding was taken to 400 grit, and the rings coated with a polyester, high-gloss finish.
The String Nut
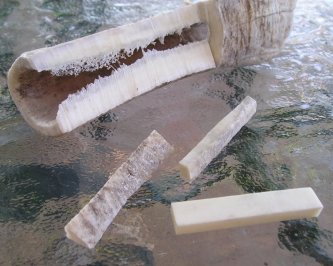
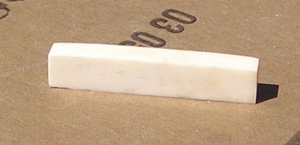
The traditional material for a string nut is bone. By chance, I was on holiday when I decided that bone would be the best thing, and Chester had a bucket full of old bones. |
|
|
|
|
|
|
Before the crime-scene investigators move in, I should explain that Chester is a golden retriever - newfoundland cross. Chester (below) didn't seem to mind sacrificing one of his older bones, for the benefit of craftsmanship and music. |
|
|
|
The thickest part of the bone was cut out using a hacksaw, then tidied up with a grinding wheel. (Thanks for the use of the workshop, Richard) |
|
|
 |
|
|
|
|
|
|
 |
|
|
|
|
This produced a "blank" that was about 5 cm long (2") |
|
|
|
|
|
 |
|
|
|
|
|
|
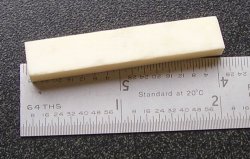
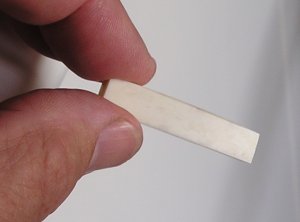
Using a mini-hacksaw, I cut the blank to 45 mm long, then, using a template cut from a piece of card as a radius gauge, sanded the top to slightly more than 12" radius, to match the fretboard. Finally, it was polished through a series of grades of emery, 400 grit, 600, 800, 1000, and 1200, giving a smooth shiny surface. |
|
|
|
|
|
 |
|
|
 |
|
|
|
|
|
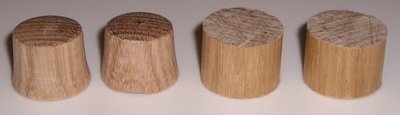
Control knobs |
|
|
|
|
|
|
My original choice for control knobs was wooden ones, made from Tasmanian oak to match the colours of the control switch surround and the pickguard. After shaping them and putting them against the guitar body, I decided that they just were not right alongside gold-plated hardware - they looked really dull. So I gave in and bought a set of proper gold Les Paul speed knobs from Justin at jcguitars (eBay). |
|
|
|
 |
|
|
 |
|
|
|
|
|
Just no contest! Okay... a blow to my pride, but the real thing does look great. |
|
|
|
|
|
|
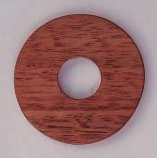
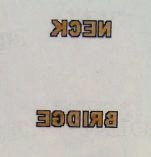
For the ring surrounding the 3-position switch, I used a method similar to the one described by Bill Jehle at a ProjectGuitar.com tutorial site. This involved printing the words I wanted to apply in outline, photocopying the image in reverse onto transparency film, filling in the outline with gold paint, then gluing that onto a circle cut from my home-made Tasmanian oak plywood. I changed the reddish stain originally applied to this, to match more closely the final colour scheme. The Les Paul labels of "rhythm" and "treble" don't accurately describe the way I use the pickups, so I opted for "neck" and "bridge" to indicate which pickup was selected. |
|
|
|
Instead of the glue Bill used, I used 5-minute setting epoxy and squeezed the film tight onto the wood, to make a very thin glue layer. Then after the glue was set (12 hours for maximum hardness) I peeled off the film, |
|
|
 |
|
|
|
 |
|
|
|
|
|
|
leaving just the gold paint behind, and some of the surrouning printed edge. With several coats of polyester finish the final finish was okay. The same approach was used to put a sort of logo onto the truss-rod cover (details coming soon). |
|
|
|
|
|
 |
|
|
|
|
|
|
|
|
|
to be continued...
INDEX |
|
|
|
|
|
|
|
|