
page 14
previous page INDEX
| Fretboard - again... keith gregg - first time guitar builder | ||||||||||||||||||||||||||||||||||
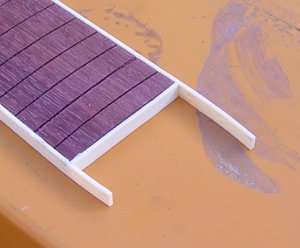
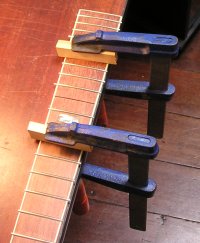
| The taper on the fretboard was marked from the centre line, to be sure that the frets were parallel to the nut-end of the board. The board was cut about 2 - 3 mm (1/10 inch) outside of it's final width with a jig-saw and brought down to its final size by sanding on a long strip of 80 grit paper, checking regularly with vernier calipers. It was made 2 mm less than the required width to allow for 1 mm of binding each side. After making sure that all the fret slots were deep enough all the way to the edge, the binding was attached with general purpose glue and held in place manually, until it was firmly stuck. | ||||||||||||||||||||||||||||||||||
| The top was be sanded with the radiusing block, and the under side leveled by sanding the whole board on a flat surface | ||||||||||||||||||||||||||||||||||
|
||||||||||||||||||||||||||||||||||
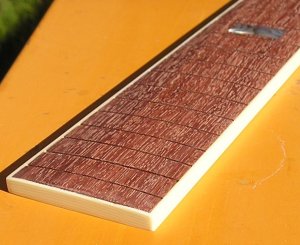
| After trimming and sanding, the finish was quite smooth. | ||||||||||||||||||||||||||||||||||
|
||||||||||||||||||||||||||||||||||
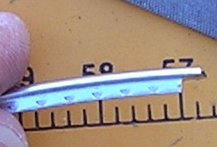
| Next was to prepare the frets. My friendly supply-guy | ||||||||||||||||||||||||||||||||||
|
||||||||||||||||||||||||||||||||||
| (Perry Ormsby, Ormsby Guitars) put the fretwire through his bender, putting approximately 5" radius on each strand. Starting with the widest part of the fretboard, I cut a length just a little wider than the board and ground off the tang at the edges, because I didn't want the tang to cut into the binding at the sides of the board. The reason for starting at the wide end of the board was that, once in a while, the dremel grinder would skip over the top of the fret and scar it badly. If the wire was cut for a wide fret, it could be salvaged by grinding in a bit and cutting off the end to fit a narrower part of the board. The small radius bending, for a board with a final 12", is designed to ensure that the ends of the frets spring downwards when the fret is fastened into the board. Frets were glued in as before (page 11) using flat blocks to press them down, rather than a curved block. This proved more efficient at getting the frets down tight, although four still had to be removed and re-fitted. With the bevelled tangs, this was done without chipping the fretboard (Phew!). | ||||||||||||||||||||||||||||||||||
|
||||||||||||||||||||||||||||||||||
|
||||||||||||||||||||||||||||||||||
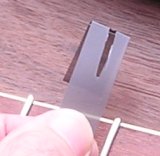
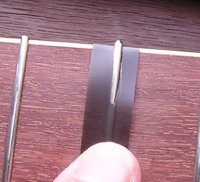
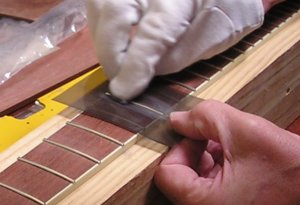
| The ends of long frets were snipped off with wire-cutters, and the ends leveled with a small file, using a shield to protect the bound edge. The shield was made from a piece of X-ray film, with a hold punched in it, and slotted to allow the fret to show through it. It was folded to fit neatly around the side of the board so that the fret could be filed without damaging the binding. The mylar plastic used for making X-ray film is extremely tough and one piece was able to withstand the filing required to level the ends of 4 or 5 frets. | ||||||||||||||||||||||||||||||||||
|
||||||||||||||||||||||||||||||||||
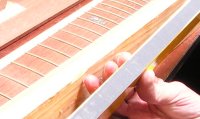
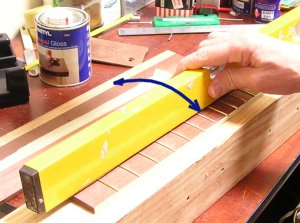
| After all the fret-ends were smoothed off, the whole lot were levelled by gluing the board down to a flat surface and using 800 grit emery glued to the flat edge of my builders level. By moving the level from side-to-side on the board (arrow), the frets were all brought down to the same level. They were already fairly level, so this was a reasonably quick process. | ||||||||||||||||||||||||||||||||||
|
||||||||||||||||||||||||||||||||||
| The frets were polished with 000 steel wool, using X-ray film with a slot cut in it as a shield to protect the wood. | ||||||||||||||||||||||||||||||||||
|
||||||||||||||||||||||||||||||||||
|
||||||||||||||||||||||||||||||||||
|
||||||||||||||||||||||||||||||||||
| At the end of all this, the frets looked fairly good and the board was ready to glue to the guitar neck. | ||||||||||||||||||||||||||||||||||
| Logos, dots, and gluing the fretboard on.... page 14 previous page INDEX |
||||||||||||||||||||||||||||||||||