 |
|
|
|
|
|
|
|
|
|
|
|
|
|
|
|
|
|
|
|
|
|
|
|
|
|
|
|
|
|
|
|
|
|
|
|
|
|
Remaking the fretboard - home-made slotting jig first time guitar builder - keith gregg |
|
|
|
 |
|
|
It took only a few hours to get over the frustration of ruining a perfectly good fret-board, although it will take a bit longer to get over the embarrassment of having to admit it.
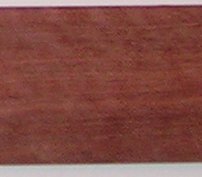
On the bright side, I found a piece of wood with good tone, although what looked like a flame pattern in the otherwise straight grain disappeared on sanding. The remaking of the fretboard gave me the opportunity to build a proper jig for cutting slots, without the stress of doing it freehand.
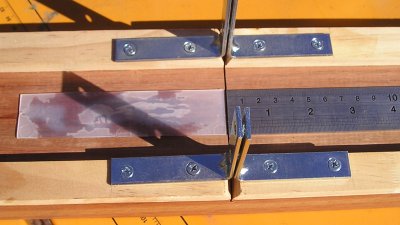
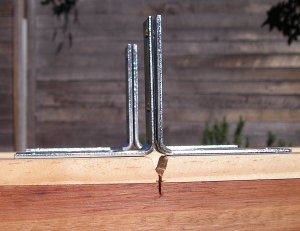
This was a slab of wood with two pine rails attached, 6 cm apart (my fretboard blanks are 6 cm wide) and four shelf brackets attached to act as a |
|
|
|
|
|
|
saw guide, like a mitre box. A steel ruler was taped (double-sided tape) to the base to measure distance from the saw position. Some strips of plastic from an old kitchen storage box were glued onto the opposite side to keep the fretboard level and assure that the cut would be truly vertical in the board. |
|
|
|
 |
|
|
 |
|
|
|
|
|
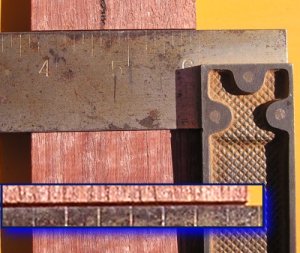
The positions of the brackets and the |
|
|
|
|
|
accuracy of the ruler measurement were tested on off-cuts. I had to reposition the rear brackets twice, by filling the holes with epoxy glue and sawdust, and re-drilling them. The vertical alignment was set by a bit of judicious bending. The test cut was compared with an ancient, but still accurate try-square. The inset picture |
|
|
|
shows a close-up of the level and the slot. |
|
 |
|
|
|
|
 |
|
|
|
|
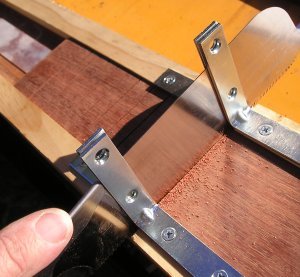
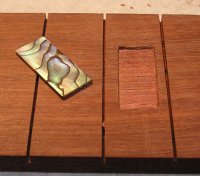
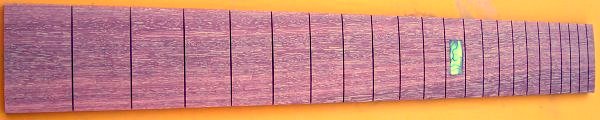
After setting up the jig, cutting frets was very simple - just align the nut-end of the board with the steel ruler, at the measurement given by the online fret calculator, and the cut was exactly that distance from the end of the board, When the frets were all cut, a shallow space was cut using a multi-blade craft knife, between frets 11 and 12, to glue in a rectangle of abalone shell, with the epoxy/sawdust mixture, which was clamped to seat it flat. |
|
|
 |
|
|
|
|
|
|
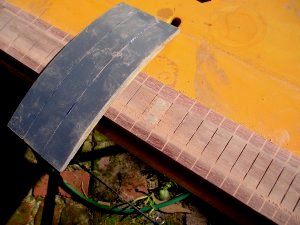
The radiusing of the fretboard was designed to be a typical Les Paul 12". This was done with a home-made radius block, made by cutting a rectangle of PVC into strips, heating each one in turn, and holding them tight against the edge of a round coffee table (with a 12" radius - lucky coincidence) until they cooled and set. Then the three were glued together and sandpaper was attached to the internal surface with double-sided tape. |
|
|
|
|
|
 |
|
|
Yet more manual sanding, but finally,his gave an even curve to the board along its whole length. |
|
|
|
|
|
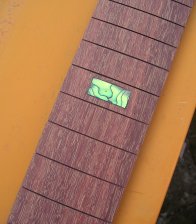
It also brought the inlay down to the level of the wood so that (to my fingers anyway) the join was dead level. Now the board just needs shaping to the required taper and the binding and frets can be attached. |
|
|
|
 |
|
|
|
|
|
|
|
|
|
|
 |
|
|
|
|
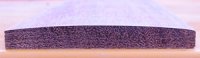
<------ end view of the board. |
|
|
|
|
|
|
|
|
 |
|
|
|
finishing the fretboard, page 13 INDEX |
|