| Bisswanger Ultralight |
| RagWing RW6 |
| Rib Construction |
| Project Plan & Build Status |
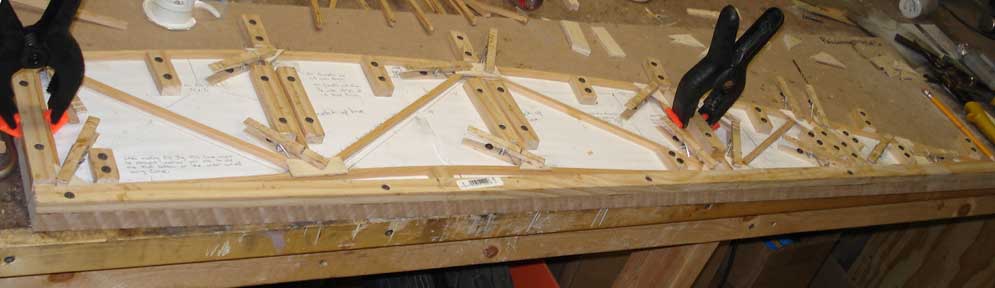
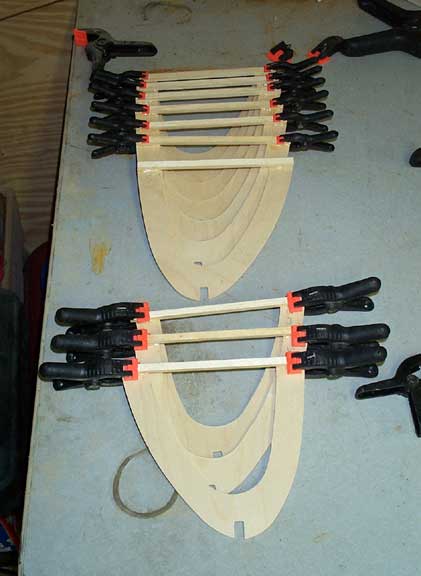
| I chose like many to start my project with building the ribs. There are 20 full ribs that need to be made along with 2 false ribs. I started as the plans suggest with a rib jig. The rib jig is made from 5/8" MDF (12"x48") I glued a strait edge on the forward and bottom sides. From there I taped a full size drawing of the the rib on the jig. I screwed location blocks in the appropriate places and then made clamps to hold the gussets in place. The clamps are made from modified clothespins. |
 |
 |
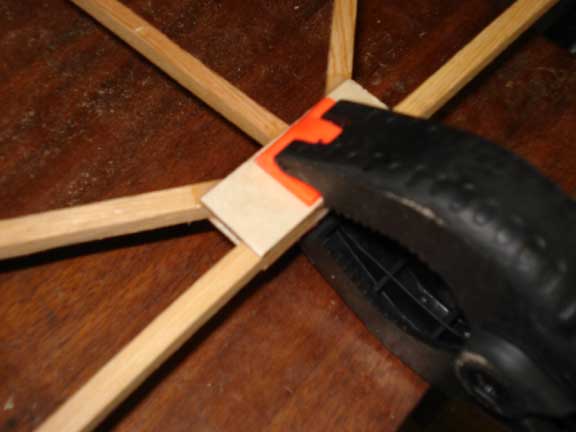 |
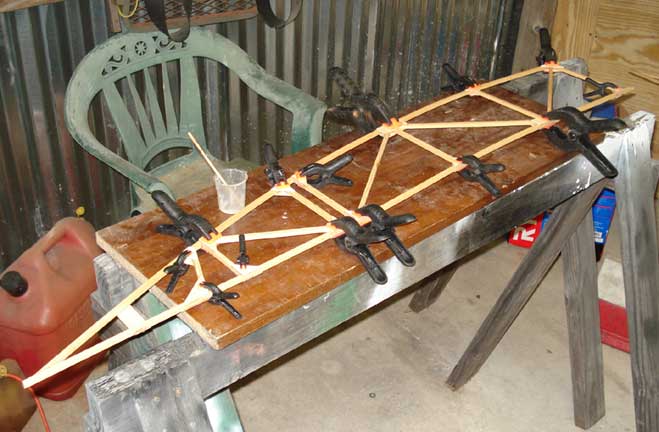
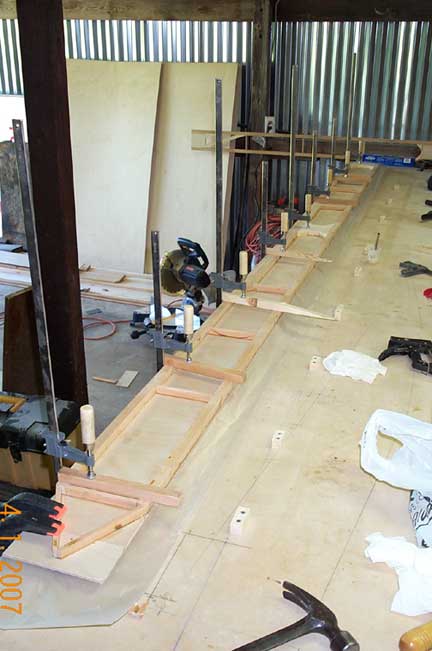
| Rib construction begins by ripping 1/4" x 1/4" pieces of wood. I am using clear Douglas Fir for my ribs. The gussets are made from 1/16" ply (birch). The gussets are 7/8" wide and cut at appropriate angles to meet the plan requirements. The 1/4" pieces are cut (and mitered) to fit tightly in the jig. When satisifed with fit Hysol glue is mixed and each joint is glued. Glue is then applied to the gussets and they are place in appropriate locations. The gussets are then clamped using the clothespins. Remember to use wax paper in the areas of the joints. The rib is left to cure and the cycle repeats and repeats...(20 times). The reverse gussets are glued in the same manner and clamped using standard spring clamps. Next hink to build was the spars. I cut and layed everthing out per the drawing. I glued two spars at a time by laying a piece of wax paper between them. I applied clamping pressure by clamping to the work table. The spars are made from 3/4" x 3/4" Fir with a 1/16" web. After drying, both the front and rear spar had to be cut on an angle to match the curviture of the wing. Now wing assembly actually begins. It begins by threading the ribs over the rear spar; spacing them according to the plans. The wing is then glued together as seen below. Various drag bars ans compression members are installed as well as the wing tip. Now the aileron spar is installed and the aileron control urface is cut away. Alot of time goes into the aileron construction and many pieces are install; just follow the plans. |
 |
 |
 |
 |
 |
 |
 |
 |
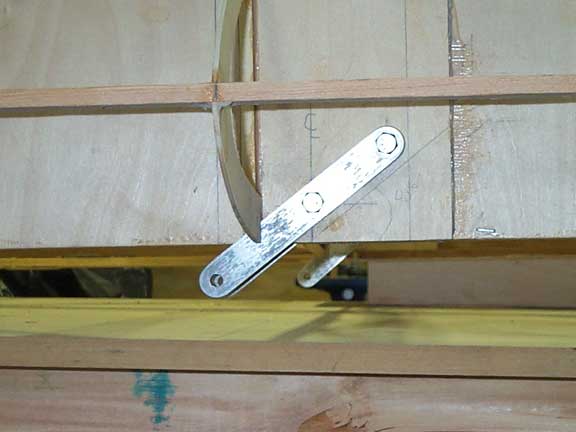
| The nex step in construction the wing is the nose ribs. I cut all 20 on a small CNC mill at work, but it could be done with a bandsaw. The nose ribs were glued to the front spar at the rib locations. A leading edge piece runs the length of the wing which is glued in the slot at the tip of the nose rib. Before the leading edge ply is attached the strut and root attachment brackes must be installed. Again following the plans for location. The brackets were cut using the same CNC mill used for the nose ribs. They are cut from 1/4" x 3/4" 2024 Alum. Again they could be cut with a bandsaw and drilled with a drill press. Finally the leading edge ply is installed using glue, staples, clanps, and ratchet straps. It is a little tricky but it does come together. Remember to spray the inside of the leading edge and spar with polyurethane before gluing the ply on. Well that's about it for wing construction, I just need to build the other side now! |
| Wing Construction |