|
|
|
|
|
|
|
|
|
|
|
|
|
|
|
|
|
|
|
|
|
|
|
 |
Date - 23rd and 24th June 1314
Combatants - King Robert the Bruce of Scotland .v. King Edward II of England
Setting - Bannockburn, outside Stirling, Scotland
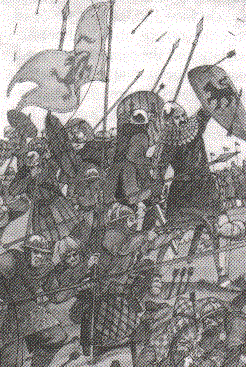
This decisive battle was fought on the 23rd and 24th of June, 1314, between the Scots, headed by King Robert the Bruce, and the English, headed by their King Edward II (Longshanks' son). The English were soundly defeated and Edward barely escaped capture. The film Braveheart gave the impression that the Scots only decided to fight rather than agreeing to humiliating English terms, at the last moment. This is not the case. On the contrary, Bruce challenged the English to meet him by mid-Summers day 1314, or Stirling castle (the last castle in Scotland still garrisoned by English troops) would be taken. The English marched north, in an attempt to save the castle.
Before the Battle, Bruce spent two months training his army. He wanted to make sure his forces were mobile, since immobility had proved the undoing of the Scottish army under Wallace at the Battle of Falkirk, 22nd July, 1298. Bruce organized his horsemen into a light cavalry of about 500 (who faced the 2000 heavily armoured English cavalry). There were four Scottish Divisions of foot soldiers, and a few archers from Ettrick Forest. It is claimed that the Camerons, Campbells, Chisholms, Frasers, Gordons, Grants, Gunns, Mackays, Mackintoshes, Macphersons, Macquarries, Macleans, MacDonalds, MacFarlanes, MacGregors, MacKenzies, Menzies, Munros, Robertsons, Ross, Sinclairs, and Sutherlands were there.
They were determined, as patriots, to defend the Independence of Scotland, under Bruce's great leadership. The fact that the Scottish nobles, knights, landowners and tenant farmers fought on foot together with their men, made for a more cohesive force than the English army, which was less democratic. Most of the English leaders were in the cavalry, leaving the infantry at a disadvantage. Bruce prepared the battle field by digging rows of camouflaged pits and laying calthrops to maim the cavalry horses.
On the 23rd June, 1314, lightly armed Scots numbering 7,000, faced an English army of 20,0000. The Battle of Bannockburn began. Bruce's army were drawn up in mighty 'schiltrom' (as in Braveheart), to stop the cavalry charging at the undefended troops. The day passed without any real gains on either side. Bruce began to realise that he could lose this battle.
However, Bruce's luck did not desert him. During the night, the English changed their position, and Bruce, seeing this in amasement, realised at once that he had what he needed - a major tactical blunder. No one knows why Edward had moved his mighty force into a confined area of marshland, but Bruce exploited the error to the full. Both armies fought magnificently all that second day, but it ended at last in a bloody and disastrous rout of the English. Eventually, it turned into a massacre, as the fleeing English were cut down defenseless. Edward was lucky to escape.
This battle is often viewed as the 'be-all-and-end-all' of the Scottish Wars of Independence. It was not, it took another 15 years until the English finally recognised Scottish Independence by form of the Treaty of Edinburgh - Northampton,1328. However, this battle was a substantial victory for Scotland, and it showed the English invaders that Scotland would not be dominated.
![]()

![]()
Date - 11th September 1297
Combatants - William Wallace of Elderslie .v. Earl of Surrey (commander-in-chief of Scotland under Edward I)
Setting - Royal Burgh of Stirling, Scotland
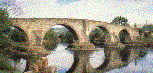
First of all, forget the film Braveheart. Wallace's victory was not in a field, it was over a bridge - Stirling Bridge. This is the real account of what happened at that battle.
With many of his Barons hostile, Edward I was desperately trying to raise an army to use against France. This situation left him with no troops to send north against the Scots. He therefore decided to release several of the Scottish nobles he had been keeping prisoner since the Battle of Dunbar, Scotland, 27th April, 1296. Among them were Alexander Comyn, a Scottish nobleman and John Comyn who was the Earl of Buchan. They were released on the condition that they quell the disturbances in Scotland. When the nobles arrived north, they found the situation far worse than they had been told. They sent various letters to King Edward I, expressing their loyalty and hopes of success. In the meantime, they actually did nothing and waited to see how matters turned out. They also made no effort to prevent their followers from joining the rebels. Wallace and Andrew De Moray had not been idle during this time. By the end of August, they had captured Inverness, Elgin, Nabff, Aberdeen, Irvine, Fife and Dundee. The entire country of Scotland, north of the Firth of Forth, was in Scottish hands. Finally, the Earl of Surray, Edwards Viceroy in Scotland, decided he should do something. He was an elderly soldier who had learned over the years that hundreds of foot soldiers could be scattered by just a few mounted knights. He was convinced that with most of the Scottish nobility and also their knights, either on the sidelines, in prison, or in the service of Edward, the Earl of Surray could wipe out the commoners of Wallace and Moray with ease. Gathering a large host of heavy horse and foot soldiers, he marched towards Stirling, which was the key to crossing the River Forth, and therefore, the key to the North. On hearing of his approach, Moray and Wallace joined forces and moved south to meet him and defend Stirling. Overlooking a loop in the Forth River, which was crossed only by a single bridge, was an abrupt rock called Abbey Craig, from which a small neck of ground led back to give safe retreat. Below the northern end of the bridge was an area of boggy ground, almost entirely encircled by the Forth. The Scots deployed their men upon the crag (hill). The English were camped on the south side of the river. As no army of foot soldiers had ever prevailed against a large force of heavy cavalry, they were extremely self confident. James Stewart and the Earl of Lennox were hovering on the outskirts with a troop of cavalry, uncertain whether to join Moray and Wallace or not. They didn't feel the Scots had much of a chance and were hesitant to risk their forces. In an effort to prevent the annihilation of their countrymen, they approached the Earl of Surray with the suggestion that they initiate a discussion between the enemies. The Earl agreed but Wallace and Moray refused. Two Dominican friars were then dispatched to Moray and Wallace with offers of generous treatment if they would yield. "Tell your commander", Wallace replied, "that we are not here to make peace but to do battle to defend ourselves and liberate our kingdom. Let them come and we shall prove this in their very beards." At dawn on September 11, 1297, a party of English foot soldiers were sent over the narrow Stirling Bridge but they were recalled because the Earl had overslept. Hugh de Cressingham was fuming with impatience. He urged that no more time be wasted and the Earl gave him the order to cross. He arrogantly led his cavalry across the bridge two by two. When approximately half of his force had crossed the bridge, Wallace and Moray gave the signal to attack. The main force of the Scots fell upon the leading ranks on the causeway that led from the bridge to the more solid ground some distance from the bridge. A hand picked detachment seized the bridgehead and began to cut away its timbers. Jostled from the causeway, the heavy horses of the armored knights plunged into the deep mire on either side, unable to move or charge, throwing their riders to the ground.
Behind them, the rest of the English army was powerless to help, as the bridge was now destroyed. A massacre now took place. Hugh de Cressingham was flayed and pieces of his skin were sent throughout the country, as tokens of defiance. Legend has it that Wallace had a baldrick made from a large piece of it. The Earl of Surray did not cross the bridge. Aghast at the carnage, he fled straight to the border. The foot soldiers and the baggage trains were not as fortunate. As they retreated, James Stewart and the Earl of Lennox, who were lurking in the woods on either side until they saw the outcome, fell upon the fleeing groups. The effect was immediate, for the first time, commoners had defeated mounted knights. The dissenting barons were so shocked that they immediately patched up their disagreements with the King.
