What's in this Page?
1) The Toolbar
2) Parts of the Toolbar
2.1) Selection Tools
2.2) Alteration Tools
2.3) Vector Tools
2.4) Assisting Tools
3) Sample Outputs
|
The Toolbar
When you start Photoshop, the Tools panel appears at the left of the screen. Some tools in the Tools panel have options that appear in the context-sensitive options bar. This tool panel is what you call Toolbar.
So, for short, the Toolbar is the part of the Adobe Photoshop which contains the tools that you can use in editing your image.
 This is an example of a toolbar. This is an example of a toolbar.
Parts of the Toolbar
There are four(4) kinds of tools that can be found here in the toolbar: the Selection tools, the Alteration tools,
the Vector tools, and the Assisting tools.
1) Selection Tools
The selection tools are used to facilitate the process of making selections of shapes, colors and objects inside Photoshop, and positioning them in the working image area. With tools like the magnetic lasso and magic wand, Photoshop packs a powerful array of selection gadgets!
In Photoshop, selections that you learned in Lesson 1 are used to work in a specified area, while not altering any of the area around it. In many regards, a selection is a lot like a stencil. You are basically enabling yourself to only paint in one area while the rest of your canvass is left unaffected.
There are variety of tools to help you draw out specific sizes and shapes of selections in Photoshop.
 Marquee Tool Marquee Tool
Selects an object by drawing a rectangle or an ellipse around it.
Click the tool button, choose a rectangular or an elliptical marquee. Drag the marquee over the area of the image you wish to select.
 Move Tool Move Tool
Used to select and move objects on the page.
Click the tool button, then click on any object on the page you wish to move.
 Lasso Tool Lasso Tool
Selects an object by drawing a freehand border around it.
Click the tool button, drag to draw a freehand border around the are of the image you wish to select.
 Polygonal Lasso Tool Polygonal Lasso Tool
Selects an object by drawing a straight-edge border around it.
Click the tool button, click on the starting point on the image, drag to draw a straight-edge border, click and drag again to select the are of the image you wish to select. Double-click to finish.
 Magnetic Lasso Tool Magnetic Lasso Tool
Selects an object by drawing a border that snaps to the edges of the defined area of the object.
Click on the starting point on the image, drag around the are of the image. The tool will make fastening points at the edges. To finish selecting, drag the border to the starting point and click precisely in the point.
 Magic Wand Tool Magic Wand Tool
Selects all objects in a document with the same or similar fill color, stroke weight, stroke color, opacity, or blending mode. By specifying the color range, or tolerance, you can control what the Magic Wand tool selects.
 Crop Tool Crop Tool
Click the tool button, then click on the area of the image you wish to select.
Selects and cuts parts of an image.
Click the tool button, then click and drag the tool over the part of the image that you want to keep. Resize the selected area dragging the squares at the sides and corners. Click the RETURN key when your crop box is sized correctly.
 Slice Tool Slice Tool
Used to cut images into slices, which can be exported to a web page.
2) Alteration Tools
Alteration tools are also indispensable tools that you need to be familiar of. Each tool under it is described below.
 Healing Brush Tool Healing Brush Tool
Corrects small blemishes in scanned photos.
Select the tool, hold down the ALT key and left-click on the base color you need to heal. Then left-click over the blemish.
 Brush Tool Brush Tool
Draws lines of different thicknesses and colors.
Select the tool. Then click on the selected area, drag to draw lines. Use the Options bar to change the Brush, Mode, Opacity, and Flow.
 Clone Stamp Tool Clone Stamp Tool
Takes a sample of an image and applies over another image, or a part of the same image.
Select the tool. Hold down the ALT key and left-click on a certain point of the document where you want to start your copy point. Then, put your mouse over whatever part of the new document you want the picture to go to. Hold down the left mouse button and drag the mouse across the page to copy the picture.
 Art History Brush Tool Art History Brush Tool
Paints over an image using the source data from a specified history state or snapshot.
Select the tool, specify the Brush, Blending Mode, Opacity, Style, Area, and Tolerance.
 Eraser Tool Eraser Tool
Removes part of an existing path or stroke. You can use the Erase tool on paths, but not on text.
Select the tool, click on the part of the image you wish to erase. Drag to erase pixels.
 Paint Bucket Tool Paint Bucket Tool
Fills and entire area with a specific color of your choice.
Select the tool. Choose a foreground color in the Color Box. Select an area you wish to apply the color to. Click the tool button, then click on the selected area.
 Gradient Tool Gradient Tool
Applies a gradient fill to a selected part of the image or to an entire layer.
Select an area you wish to apply gradient to, click the tool button, choose a fill in the Options bar, click on the starting point, hold the mouse down and drag to the end point.
 Blur Tool Blur Tool
Blurs the sharp edges of an image.
Select an area where you wish to apply the tool. Click the tool button, choose the Brush, Mode, and Strength. Drag the brush along the edges.
 Dodge Tool Dodge Tool
This tool is not as crappy as the car brand. It is actually used to lighten whatever area you use it on as long as it is not an absolute black. Absolute black cannot be lightened.
3) Vector Tools
 Path Selection Tool Path Selection Tool
It is related to the Pen Tool. You use this tool when working with paths.
 Text Tool/ Horizontal Type Tool Text Tool/ Horizontal Type Tool
You can click a single point, and start typing right away. Otherwise, you can click and drag to make a bounding box of where your text/type goes. There are many options for the Type Tool that you can choose from. Just play around, it is fairly straight-forward.
 Pen Tool Pen Tool
It is used for drawing smooth-edged paths, selected in the Path Selection Tool. Paths can be used in a few different ways, mostly to create clipping paths, or to create selections. Click and drag the anchor points to modify the path. This will allow you to bend and shape the path for accurate selections.
 Rectangular Tool/ Shape Tool Rectangular Tool/ Shape Tool
By default it draws a Shape Layer in the form of a rectangle. It fills the rectangle with whatever foreground color you have selected. It is somewhat complicated but as you increase your skill level in working with Photoshop, you will learn it perfectly.
4) Assisting Tools
 Note Tool Note Tool
This tool serves as a comment feature usually used for electronic text edits but digital just like post-it notes. You can use this tool to add small note boxes to your image. These are useful if you are very forgetful, or if you are sharing your Photoshop file with someone else. It only works with .psd files.
 Eyedropper Tool Eyedropper Tool
This tool takes color samples from colors on the page and displays them in the Color Boxes. It works by changing your foreground color to whatever color you click on. Holding the [Alt] key will change your background color.
 Hand Tool Hand Tool
This tool allows you to move around within the image. It is used for moving your entire image within a window. Just click and drag. You can get to this tool at any time while using other tools by pressing and holding the [Spacebar].
 Zoom Tool Zoom Tool
This tool magnifies or reduces the display of any area in your image window. It allows you to zoom into your image. Hold the [Alt] key to zoom out. Holding the [Shift] key will zoom all of the windows you have opened at the same time. Double-click on the Zoom Tool in the palette to go back to 100% view.
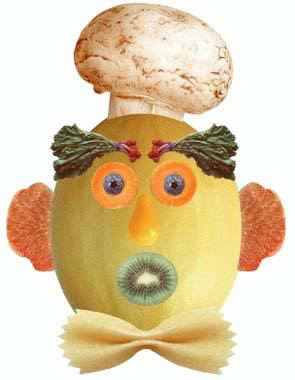
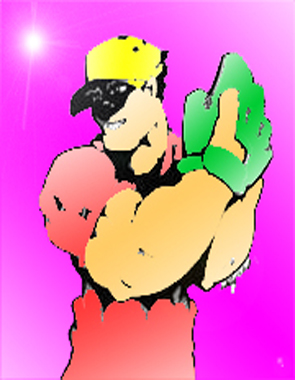
Sample Outputs
Click on any of the pictures below to show their procedures!
|