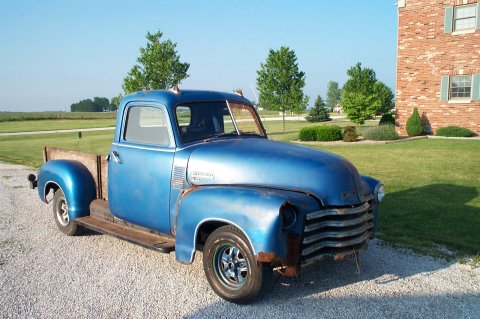
Now that the truck runs and moves, it is time to get back to replacing rotten metal. I had already replaced both inner and outer cowl on the drivers side. The floor is in real bad shape, so it will be replaced, Before I replace the floor, I need to replace the inner and outer cowl on the passenger side. The seat smells really bad from all of the mice that lived in it and were not potty trained. The best option for the seat is to removed it and trash it. Once the seat was removed, the gas tank was exposed and easy to remove. Since it was full of pinholes, I sent it to the scrap metal yard. I had read that removing the seat support is not a good idea. The support strengthens the floor and keeps the cab from buckling. I got a set of bucket seats from my son-in-lay, covered the seat support with a piece of plywood and mounted the seats on the plywood. I removed the seats and plywood, then finished welding in the cowls and the new floor. The cab mount channels under the floor were also rusted away. My son is a tinbanger, so it was not too hard to get him to make new ones for me. I also had him make me a new transmission cover.
Once I had a floor back in the truck, I put the hood and the front fenders back on. They do not fit, all of the parts have LARGE gaps between them. What I finally figured out was that the front of the hood was to high, both fenders were too far forward and grille was bent. I bolted the fenders, inner fenders, and the grille together without bolting them to the cab. I mounted the hood and the set the front fenders on blocks. By doing this, I was able to move everything around until it finally started to fit. Once I got it close, I started bolting the inner fender to the radiator support. Some the bolt holes had to be elongated to make it fit. While I was making the front fenders fit, it seemed like a good time to remove all of the old paint on the left front fender. The fender looked like it was in good shape and except for a few small dings would be easy to fix. The paint was starting to powder and the orange peel was really starting to show. What I did not realize is that the fender had repaired several times in the past. Once I started taking the paint down to bare metal, I found lots of bondo, some was needed to fill previous dings, some was just there. In the end, I took the whole fender to bare metal, pounded out some dings and filled others.
As I moved around the truck, the drivers door was next. The worst part about the door was that the window rattled. It did not matter if it was up or down, it rattled. It seems that the only way to get rid of the rattle was to replace the channel around the window. This was not hard to remove. While I had the window out, I wanted to see if I could make the door fit better and close without slamming. A hydraulic floor jack and several two-by-fours later, the door fits nicely and closes with ease. The door was sprung and took some real brute force to un-spring it. I remember reading that the way to get the doors lined up is to put a two-by-four between the door and the body (at the hinge) and start pushing on the door. I also remember working on cars made in the 50s and using bumper jacks to bend doors ( we even used trees and chains on some). Once the door would close the correct way, I wrapped the window channel with felt and re-installed it. I took the window regulator out, cleaned, and greased it. The window rolls up and down really easy and does not rattle any more.
After I was satisfied with the drivers door, I started on the cab corners. They had been previously repaired using liquid fiberglass and matting. When the metal undeath is rusty or grows new rust, this stuff lets loose. The patch came off in a nice chunk. I ordered new cab corners from Chevy-Duty. They fit very well, but the thought of welding them in seemed overwelming. I had seen some information on glueing panels together. After talking to a pro, I decided that the cab corners would get glued. I cut all of the damaged metal out and then cut out enough metal so that there was only an inch of overlap. Next I placed the patch panel in place and used sheet metal screws to hold it there. Once I was satisfied that the panel was right, I removed it and applied the epoxy mix. The screws were used to put the panel back exactly in place once the glue was applied. Before the epoxy was set, I removed the screws one at a time and replaces them with rivets. After the glue dried, I sanded it down and applied glue to cover the rivets and fill the low spots I was not happy with. After this dried and I sanded it down again, it looked good enough to block sand and paint. After doing this I would definately recomend using glue where ever the patch panel won't see a lot of flexing.
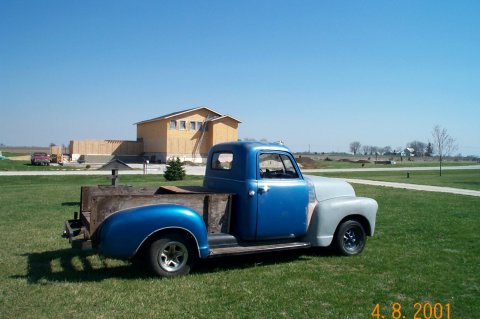
When I got this truck, the bed was completely made of wood. Although the bed looked pretty good, I wanted steel sides. I looked around for another bed and gave up on that idea. The ones I found in Illinois were overpriced and rotten. I was able to find some on the west coast, transportation put that out of range.My next plan was to fabricate my own sides. A 4' x 8' sheet of 18 gauge steel cost me $50. Since my son works sheet metal for a living, I had access to large sheers and brakes, and even someone to operate them. We cut the metal into two pieces, 24" x 78" and then bent them at 2" at 30 degrees like the original. I have installed the sides, but still need to weld the 1 1/2" tail pipe to the top edge.
