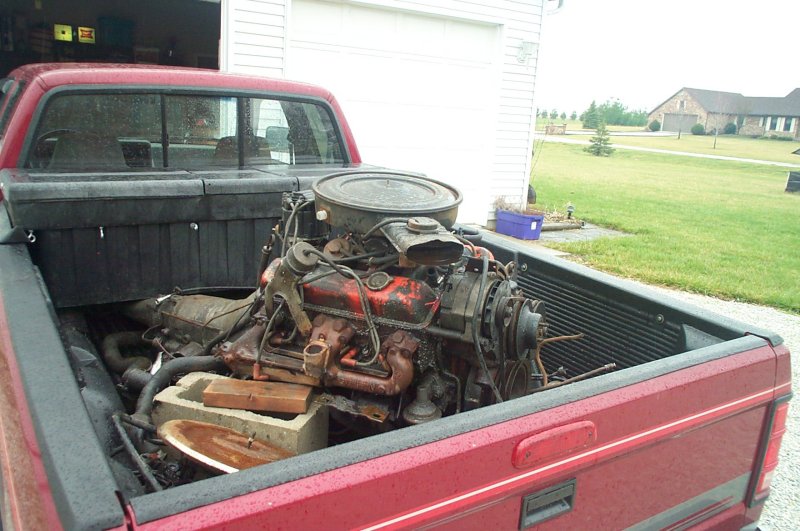
Once I got the clip welded into place it was time to get the Chevy 350 motor and trans. Another trip to Joliet and then a ride home with another pickup truck full of car parts. My wife is a candidate for sainthood for putting up with the things I do for entertainment.
When I got the motor home it was oil soaked as if every gasket had been leaking for the last hundred thousand miles. A trip to car wash was called for. Most people frown on someone washing a motor and transmission where they wash their nice new car. Since it was raining, I decided this was the perfect time to get a pocket full of quarters and head for the car wash. After spending five dollars in quarters, I decided the motor was clean enough. It was, but the bedliner in my Dodge truck was filthy. (It took another five dollars in quarters to get it clean.) I took the motor home and unloaded it before cleaning the Dodge.
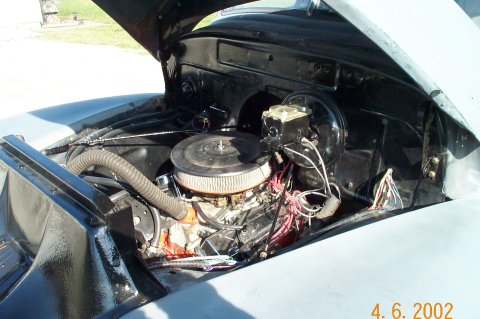
The engine already has an HEI ignition system, a two wire alternator, and a power steering pump. The bad parts are that it has a 2 barrel carburator and all of the emmission equipment required in 1973. This was probably the worst model year for power, the feds went overboard with emmission controls. I have an earlier 4 barrel intake manifold with no EGR valve, the cam will be replaced, as well as the cylinder heads. That will allow the 350 to preform again.
The next weekend was sunny and warm. It was a great day to drop the motor and trans into Blue. I initially thought I would just drop the motor in and one the predrilled motor mount hole patterns in the Firebird frame. That did not work. It would have put the motor too far forward. After figuring out where to put the motor and drilling new mounting holes, I finally got it installed. A little bit of torch work on the Firebird crossmember and it fit. A new tramsmission mount block would have to fabricated, but it would wait. Time to build a fire in the small block Chevy. Not my day! It would not start, It tried, it spit fire at me, it coughed and choked, but, it would not go. That's enough for one day.
The next day (Sunday) was another warm day. After a few shots
of either and some fire belching, I decided to pull the timing
cover and check the timing chain. Since most of what I have worked
on in the past has been Fords, I am not familiar with a timing
sprocket that has multiple timing marks.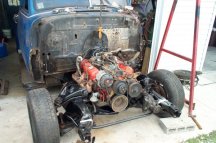 A few phone calls later, I decide that some has advanced the cam
timing 4 degrees and the the chain has jumped by one tooth. I
put the timing back to factory specs and put he cover back on.
It fired right up, runs kinda rough, but I new it was tired when
I got it. At least it will run. Great, time to remove the two
barrel and install the four barrel manifold and carburator. That
did not fix the rough running and now I notice that that starter
grinds when it starts. I decide not to worry about the rough idle,
I am going to rebuild the engine anyway. I do have to fix the
grinding starter. When I investigated I was shocked to find about
a quarter inch of shims between the starter and the block, I never
had this trouble with a Ford. Several discussions later I find
that Chevy made a few revisions along the way and some starters
have to be shimmed to work right on small blocks. After messing
with this for several weekends and two new starters, I removed
about .030 from one starter ear, installed it with no shims and
it has worked well every since.
A few phone calls later, I decide that some has advanced the cam
timing 4 degrees and the the chain has jumped by one tooth. I
put the timing back to factory specs and put he cover back on.
It fired right up, runs kinda rough, but I new it was tired when
I got it. At least it will run. Great, time to remove the two
barrel and install the four barrel manifold and carburator. That
did not fix the rough running and now I notice that that starter
grinds when it starts. I decide not to worry about the rough idle,
I am going to rebuild the engine anyway. I do have to fix the
grinding starter. When I investigated I was shocked to find about
a quarter inch of shims between the starter and the block, I never
had this trouble with a Ford. Several discussions later I find
that Chevy made a few revisions along the way and some starters
have to be shimmed to work right on small blocks. After messing
with this for several weekends and two new starters, I removed
about .030 from one starter ear, installed it with no shims and
it has worked well every since.
Now that the motor will start, I need to install the radiator. This is where I found out that I skipped a very important step. I did not fabricate a jig that would show me where the radiator shell should go. The fenders and inner fenders bolt to the radiator support. The only way to get it positioned will be to put the hood back on, then put the inner and outer fenders about where they go in relation to the hood. This proved to be quite a challange. I had already replaced the driver's side dog-leg cowls. Those peices came without predrilled holes. The original peices were rusted away, so I had to clamp the fender to the new cowl. The passenger side had been hit in the front fender and the alignment on this side was bad to begin with. Once I got both fenders clamped to the cab, I used my floor jack to raise the front of the fenders up to meet the hood. Since I had bolted the front fender assembly together, the radiator support was now in the right place. I made a crossmember support from a length of 2" square tubing and bolted it to the clip horns.
The 350 does not really fill the engine bay. I am sure that there is room for a 500 Caddie engine. The only way to get the fenders and the hood to fit correctly was to find and install fender to firewall braces. Durring the Chevy's 50 years someone had decided that they were not necessary.