 |
|
|
|
|
|
|
|
|
|
|
|
|
|
Modding with a Hex Editing tutorial
Everything that you will need to know when modding with a Hex editor
|
Click here to view
this tutorial
|
|
|
Modding with Halo Modding Tool versin 3
This will tell you what you need to know about using HMT v3 to mod Halo
|
You are currently
viewing this tutorial
|
|
|
|
Batch Extracting (Originally posted by Bigmick)
Installing Halo Moding Tool (HMT v3)
|
|
|
STEP 1
Before you are able to use HMT v3, you will first need click on the "Installing Halo Moding Tool (HMTv3)"
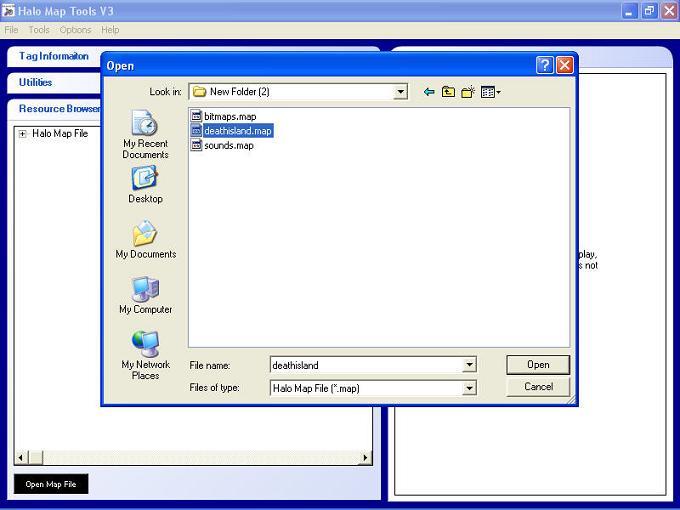
Ok, this is a tutorial to tell you how to get files from single player into multiplayer with Halo Map Tools v3. We will be
using the map deathisland and we will be putting the wraith mortar shell (in case you didnt know, HMT is halo map tools)
Now, first off load up your map in HMT. Now, When you load this map, it has to be completely clean. No mods or any
changes you made AT ALL can be in it. If so, you will get an error. Also, you need to have bitmaps.map and sounds.map
in the same folder as the map you are opening. You can have all the other files you want, but without bitmaps.map and
sounds.map, it wont work.
|
|
|
|
 |
|
|
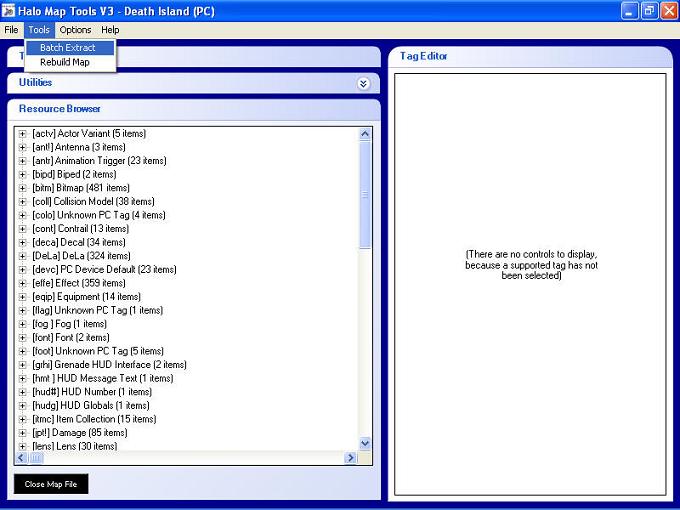
STEP 2
Then, under tools, select batch extract.
|
|
|
|
 |
|
|
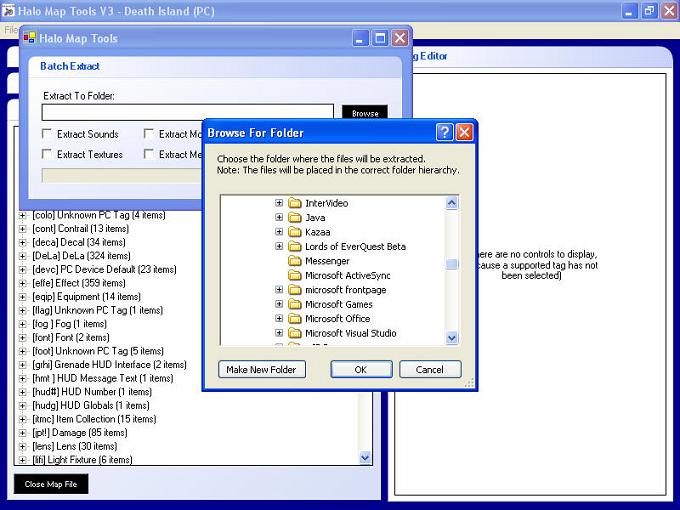
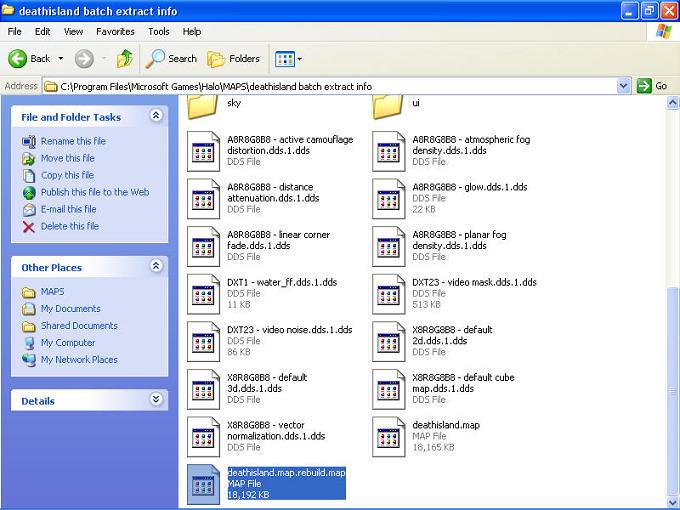
STEP 3
Now, pick where you want HMT to put the extracted files. Make sure its an empty folder. (except for deathisland.map
which you will need in that folder later on, so its easier to put it in there now)
|
|
|
|
 |
|
|
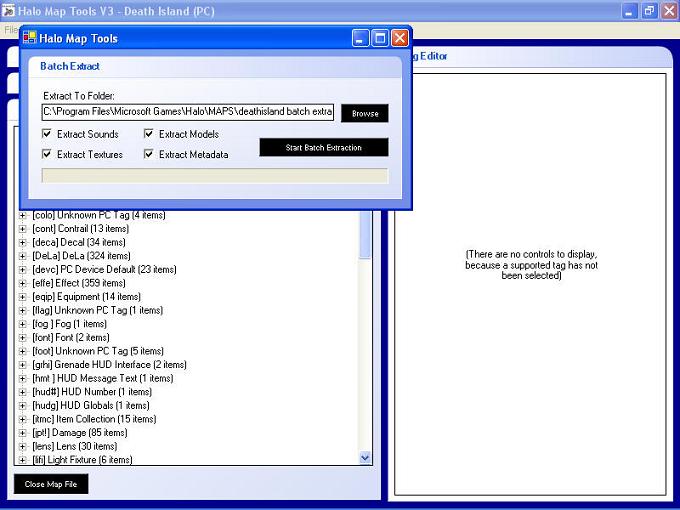
STEP 4
Now that you have a place to put the files, check in all the check boxes, and hit start batch extraction
|
|
|
|
 |
|
|
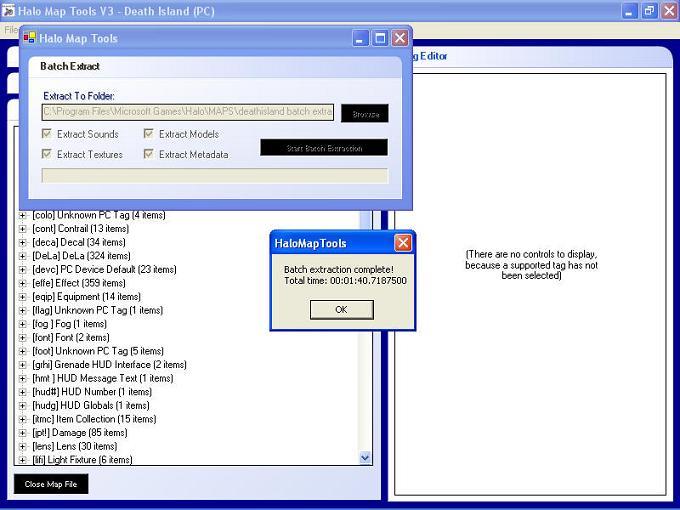
STEP 5
Now when it finishes (it will take a few minutes) you should see this
|
|
|
|
 |
|
|
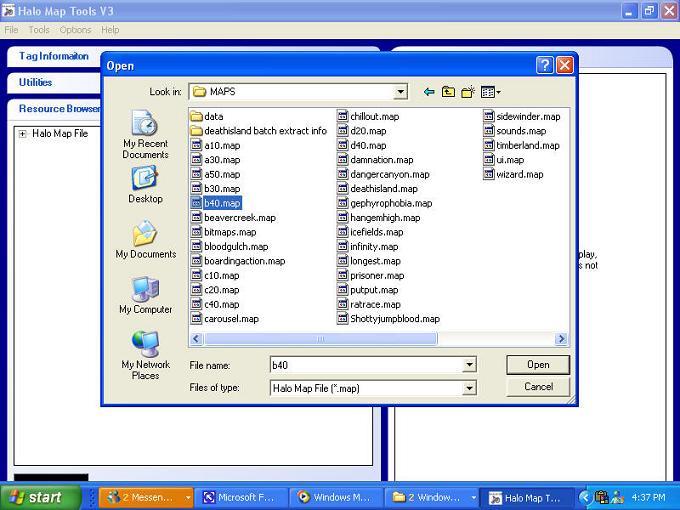
STEP 6
Now thats it done, you need to load up a single player map that has the object you want to put into multiplayer. In this
case, we are using Assualt on the Control Room, or b40.map
|
|
|
|
 |
|
|
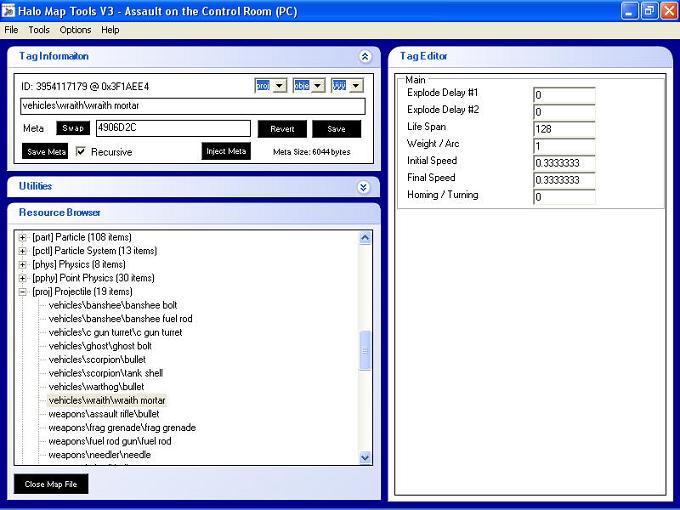
STEP 7
Ok now find the projectile for the wraith mortar. Click on that. Then, check in the box that says "recursive" and click save
meta. Now, it will ask you where you want to save it. You need to save it in a seperate folder that has nothing in it. I also
suggest you put it close to the batch extracted map folder because of what you do next.
|
|
|
|
 |
|
|
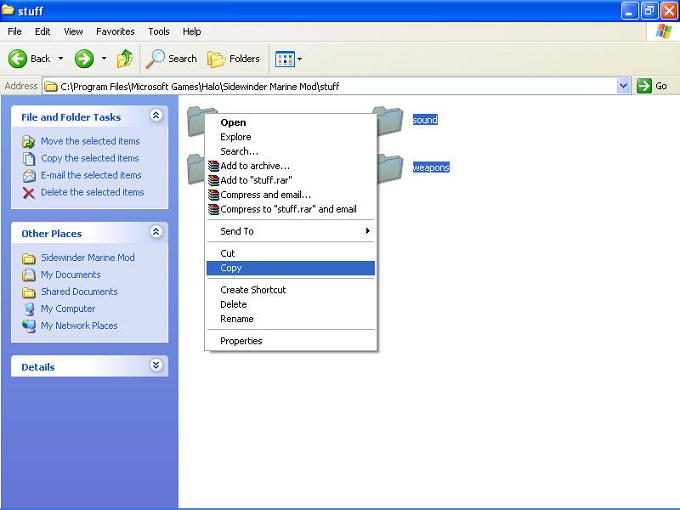
STEP 8
Now go to the folder where you saved the wraith data. Select all the folders, right click, and select coy.
|
|
|
|
 |
|
|
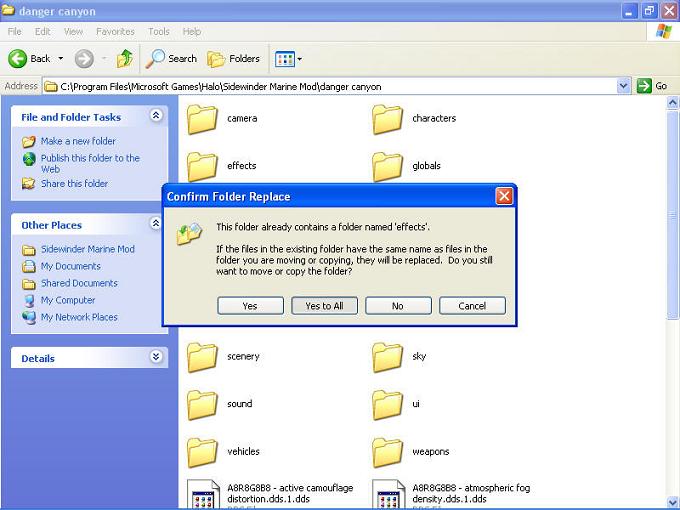
STEP 9
Now go to the folder that holds the batch extracted map information. Right click in there, and click paste. It will prompt
you and ask if you want to over right the files. Click "Yes to all"
|
|
|
|
 |
|
|
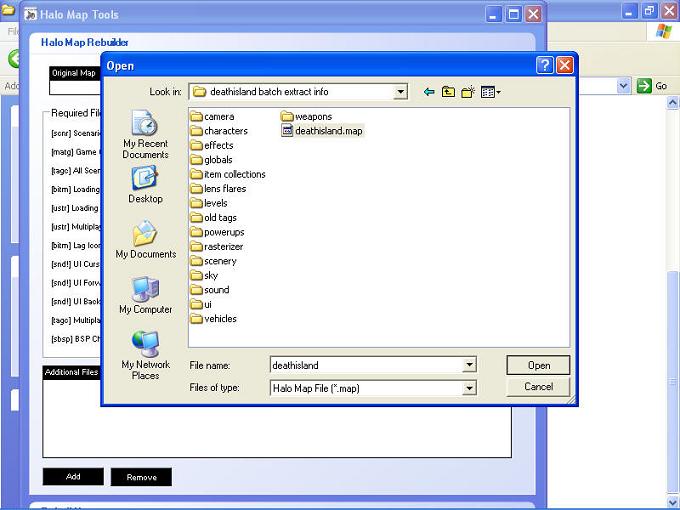
STEP 10
Now, go back to HMT, go to tools, and click rebuild map. Now, find the folder you batch extracted in, and select the
original map file (you did put deathisland.map in there right?).
|
|
|
|
 |
|
|
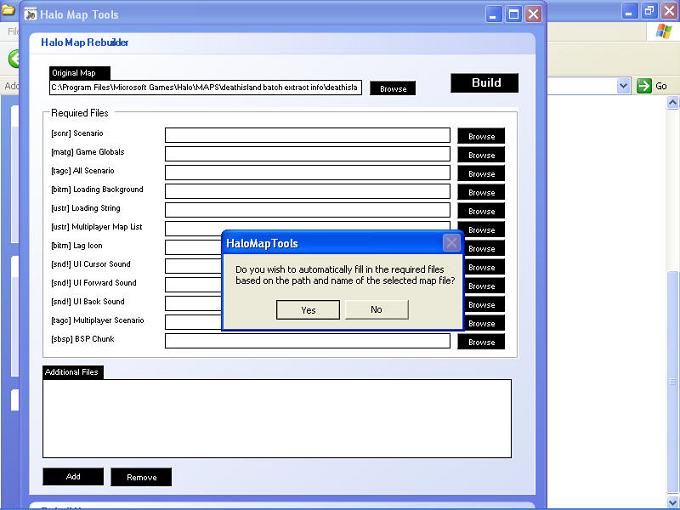
STEP 11
Now, HMT will ask you if you want it to fill in the rest of the files. Click yes.
|
|
|
|
 |
|
|
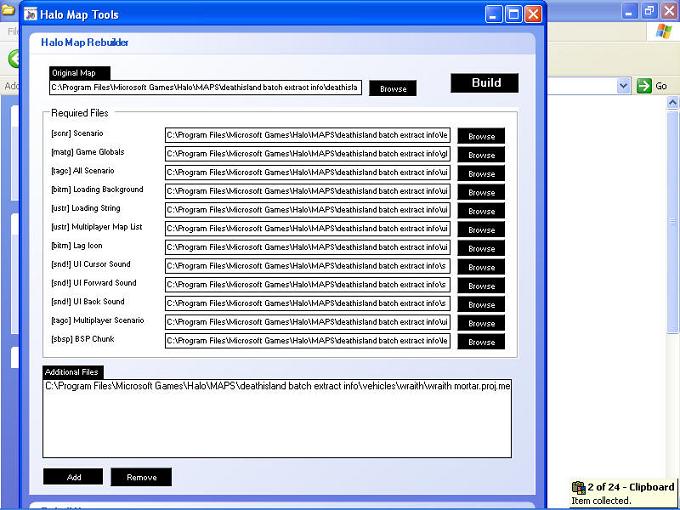
STEP 12
Now, at the bottom, you will see a "Additional files" section, and an add button. Click add. Now you need to add the file
that you added. In this case, thats the wraith projectile. Now this may be kind of tricky. You need to think about where
the file will be. In this case, its in the vehicles folder, under wraith. Its called wraith.mortar.proj.meta. . Click that, and add
it.
|
|
|
|
 |
|
|
STEP 13
Now that the file is added, press build.
|
|
|
|
 |
|
|
STEP 14
Now just let it build, it might take a while. When its done, you should see this.
|
|
|
|
 |
|
|
STEP 15
Now, go to the file that you batch extracted your map to. In there, you should see a file with the name *original map
name*.rebuild.map. Rename that to deathisland or whatever map you modded, then put it back in your maps folder.
|
|
|
|
 |
|
|
STEP 16
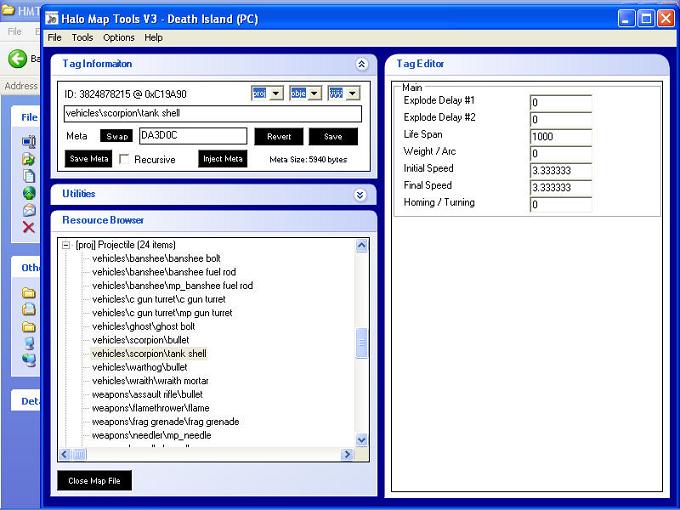
Now, open up that map you just put in your maps file with HMT and swap the tank shot projectile with the wraith mortar.
|
|
|
|
 |
|
|
STEP 17
Now, open up that map you just put in your maps file with HMT and swap the tank shot projectile with the wraith mortar.
|
|
|
|
 |
|
|
Tools for remodeling object in Halo
|
|
|
|
|
|
Remodeling with Milk Shape 3D
Here you will learn how to reshape objects used in Halo
|
|
|
|
|
Tools to make and apply patch files to Halo
|
|
|
|
|
|
|
|
Tools to uncompress files which are compressed
|
|
|
|
|
|
|
|