| Page last updated on : |
| 13/06/2006 |
| Copyright (c) GALT Locomotives 2006, all rights reserved |
 |
| GALT LOCOMOTIVES The Home of the Little Purple Engine |
| Painting the Chimney and Dome |
| The chimney supplied in the Trojan kit is a white coloured resin casting, shown in the picture on the Trojan Kit page. Despite my best and very careful efforts to remove the resin casting remnants significant lines and indentations were clearly visible on opposite sides of the chimney. To overcome this is used the filler-primer to build up thick primer deposits, which would hopefully either completely hide these imperfections or cover them up enough so that they were hardly noticeable. |
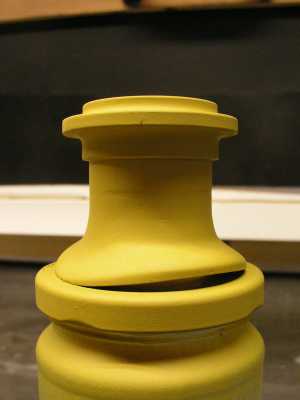
| The chimney after one coat of filler-primer is shown in the left hand picture. Looking closely at the left hand side of the chimney, it is possible to see a horizontal indentation and several imperfections on the rim at the top of the chimney. To overcome these problems I used masking tape to mask off the areas of the chimney, which I considered ok and to expose those areas, which contained the unwanted imperfections. |
 |
 |
 |
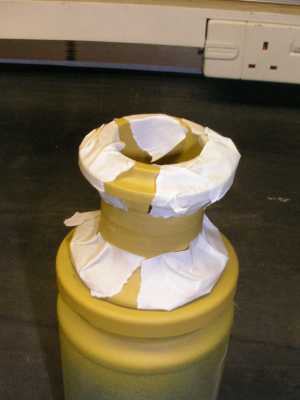
| The initial masked chimney is show in the right hand picture. By liberally spraying the exposed areas I was eventually able to build up sufficient filler-primer to hide most of the imperfections. I then carefully rubbed down the entire chimney with small pieces of 1200 grit wet and dry, regularly cleaning off the paint residue on the wet and dry and occasionally changing it for a new piece. After a number of coats I eventually obtained a finished surface that, although still containing a few minor blemishes, was acceptable and ready for painting. |
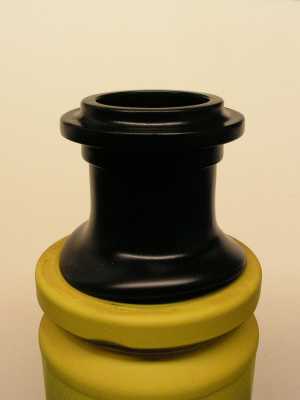
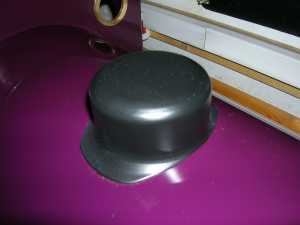
| The picture shown on the right is the finished chimney sprayed with several coats of satin black. |
| Suggestion Although the chimney is shown in all the pictures sat on a jam jar, which makes the job of painting it considerably easier, don�t do as I did and spray it while in contact with the jam jar lid. When the filler-primer dried, I found I had done a good job of sticking the chimney to the jam jar lid !!! Place, for example the upturned spray tin lid, in between the chimney and the jam jar lid. What ever you use it needs to be a smaller diameter than the chimney. |
| The Dome |
| The dome supplied by Ride On Railways is from a spray paint can lid, which just happens to be dome shaped, and was supplied free of charge as an optional extra. After much thought and deliberation I decided that this �dome� was not the dome for me, as it did not give the characteristic appearance I was looking for. Unfortunately, despite considerable searching on the Internet I was not able to find a suitable dome directly of the shelf. After some discussions with fellow model engineers I was eventually convinced the best approach was to make my own from either plastic or a hardwood. In the end I decided to use Actel, which is a form of plastic with good machining properties. I chose an 80mm diameter Actel rod, which would ultimately provide a dome with a diameter of approximately 60mm. The first challenge was to cut the curve into the dome where it sits on the Trojan boiler. On my Trojan the radius of the boiler is approximately 130mm, give or take a little bit. After spending many hours trying to workout how to machine such a curve it dawned on me that I was trying to be too complex, as with a little lateral thinking and a band saw, I could achieve the desired curve. |
 |
 |
 |
| The diagram shown below is the jig that I made to cut the boiler radius in the dome. By holding the Actel rod on the work holding area, I was able to pivot the rod through the band saw blade and cut a radius in the end of the rod. The closer the Actel rod was moved to the pivot point the smaller the radius. |
| Warning When cutting the radius move the Actel rod very slowly, so that the band saw blade is not over stressed. Also the Actel debris from the saw cut will be very hot, so wear goggles. |
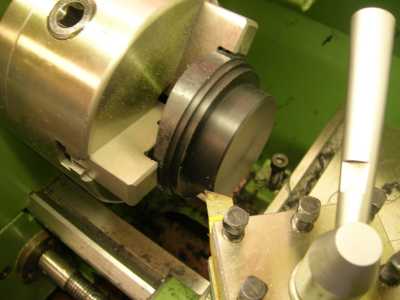
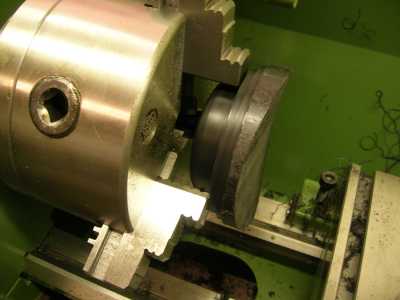
| The next challenge was to turn the inner and outer radiuses on the Actel rod to provide the dome shape. My initial attempt was to hold the boiler radius end of the Actel rod in the lathe chuck, and turn the top outer radius of the dome, as shown in the below left picture. This process worked ok, until I came to turn the inner radius at the bottom of the dome, as shown in the below right picture. No matter how I tried I could not get sufficient access with the lathe tool to turn the inner radius. If I moved the dome further out of the lathe chuck, there was insufficient grip to safety hold the dome, so it was back to the drawing board. However, both of the below pictures, clearly shown the curvature of the boiler radius that was cut on the band saw. |
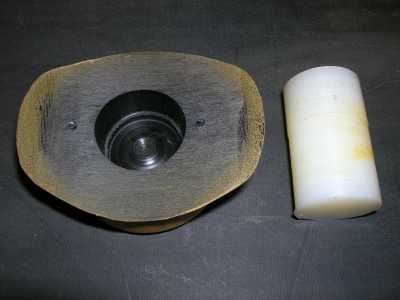
| After cutting another boiler radius in the spare Actel rod, I hit upon the idea of turning a hole in the base of the dome (Boiler radius end) and then fixing a mandrel in the hole, which I turned up from a spare piece of nylon rod. By getting a tight fit between the mandrel and the hole in the Actel rod, I could hold the mandrel in the lathe chuck and turn both the inner and outer radiuses. The picture on the right shows the hole in the base of the dome and the white nylon mandrel. |
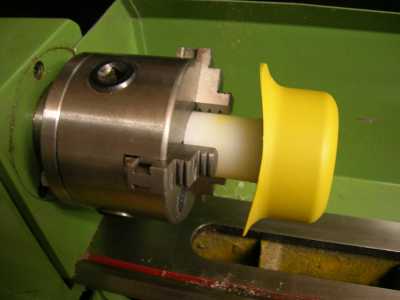
| The picture on the right shows the finished dome fixed on the mandrel during the priming stage of the painting process. During the painting process I placed the dome back on to the mandrel and into the lathe chuck, so that I could use wet and dry on the dome to improve the surface finished. |
 |
 |
 |
| Unfortunately, the pictures I took during the machining process were accidentally deleted. The picture shown on the right is the finished dome mounted on the Trojan boiler. |