 |
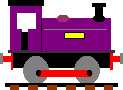
| GALT LOCOMOTIVES The Home of the Little Purple Engine |
| Painting the Metalwork |
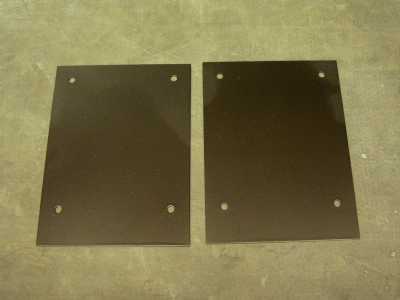
| At this point I must put my hands up and admit that I did not paint the body or a lot of the remaining metalwork myself. Based on a recommendation, I had a friend of a friend paint the metalwork. Unfortunately, some how I either wrote down the incorrect paint mix number or my handwriting, which at times is illegible, was misread. What ever happened, I ended up with a purple engine body, whereas I wanted a burgundy or maroon. Hence the subtitle of this website �The Home of the Little Purple Engine�. My wife and children love the colour and is slowly growing on me. But the finish quality was pretty good. |
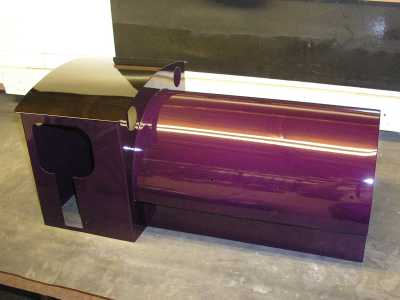 |
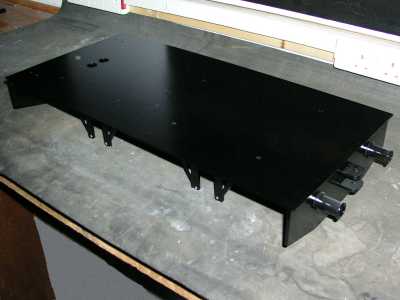
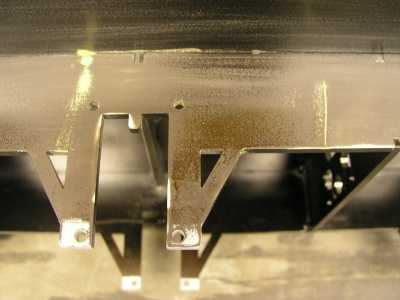
| However, when it came to the remaining metalwork, all of which needed to be satin black, I was not satisfied with the resulting surface finish, as it was uneven, missing and in places dust and dirt had settled on the paint while it was drying. As a result of this I had a lot of rubbing down to do with 1200 grit wet and dry, before I re-sprayed the metalwork. The repainted chassis, the boiler and door and the cab doors are pictured to the right and below. You can also see the curvature of the boiler door in the left hand picture. |
 |
 |
 |
| After re-spraying the chassis I noticed several scratches in the metal surface, which had not been obvious during the metalwork preparation and priming. To overcome these scratches I used some filler-primer from Halfords, which is a lot thicker than the normal primer paint. To concentrate in the required area, I masked round the scratch. After several sprays I had the result shown in the bottom left picture. After rubbing down the filler- primer with 1200 grit, I had the results given in the right hand picture below. When re-sprayed in satin black, it was difficult to spot the scratches. |
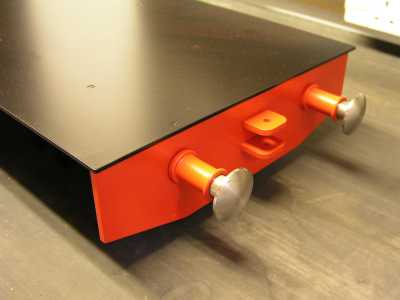
| Painting the Buffer Beams |
| After finishing repainting the chassis, the next stage was to paint the buffer beams on either end of the chassis. Due to the construction of the buffer beam and the way it is mounted on the chassis, considerable care was needed to ensure the paint colour for the buffer beams did not end up on the rest of the chassis. With a lot of news paper pages and nearly an entire roll of masking tape, I was able to mask off the chassis to leave only the buffer beams and their edges exposed. The next stage, which I initially thought would be the easiest, is where I made yet another mistake by mixing different paint types. The chassis had been painted with a cellulose-based paint. Being naive I thought that I could just use an appropriately coloured red spray paint from Halfords, which incidentally is acrylic based. Unfortunately, the two types of paint, cellulose and acrylic, don�t mix very well and I soon had a major disaster on my hands, with the red paint not taking to the satin black, giving the appearance of �paint runs�. I left the paint to dry thoroughly, which despite being a period of unusually hot weather, took several days before I rubbed down the disaster back to satin black with 1200 grit wet and dry. |
| After talking some advice from a commercial paint supplier, I obtained a cellulose-based red spray paint, which took to the satin black of the chassis straight away. Due to the positioning of the buffers on the buffer beam, you could very easy to get thick deposits of paint in one area and only a light dusting in another. Consequently, I played it safe and slowly built up the coats of red paint, with at least ten coats, all of which were what I consider to be light dustings. With the first few coats the satin black was still visible through the red paint. Shown in the right hand picture is one the finished buffer beams with the buffers screwed into place. |
 |
 |
 |
| Page last updated on : |
| 26/01/2006 |
| Copyright (c) GALT Locomotives 2006, all rights reserved |