|
All PaneLine bundles come complete with fixings and detailed mounting
instructions ensuring hassel free installation. There is however some
important guidelines that must be observed before and during PaneLine
installation.
-
Walls and
ceilings must be absolutely dry. Windows and external doors
have to be installed.
-
Before
installing panels they should be unpacked and left to
acclimatise for some days in the room where they will be
installed.
-
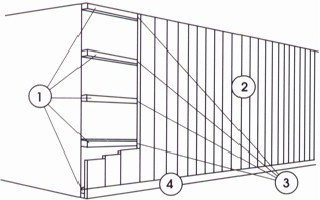
Timber
battens (sub-frame) must be installed flush with the wall
creating a level wall surface once the paneling is fixed.
-
An
expansion gap of minimum 20mm (4/5") should be left
between panels and ceiling or panels and walls.
-
Wall
panels in moist areas must always be installed vertically.
-
Panels
should not be installed in areas subject to water spills.
-
All
exposed edges are to be sealed with silicon.
-
All rooms
must be property ventilated.
|
|
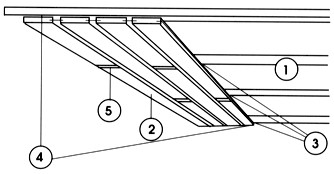
There are special
requirements for wet rooms:
-
Good
ventilation is vital behind the paneling for all wet rooms
(air compression must be avoided).
-
The
battens of the sub-frame must have ventilation gaps (between
the wall and the batten) which are minimum 1 cm (1 /2")
deep and 10cm (4") long or counter battens should be
used.
-
Before
installing the battens they should be protected against
moisture using a wood preservative keeping the pores of the
timber open.
-
Use only
zinc-galvanised clips and nails.
|
|
|