Project
Inject
Dave's Modifications Site
gives a guide to the DIY conversion of Blue/Black Holden motors
to Black motor EFI
Page 3
Results:
Once the engine was converted, it took a
little while for the injectors to clear themselves out (with
the assistance of some injector cleaner.) The conversion
components were sitting for a while before the conversion
commenced, so this was probably the main cause of the
injectors
initially not performing well.
The fuel economy was hard for me to judge since the motor is non-stock (see the specs.)
On 95 octane unleaded, and non-pedestrian driving (mostly
suburban, with a little highway), the car achieves around
12L/100km. Not bad seeing the specs...
The most obvious benefit that could be
noticed from seat-of-the-pants performance testing was a large
increase in midrange (3000-4000rpm) power. Also, the slightly
cammy idle with the carburettor-based setup was all but gone
with the EFI.
The VK EFI has very little control over the
idle of the project car. On some occasions the car will idle
around 650 rpm, and on others it will idle up to
1000 rpm. The idle does not hunt, or move around however.
The source of this idle issue has not yet been found, but it
is not particularly bothersome, so it hasn't been a high
priority.
(text continues next
page)
|
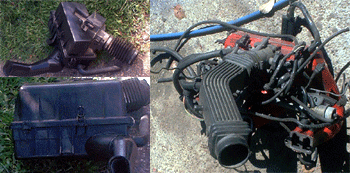
 VK EFI cars have the air box
mounting brackets welded to the car. In this
installation, thin steel brackets
were made to install the air box in the factory location.
Self-tapping screws hold them in place. VK EFI cars have the air box
mounting brackets welded to the car. In this
installation, thin steel brackets
were made to install the air box in the factory location.
Self-tapping screws hold them in place.
The project car
experienced some air box instability with only two
brackets. A consequence of this was occasional squeaking
and moving around when the engine was idling.
If the
process was to repeated, the dimensions and positions of
all VK EFI brackets would be copied as closely as
possible. |
 Next step was
to fit the manifold & air box. Because the manifold had
everything still on it (including harness and pipes in the
photo), this cut down the installation time immensely! Next step was
to fit the manifold & air box. Because the manifold had
everything still on it (including harness and pipes in the
photo), this cut down the installation time immensely! |
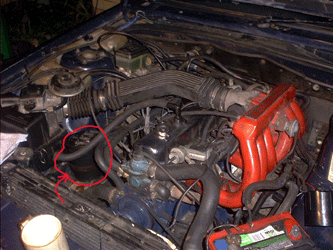 With the
manifold (& bits) and air box on, it was time to fit the
air piping, and relocate the charcoal canister (note its
new position.) Don't be deceived by the picture - there
are a fair few steps left! Also evident are a coffee cup
and wiring diagrams, both of which made the job possible! With the
manifold (& bits) and air box on, it was time to fit the
air piping, and relocate the charcoal canister (note its
new position.) Don't be deceived by the picture - there
are a fair few steps left! Also evident are a coffee cup
and wiring diagrams, both of which made the job possible! |
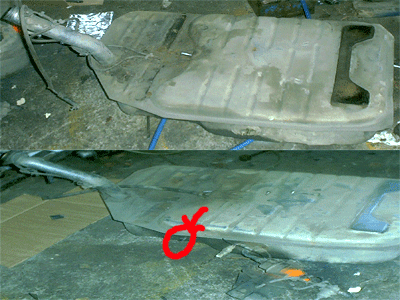 Out with the
old fuel tank, and in with the new. This tank was from a
VL, so it had an internal and an external pump (which are
wired in parallel.) Out with the
old fuel tank, and in with the new. This tank was from a
VL, so it had an internal and an external pump (which are
wired in parallel.)
Circled is the return line position.
Also, make sure the emission hoses are set
up correctly! |
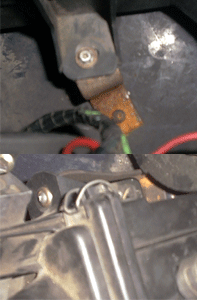
 The new tank was installed, and
the fuel pump was mounted on the car (with self-tappers.)
The fuel return line was clipped to the car with the other
lines, and was connected to the tank. The new tank was installed, and
the fuel pump was mounted on the car (with self-tappers.)
The fuel return line was clipped to the car with the other
lines, and was connected to the tank.
|
page 1 |
page 2 |
page 3 |
page 4
|