 |
|
|
|
|
|
|
|
|
|
|
|
|
|
|
|
|
|
|
|
|
|
|
|
|
|
|
|
|
|
|
|
|
|
|
|
|
|
|
|
|
TOP and TAIL MOUNT 6 CELL - BODY PREP part 1 |
|
|
 |
|
|
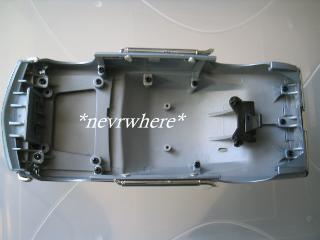
For this tutorial I have chosen to use the 65 Mustang.
Before we begin. Though during this tutorial I will show you how I modified my 65 Mustang, the installation and final fit of the product is the responsibility of the buyer. Most of the techniques I used for the Mustang can be applied to many of the other xmod body styles. Please note that not all body styles can support a tail mounted cell due to lack of space. |
|
|
|
Lets begin. |
|
|
|
|
 |
|
|
|
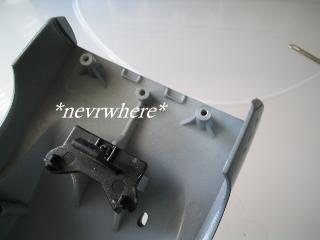
Note: We will be using glue to fix the rear bumper in place. If you plan on buying a body kit and changing the rear bumper it is recommend you do so before installing the tail mount cell. |
|
|
|
|
|
We will be removing the rear end screw posts. |
|
|
|
|
|
 |
|
|
|
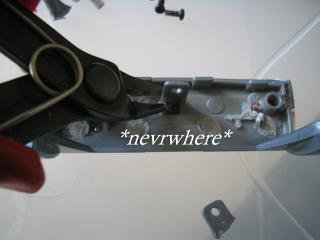
Remove the posts by using anything that will allow you to cut them away. I used something called flush cutters to cut my posts away. You can also use a dremel tool to sand or grind them away also. |
|
|
|
|
|
You will also need to cut away the mounting tabs on the rear bumper. In some cases you may need to also remove the tubes that the tail light leds go into. This was not necessary with the Mustang. |
|
|
|
 |
|
|
 |
|
|
|
|
|
|
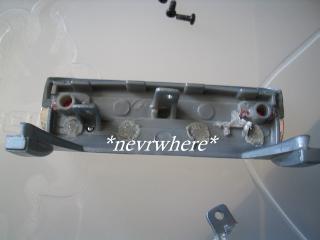
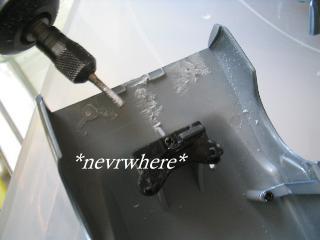
Next in the areas where I cut away the posts and rear support brace, I sanded everything down as close to the body as possible. |
|
|
|
 |
|
|
|
 |
|
|
|
|
|
 |
|
|
|
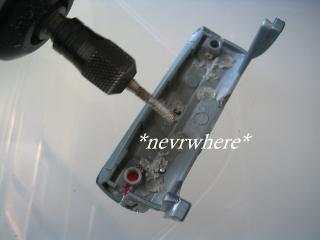
I did the same to the rear bumper. |
|
|
|
|
|
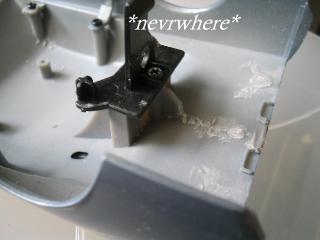
As you can see, you have much more room now to install the tail mount cell. |
|
|
|
 |
|
|
|
 |
|
|
|
|
|
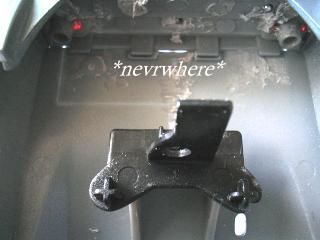
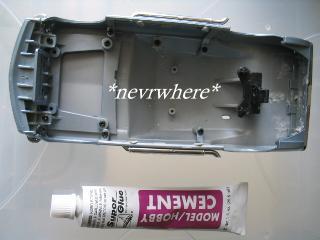
Next, glue the bumper/tail in place. I used a model/hobby cement I purchased at the 99Cent Store and it seems to work good. You can use any type of model glue or a super glue which will give you a strong bond. Just apply alittle to all the edges of the bumper/tail and attach the bumper/tail to the car body and hold in place. Follow the directions for use on the glue container. Once dry we can then install the 6 cell battery holders onto the body. |
|
|
|
CLICK HERE
TO GO TO BODY PREP - PART 2 |
|
|
|
 |
|
|
|
Car Preparation |
|
|
|
Chassis Plug Installation Part 1 |
|
|
Chassis Plug Installation Part 2 |
|
|
|
Body Prep - Part 1 |
|
|
|
Body Prep - Part 2 |
|
|
|
|
|
|
|
TO VIEW MY EBAY AUCTIONS
CLICK HERE |
|
|
|
If you have any questions, please email me
[email protected] |
|
|
|

|
|