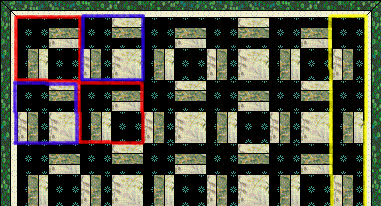
See the red outline and the blue outline.
The only other different block will be in the yellow outlined area at the very right edge and the bottom rows of the quilt.
These right and bottom edges will have only half block units to complete the design.
 ..
.. ..
..![]() ..
..![]()
.
.
And what is really neat, is that you can make the strip sets/blocks any size you want. You sew your strip sets together and measure the width, then you cut your squares the width of the strip sets! You have your quilt blocks.
.......
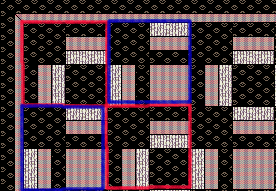
Here are the two main blocks you will piece.
The striped sections are make by strip piecing and the plain blocks are just quick rotary cut. String piece the sections together and you have a quick quilt. The only "match up" places are in the junctions of the blocks and these are those easy "butted" seams that you don't even have to pin.
You have a fabric strip set of light, medium and dark fabrics and light and dark squares that equal the size of the strip set width.
That is all there is to it!
Your strips for the strips sets can be anywhere from 1 1/2" inches for a 3 inch finished strip set and block, or maybe 3 1/2 inch strips in a strip set for a 9 inch strip set and block.
If you have a lovely focus fabric to highlight, a large block would be the perfect size to show off the fabric. A smaller size strip set and block would be perfect for a baby quilt size or a tiny print.
 .....
.....
![]() .....
.....![]()
Once again, here are the two main blocks and the two half blocks for this quilt.
How about all dark Amish solids or gorgeous hand dyes?