Motion capture is the recording of digital descriptions of motion, usually either human or animal, using either optical or magnetic systems.
The Capture menu appears as follows:
To select a menu option, click-drag down the menu until the option is highlighted.
The Capture menu contains commands to select motion capture modes of operation. Many of these commands can be activated more directly via buttons in the shuttle bank. These commands are used when the buttons in the playback shuttle are hidden.
Some of the options also have keyboard shortcuts so that you can turn on sampling and record modes easily from the keyboard. The keyboard shortcuts are indispensable when you are using the mouse as a motion capture device.
Selecting Sample toggles motion sampling on and off.
When Sample is toggled off, Record, Auto Rec, and Snapshot are not usable options and appear grayed out. Once you've selected Sample, Record, Auto Rec, and Snapshot become available options.
Selecting Sample is the same as clicking the following button in the shuttle bank:
Selecting Record starts motion recording.
Record is unavailable until Sample is toggled on. Both Auto Rec and Snapshot are unavailable when Record is on.
You can abort the recording without transferring and computing the sampled data by pressing the ESC key while in Record mode. This stops recording without saving any data. All samples are discarded. Note that the Abort function leaves the system in Sample mode; it merely ends a record session and discards the recorded samples.
Selecting Record is the same as clicking the following button in the shuttle bank:
Selecting Auto Rec starts recording motion from the In point to the Out point as specified at the shuttle bar.
This command is useful for inserting animation precisely into channels that already contain animation.
Auto Rec is unavailable until Sample is toggled on.
Selecting Auto Rec is the same as clicking the following button in the shuttle bank:
Selecting Snapshot captures exactly one frame and adjusts the time to prepare for another snapshot.
This command is unavailable until Sample is toggled on.
Snapshot is useful for capturing motion from poseable armatures. Adjust the armature while viewing the way it poses a character in the 3D view, then take a snapshot using this command. This is like using Record or Auto Rec for just one frame.
Selecting Snapshot is the same as clicking the following button in the shuttle bank:
The MotionSampler pipeline is a very powerful computing engine for manipulating animation data. Usually, it is used to measure data in real time so you can record motion and observe how it moves a model as it happens. However, this is not always what you want. For example, if you are using motion that has ben pre-recorded using the XformExport plugin, and you just want to apply the motion to a model, there is no reason for you to wait for the process to occur in real time. All the data is already available, and MotionSampler can compute this information in a much shorter time if you like.
Selecting Calculate IN/OUT evaluates the pipeline starting at the In timecode on the shuttle bar to the Out timecode. The Step value under the snapshot button in the shuttle bar is used to control the spacing of the samples.
For example, if the In point is set to 00:00:00:00, the Out point is set to 00:00:10:00, and the Step value is 2, when Capture  Calculate IN/OUT is selected, the pipeline will be evaluated for every other frame from 00:00:00:00 to 00:00:10:00.
Calculate from File... is similar to Capture Calculate IN/OUT but instead of using equally spaced samples from the In point to the Out point, it loads a list of timecode values from a file.
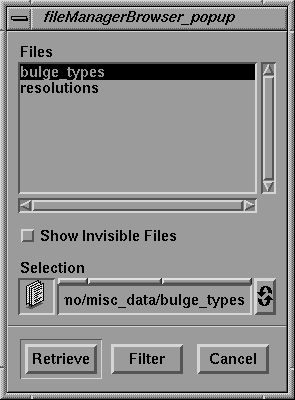
Selecting Calculate from File... opens the fileManagerBrowser which appears as follows:
Only text files or files with the extension .rsd created using the XformExport plugin are listed. Calculate from File... reads timestamps from the retrieved file.
Appropriate text files contain a sequence of timecode values or frame numbers. The values are separated by white-space characters such as space, tab, or new line. However, the values cannot be arbitrary; they should be in either ascending or descending order.
If an .rsd file is retrieved, the pipeline is evaluated using the timestamps in the .rsd file as loaded by the ImportXform plugin. Therefore, the results are identical to when the sampling is live.
Make sure that the .rsd file reading modules are set to start from the head of the file. If the file is not read from the head, the timestamps may not match.
For the ImportXform filter, the mode needs to be Slave, not Cycle.
Selecting Capture Options... displays the Capture Options window which appears as follows:
When MotionSampler is sampling or recording, the frequency of the samples is controlled by the sliders in this window. There are four sliders, but only two values are actually adjusted. The top two sliders adjust the sample frequencies in terms of samples per second. The lower two adjust the same frequencies in terms of the interval between samples. As you move one of the top two sliders, the corresponding slider on the bottom also moves.
The sliders control how often MotionSampler asks each of the source modules to grab a sample. You can set different frequencies for the recording modes Record and Auto Rec from the frequency used in live sampling mode. The default frequencies are 50 samples per second, which is a good general purpose setting.
The sliders labelled Sample set the frequency that MotionSampler uses when in Sample mode. The sliders labelled Record set the frequency used in Record or Auto Rec mode.
The standard system timer has a granularity of 10 milliseconds, which means that setting an interval value of 11 is the same as setting it to 20. Therefore, make sure the interval values are an even multiple of 10.
Setting these values to the fastest speeds does not necessarily lead to better data. Usually, it just leads to slower visual feedback rates because MotionSampler spends too much time sampling when it could be displaying the results.
Some plugins are constrained by the sampling rates of the hardware they are sampling. For example, when using the AFOB source plugin, choose a sampling frequency that is slightly faster than the rate at which the Ascension Flock of Birds hardware is configured to sample at.
When you have finished adjusting the sampling frequency and intervals, click the Done button to close the window.