Next I made the sleeves for the chemise. I didn't have a pattern anything like these sleeves, so I drafted one myself. I used the top off the sleeve pattern for Simplicity 9891 (the Galadriel style sleeves) and then drafted the rest myself. The fabric I had bought was only 45" wide and I had a metre and a half left of it. I divided the width equally by two and then cut the fabric in half, so I was left with two pieces of fabric both 22.5" wide and a metre and a half long. I then sewed the edges together on each sleeve so I had two long tubes, and I attached these to my chemise. Then I measured my fingertip length on the sleeves and cut the split upwards. I just left the sleeves like that for a bit so I could continue work on my vest.
Then the sleeves started to annoy me as they weren't anywhere as wide as the actual sleeves on the chemise, which have to be at least a metre wide. After a while of consideration and hesitation a final push off of a friend made me redo the sleeves again.
After I'd made the sleeves I had the idea of sewing a thick band of elastic into the inside of the sleeve so it couldn't be seen. This elastic would help keep the sleeve fitted to my arm, make the sleeve already gathered, help keep the puff up and make it easier to wrap cord around the sleeves.
After I'd made the body of the chemise, sleeves and altered the neckline I hemmed the bottom of the sleeves and skirt on the dress and then added french seams.
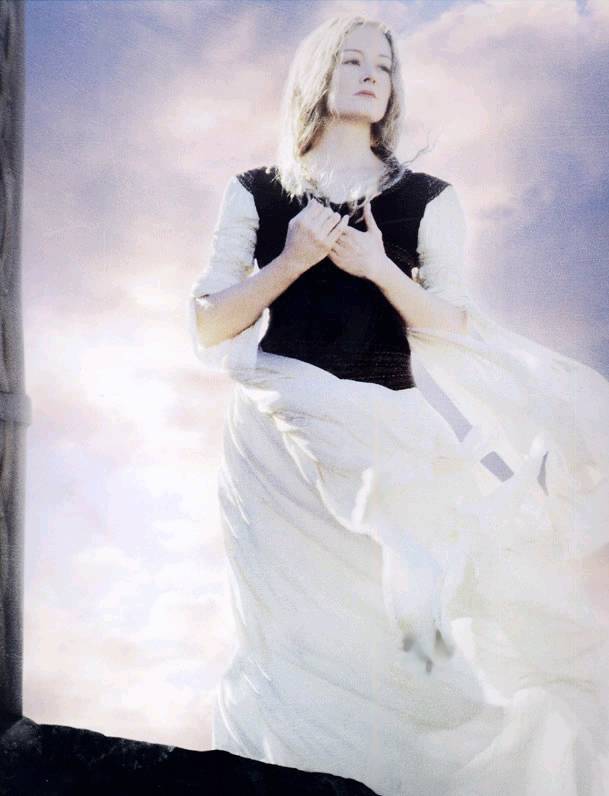
Once I'd made the chemise, then I started on the vest. The leather I was using was pretty thin and not very tough making it easier to sew and it didn't break any needles.
Firstly I made a muslin of the vest pattern, altering the neckline into a curved v-neck and extending the tops of the sleeves into sleeve caps. Then I made the bottom of the pattern curved to match the shape of the base of the actual vest.
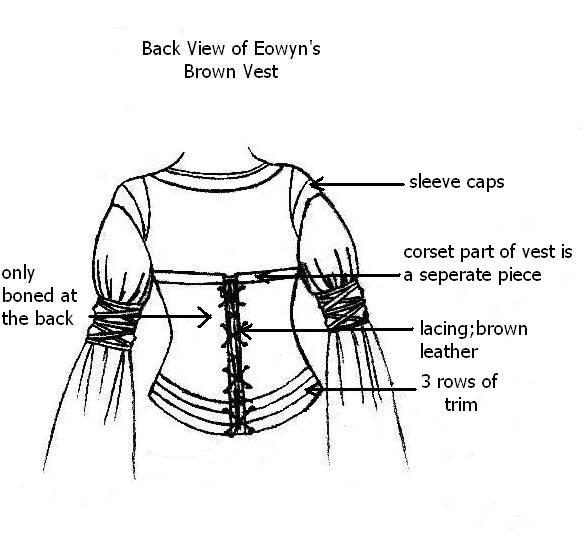
Making the back of the vest was tricky even when I was only making a muslin. I did the back of the vest per the pattern, except the curved base and the sleeve caps and then I made two wings. I then tacked all the pieces of my muslin together to see if my alterations had worked and luckily it worked first time.
Then I cut out my hero fabric using this pattern. Once I'd made the vest per my muslin pattern I added the wings to the side seams of my vest.
Once the vest was complete I added the trim. I decided to use trim on my vest because I'm not very good at embroidery let alone embroidery that is only 1cm wide, or about that, and very delicate. Anyway, I put three rows of trim at the base of my vest, one row below the bust area, one row around the neckline and two rows on the sleeve caps on the front of the vest.

Full Size Image
Full Size Image