
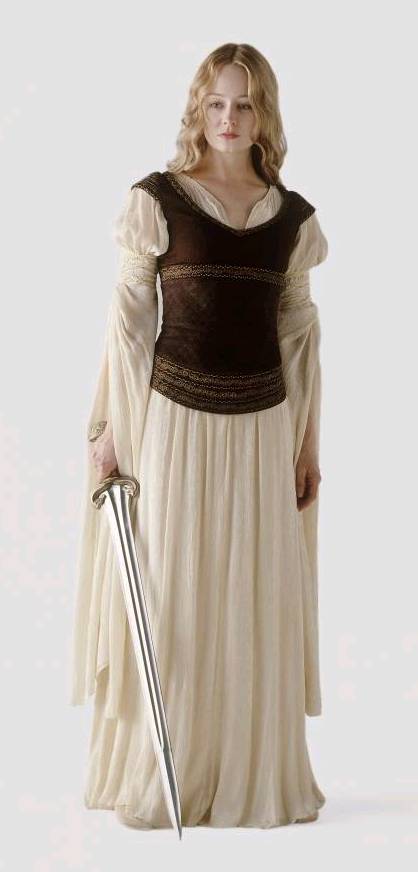
The dress, to me, has a significant meaning. It is Eowyn's sign that she too is capable of fighting like the men of Rohan and finds herself in the position where it is her decision to become independent.
This outfit did not make it into the theatre cut of TTT so I hope that it will be in the extended cut or ROTK as it is a gorgeous dress and also vital to signify Eowyn's decisions.
If it had of made it into TTT, I feel that it would have been worn before the Refugee Outfit (or Fencing Outfit as I prefer it to be called) as that dress is even more symbolic of her will to fight.
Fabrics
The fabrics for this outfit are easier to determine than other dresses worn in the film. The chemise was almost immediately identified as silk because of its sheen and soft looking texture. Later I discovered that the silk is decorated with a paisley pattern.
The vest had to be made from a stronger fabric than wool, which it was originally thought to have been made from, as it is a support device keeping the chemise fitted to the body for ease of movement.
Admired Miranda
The fabrics I used for my Shieldmaiden Gown are, for the chemise, a cream cotton/silk blend so that it has a sheen like silk and it is patterned with paisley decoration, like the chemise itself.
And for the vest, I bought brown brushed leather with an elephant skin pattern weaved into the hide. See the fabrics I used here.
Patterns
There are no sufficient patterns for this dress, so for mine I used Butterick 3552 for the chemise. When I made my muslin I put all the seams together (the pattern has princess seams so it is more fitting) and cut out the front pattern as one whole piece and the back pattern as one whole piece also, so I only had side seams like on the actual dress. I altered the neckline so that it was no longer square, but a gentle v plunging into a deep v.
For the vest I used a very old McCall's pattern, which I believe has been discontinued. It was McCall's.
How I Made The Dress
I made the chemise first. I used the muslin patterns I had made and cut out the front as one whole piece and the back as one whole piece. I encountered a problem when I went to cut the back piece out of my hero fabric though. The skirt on the dress was wider
Fantasy Planet
See full size image
The neckline was a bit of a challenge. I folded a piece of paper in half and drew one side of the required shape of the chemises neckline. This was so both sides of my neckline would be symmetrical. Then I cut it out and pinned it to the square neckline of my muslin, before cutting out my hero fabric. Once I'd cut out my hero fabric, I extended the deep v of the neckline downwards until it reached just below my bust. I made the split I'd just cut into a v-shape and inserted a piece of fabric behind the v from about two inches down from the beginning of the plunge on my neckline. I then added cream bias tape around the edges gathering the fabric into the neckline at certain intervals, so I had five pin tucks altogether all the way around. Then based on new information, I added a single gold stitch over the visible edge of the bias tape.