 Installing the Hard Drive is very similar to installing the CD-ROM drive, which is why we lumped the two together on the same page.
Before installing the Hard Drive you first have to make sure that the jumpers are set properly. Its best to keep your hard drive as the master. Typically, computer setups have two IDE channels which usually hold a Hard Drive and a CD-ROM drive. These channels are able to control two devices, this gives you an availability of four devices on one system. If you plan on building a typical system then make both the CD-ROM drive and the hard drive masters, and plug each of them into a separate IDE channel. If you plan on having more than two drives than keep your main hard drive and CD-ROM drive as the master and set any additional devices as slaves.
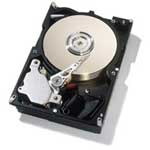
 This is an example of the back of a fairly standard hard drive. Different companies have different jumper configurations though, so be sure and check your manual and the schematic on the top of your hard drive to be sure of what is correct for your system.
* Cable Select (CS) systems utilize a special cable configuration where the hard drive’s position on the ATA cable determines its master or slave status. In this type of configuration, both drives must have their jumpers set to CS.
Once your jumpers are set properly, slide the hard drive into one of the open half-height bays. You do not need to remove any plastic panels since the hard drive does not need accessibility from the outside.
Insert small screws through the drive bay and into the hard drive on both sides to fasten it securely to the computer case.
Connect the hard drive to the motherboard with the ribbon cable. Since the hard drive should be set to master, you should connect the terminal end of the cable to the drive.
Connect the power supply cable to the hard drive and your installation is complete.