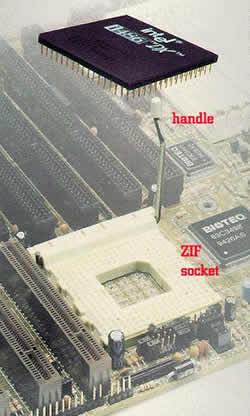
This involves locating Pin 1 on both the chip and the socket. This is easy to do. The chip is always marked at Pin 1. The mark may be a little dot on one corner, a slightly notched corner, or a mark at one of the pins under the chip. On the socket, there is usually a notch on one corner, or a big "1". These corners will be matched up for correct installation. OPENT THE ZIF SOCKET This is done by grabbing the lever on one side of the socket and opening it. Pull the lever from the closed, level position, to the open, vertical position. You may need to pull the lever out a little before it will open. Do this slowly and be sure not to force it. You don't want to break the socket. On the way up, you may experience a little more force. This is normal. |
INSERT THE PROCESSOR Bearing in mind the orientation determined in Step 1, insert the chip into the socket. With a ZIF socket, the chip should install very easily. It should almost fall into the socket with all pins lining up. If not, the socket is probably not open all the way. CLOSING THE ZIF SOCET Just close the lever. You will probably feel some resistance. This is normal and it should close anyway. If you really need to lean on it, check to be sure the chip is installed correctly. When down, make sure the lever snaps into place. |
 ORIENT THE CHIP