Main Menu
Index Page
About SWTNZ
Links
Creative
Build a LightSaber
The Vacuum-Saber
DIY 12' Bandolier
Inside the X-Wing
Restoring Toys
Creative Reviews
Inside RC R2D2
Broken 12' R2D2
Prop Reviews
The Hildebrandt's
Collecting
Vintage Collectibles
Collecting & Pricing
Toy Concepts
Wampa Revealed
Behind the Beast
Behind the Vehicle
Droids & Ewok
From Steve to Star
Death Star Play Sets
Downloads
Video Edits
Rebel TieFighter
Wallpapers
Star Wars Browser
R2M-Player
Toy Company's
Kenner
Toltoys
Palitoy
Remco
|
|
Inside a Vintage Remote Control R2D2 1978 |

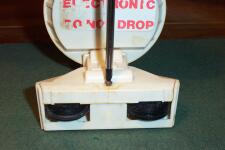
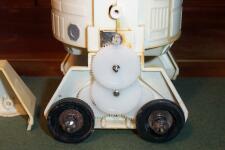
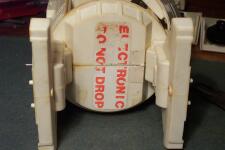
An old vintage remote controlled R2D2 toy made in 1978 by kenner,
this one has seen better days and is need of some cleaning and
repairing, so lets take this opportunity to look inside and see what
makes this special toy tick, above is the before picture. You can
see the left leg is not sitting correctly and what you cannot see is
that the same leg has a nasty crack because of miss-alignment or
the poor little guy may have been in an accident sometime in the past..
|
|
lets begin by taking him apart |
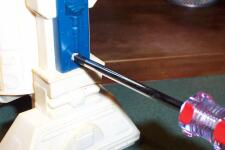
First lets undo the screws that hold the outer leg panels, these are PK screws
so you will need a fairly small PK screw driver, these screws are different
sizes so remember that the longer screw comes from the side leg panel and
the shorter screw from the bottom inside leg.
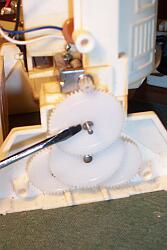
The side leg panels will then easily remove, but take care the wheel gears
don't fall out. The wheel gears are simply sitting inside the legs and can
be loosely fit so hold R2's body on its side just in case..
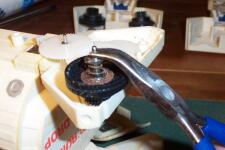
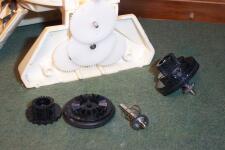
The Wheel gears might be tightly fit and if they are grab hold of it carefully
with a pair of pliers and give it a twist to loosen it up, as you can see the
wheel gears are made up of a number of little parts so take care not to
loose anything and place the gears and screws to one side with their
corresponding leg panels so you wont get them mixed up or lost..
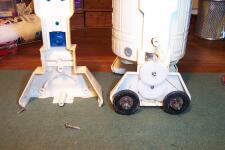
There are two different wheel gears used, the wheels at the back of R2
have rubber tracks for traction and the front are plain, so take care to
place them back in the same way later on. Another thing you may or
may not need to check for is the sticker underneath, if the sticker is
in good condition it may be covering the join and if it is you will need
to cut a slit across it with a craft knife. Remember this R2 is in bad
condition and its sticker is deteriorated so i wont need to make a cut..
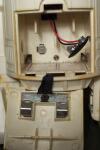
The next screw you will need to undo is hidden inside the battery
compartment, you can see that this unit is dirty inside and out and the
screws have become rusted, staining the white plastic forever..

The Battery cover is held to the R2 via a small black ribbon, this can
be removed also by undoing the screw on the panel, the screw holds the
battery terminal to the lid so place this to the side also..
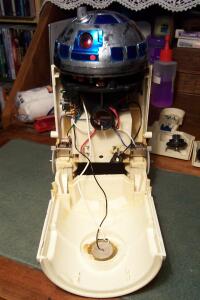
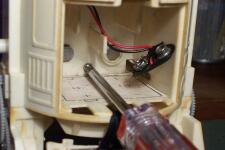
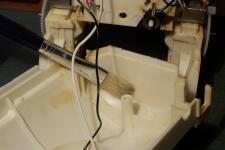
Ok now you can remove the front section of R2, you may need to work
this off gently as it clips into place and don't pull it away with a sudden
pull because it is also attached to the back half of the unit via the speaker
wires. In the above left picture you can see a round disc attached to wires
on the front panel, this is a thin speaker from where you would hear R2's
beeps and clicks. This cannot be removed without damaging or
de-soldering the wires so you need to work around it carefully.
On this unit i noticed that a metal holding clip on one of the gears was
missing, this wasn't going to be much of a problem though as there is
no way for the gears to fall off when the leg panels are back in place.
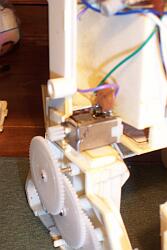
You may also find that the metal washers and pins attaching the wheel
gears in place are badly rusted, this part of the toy is more exposed than
any other part and some children may have played with it outside.
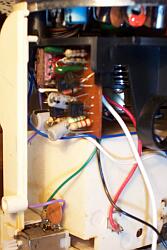
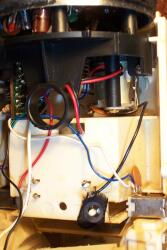
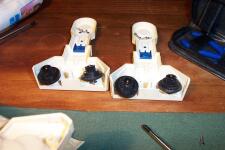
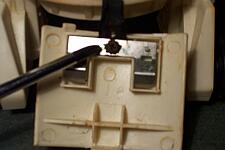
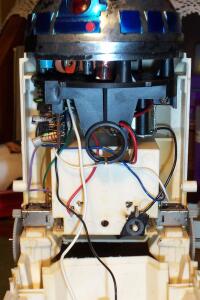
A couple of close ups, in the left picture you can see a brown circuit board,
this is its main remote control circuit and its powered by the 9v transistor
battery pack. In the right picture you can see a large motor up high near
the head section for turning R2's head about, notice how the leg motors
are considerably smaller than you would expect and when i pulled the
unit apart I found an unknown screw lodged in one of them..
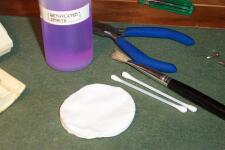
To clean away the dirt and dust from the inside use a soft bristle artist brush,
this way you can get into a lot of hard to reach area's easily and without
damaging the electrics, but be cautious as sometimes a wire can break away
if the weld is weak enough. To clean any nasty stuff away from the inside
use a cotton bud ( Swab ) dipped in Isopropyl alcohol or if that's not
available try methylated spirits, but do not wipe the electronic components.
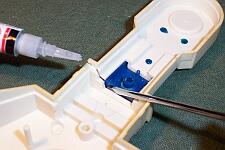
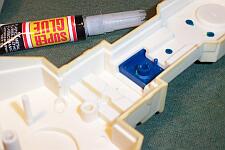
Ok now remember that miss-aligned cracked left leg, its time to fix it before
putting everything back together. Spread the crack with a small flat head
screw driver or what ever is suitable and place a very thin amount of super
glue into the crack. Careful using super glue as not only can it glue your
skin together it will damage area's of the plastic you didn't intend to get
glue on, use it sparingly as it is very strong and then hold it together
firmly for a few seconds before letting it go completely. Make sure there
is no glue running or wet before placing the leg back on as you may glue
it permanently to the body of the unit, see the newly fixed leg on the right..

To finish off the cleaning you can clean various parts of the body with
Isopropyl alcohol or methylated spirits, but what ever you do don't touch the
blue painted area's on the body or the head as you will wipe it off almost
instantly. You can however wipe the blue plastic area on the leg panels as
this is not blue paint and only plastic. You can wipe the chrome area on the
head but use extreme care as the blue squares will become smeared very
very easily. Instead i recommend using a soft lint free cloth to polish the
chrome and blue parts, you'll be surprised what a difference it can make.
You cannot remove the yellowing from old plastic no matter what you try
as this is apart of the plastics natural ageing process, but you can help
slow the damage down by keeping the toy away from heat and light.
Also you cannot remove the stains caused by rusty screw and battery
terminals but you can prevent further damage by cleaning them as best
you can, try rubbing the head of the screw on a piece of carpet to buff
away the iron oxide. If the screw is beyond buffing you might want
to find a replacement as in the case of the screw i found connecting
the black ribbon to the battery cover.
Now i don't have the remote unit for this particular R2 but there is
some clue to find out if the unit is still functional, attach a 9v transistor
battery to its terminals and switch it on while looking at the red eye
on its head. You should hear a bleep and see the eye light up for half
a second, this is a good sign the unit may still be active. I learnt
from another collector that certain remote units used on cars may be
a good replacement, if you have any information i can add to this
article please send it in, i hope you enjoyed this inside look at RC R2D2..
|
Star Wars Trader - New Zealand , � 2005-2008 Copyright SWTNZ
Original photographs, graphics & text etc is the property of SWTNZ unless
otherwise stated, "Star Wars" related media including images, video and characters
etc are copyright to and owned by Lucasfilm Ltd. SWTNZ is neither sponsored or
endorsed by Lucasfilm nor does it affiliate with any other division thereof.
This website is best viewed at 1024x768 with Internet Explorer
|
|
Affiliates
VidBox
Buck Rogers
The Time Machine
|