Creating Glowing Type
by Irene Smith
This tutorial is for PaintShop Pro 5.0 but you can create the same results with almost the same steps in
Adobe PhotoShop. The final result is text that has a glowing halo, nimbus, aura, pick your own adjective, around it. The technique works best with a black or dark-colored background. Here goes.
Open a new graphic with a black or dark-colored background. Select
the type tool and add your text. The font doesn't really matter but the size should be fairly large. Make sure that "Floating" is unchecked. Save the selection to the Alpha Channel (Selections/Save to Alpha Channel...)
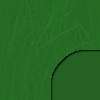
Add two new layers to the graphic. (Hint: You can add a layer quickly by holding down the shift key when you click on the new layer button on the Layers palette.) Make the middle layer active by clicking on it. Now expand your selection by from one to three pixels depending on the thickness of your font. Thicker fonts can be expanded more. (Selections/Modify/Expand) Fill the selection with the color you want for your glow and then clear the selection. For the sample, I expanded the selection by three. (Selections/Select None) Your graphic should look something like this:

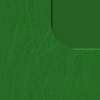
Now we're going to blur the text. Select Image/Blur/Gaussian Blur and enter a radius of 4. This is the result:

Now load your selection from the Alpha Channel (Selections/Load From Alpha Channel) and fill it with the background color. The final results look like this:

That's it. If you are using a thick font, there are several variations you can create. For example:

The first variation uses a much thicker font. I expanded the selection by three before filling it with hot pink and blurring the text. Then I merged the layers (Layers/Merge/Merge All (Flatten)) and applied the cutout effect (Image/Effects/Cutout) twice. In both cases the Fill Interior with Color checkbox was NOT checked. First I used the foreground color for the shadow color with a
opacity set to 50%, a blur of 15, and x and y offsets of -2. Then I used white for the shadow color, opacity still at 50% and blur set to 2. This time the offsets were 2 and 2. It's really quite a subtle difference from the simpler version, but the text seems to have more definition.

The final example used the same basic image as the last one. This time, however, I added an extra layer between the bright pink and the black fill. I loaded the selection on the intermediate layer and expanded it by a single pixel. For the fill I selected a bright sky blue and then blurred the image by the same four pixels. Finally I loaded the selection on the top layer and filled it with black as before. Experiment with the technique and see what you can come up with. If you use images you created using this technique on your web site, let me know. I'd love to see what you've done! Remember, you can reach me at: [email protected]
|