| Keef’s
IMVU > Developing Tutorials
> XRF
Develop
The
Hidden World of the XRF,
How to add Opacity and Customize XRFs for use in Your Products
Alright,
time to put and end this long standing IMVU rumor...
“You
cannot add opacity to an existing non opacity maped
product.” FALSE
You can make
ANY texture on ANY product in IMVU have opacity. However,
not all meshes were made with opacity in mind and just
making a mesh have opacity may not get the results you’re
hoping for.
In this tutorial
I will walk you through how to edit an existing XRF
to make your own. And no, you DO NOT need a 3D program,
all you need is Notepad!!!!
For you meshers,
once you learn this you will never have to export a
texture again!
This tutorial
assumes you already have an basic understanding of how
the previewer works and how to retexture a product.
Please do my make a shirt
tutorial first if you do not have these skills yet.
An
XRF is a simple text file that tells the previewer what
texture slots to provide and what to label them as. This
is all an XRF does in the Previewer. An XRF has nothing
to do with the final texture assignments, texture maps,
texture repeats, or anything else.
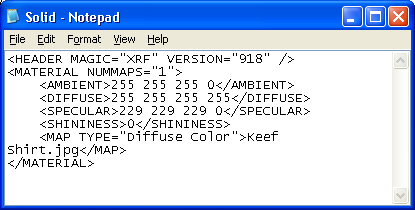
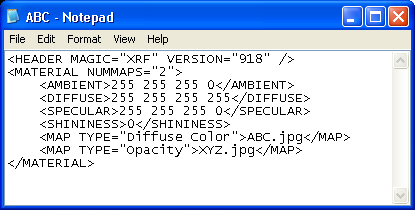
Here are
the entire contents of two XRF files. Highlighted is
the only data we need to worry about.
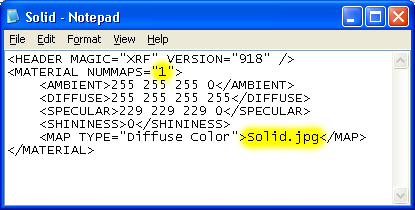
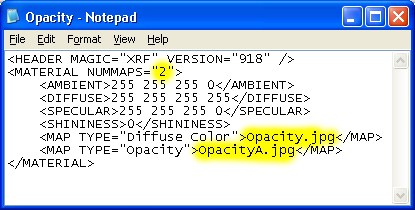
The
first number highlighted tells us how may textures the
XRF has. If it is a solid the number is 1,
if it has an opacity map the number is 2.
The next
things highlighted are the texture’s file names.
<MAP TYPE="Diffuse
Color">Solid.jpg</MAP>
<MAP TYPE="Diffuse
Color">Opacity.jpg</MAP>
<MAP TYPE="Opacity">OpacityA.jpg</MAP>
Whatever
is typed here (here highlighted in bold) will appear
in the text slot under the texture and it will be the
name the texture uses in the CFL.
If
you name it the name of an existing texture in your Previewer's
examples directory it will automatically load that texture
for you. If not, it will load blank and you can browse
for the texture you wish to use just as you would when
replacing a texture when retexturing.
**Important
note**: If two or more XRF texture files have the same
name for their textures, replacing the texture on one
will effect them all. If you wish to use different textures
make sure to give them unique names.
Exercise
Part 1: Editing a Solid Texture XRF
First download
this zip  clicky!! clicky!!
Then extract the files and the texture files into your
Previewer’s Examples file. (same place you put
your textures for use in the Previewer.)
Zip
Contents
185Op1.jpg
185Op2.jpg
185Op3.jpg
185Tex.jpg
Opacity.xrf
Solid.xrf
Now go to
where you extracted the files to and find the files.
Right click on the one called Solid.xrf and choose ‘Open
With’, then Notepad. You may have to browse for
the Notepad option the first time you do this. If you
wish you can set Notepad as the default program for
opening all .XRF files.
Now you should
see this.
Change
the text ‘Solid’ to anything you wish. In
my case, I will change mine to Keef Shirt.
So it now
reads like this:
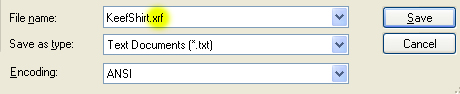
Now go to
File, Save As and change the name. I’ll change
mine to KeefShirt.xrf
IMPORTANT!!!
You MUST manually type in .xrf
at the end of the file name in order for it to save
as a XRF.
Hit save
and you have just made a new XRF! woot woot.
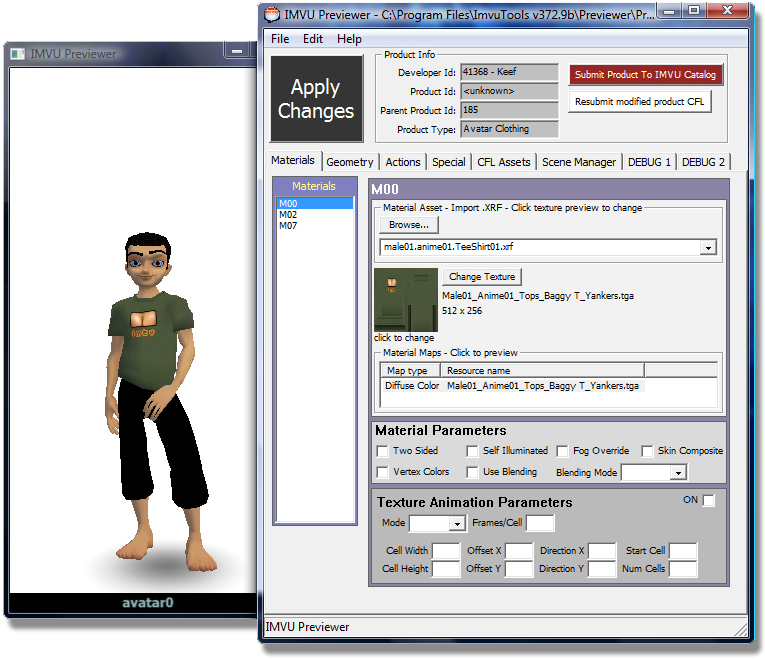
Now open
the Previewer and Derive from product number 185 IMVU's
Baggy T Green
(Huh? How do I do that? If you do not know previewer
basics please start with the how to make a shirt tutorial
for how to load and edit products.)
Go to the
Materials tab and look for the textures XRF. Browse
for the one you just saved.
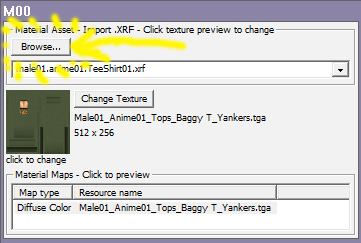
Hit
‘Apply Changes’
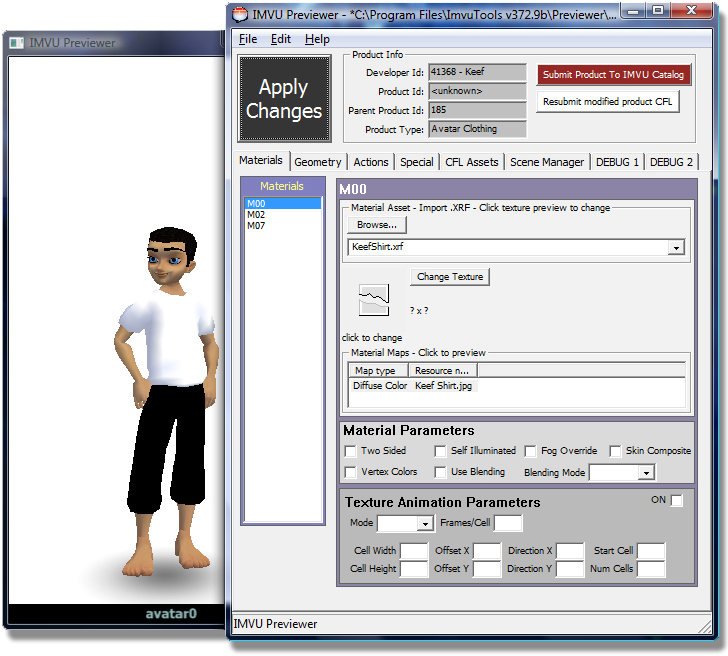
Now the texture
name below the texture box will have changed to your
new name. The file name will change in the XRF input
field to the new one once you save and reload.
Just at the
Texture of your choice into the texture box as you normaly
would. The name in the Material File box will show the
new xrf name when you save and reload your cfl.
Now on to
opacity!
Exercise
Part 2: Editing an Opacity Enabled Texture XRF
Now
go back to the files you unzipped and open the one named
Opacity.xrf with Notepad.
It
should look like this.
Now
change both texture names, again, make sure they are unique.
Now ‘Save
As’, pick a name, type in .xrf at the end, and
save.
You just
made a new Opacity XRF!!!!
Open the
Previewer again and derive from the same product 185
IMVU's Baggy T Green
Browse for
your new opacity XRF. Hit Apply Changs.
Now the texture
names should have changed and like magic the Opacity
option is enabled!!!
Now..
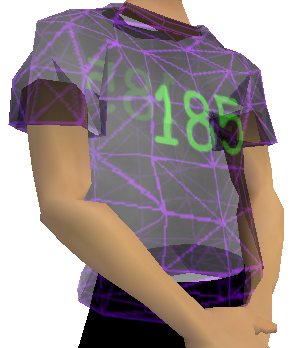
Why adding an Opacity Map won't do what you may have wanted.
I included
one texture and three opacity maps with the ziped files.
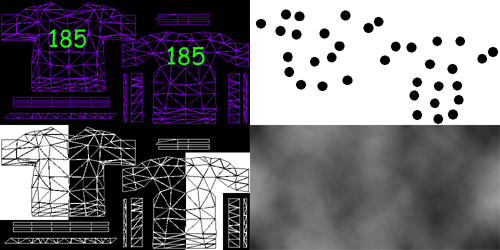
Click on
the 'Diffuse Color' Line and then change the texture
to the supplied ‘185Tex’ texture.
Click on
the 'Opacity' line and change the texture to the ‘185Op1’
map.
Hit Apply
Changes.
Now look
at your model.
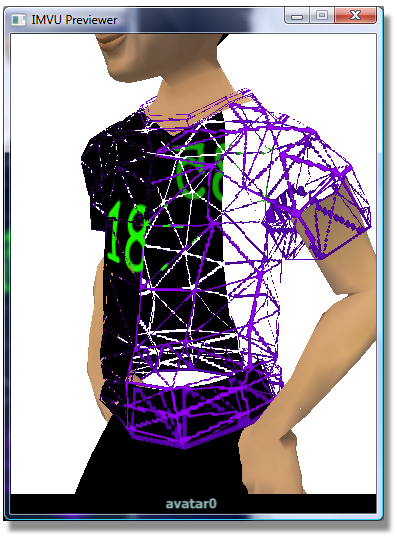
Was it what
you expected?
As you can
see, not all meshes are created to support opacity and
just adding an opacity map to them may not get you’re
the results you were hoping for as there is no skin
mesh beneath the shirt. However, you can still do some
fun stuff.
Try it with
Op2 and Op3 for some fun options.
For Op3,
which uses gray, make sure to activate Composite Blending
Mode.

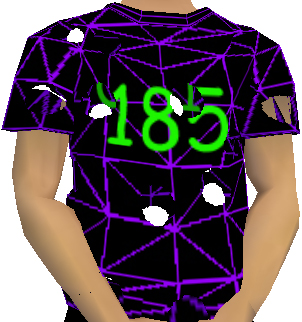
Bullet holes
and Ghostly Avatars are just two fun options that can
be created by adding opacity. Just have fun with it!
Remember:
Any time you are using a Texture and an Opacity Map
they must be the EXACT
SAME SIZE or they will not work.
NOW
get cracking!
Can’t wait to see what crazy stuff you all come
up with! Oh and *psst*, it works on rooms too ;)
|
|