How
to Retexture a Shirt with an Opacity Map using Photoshop
This tutorial
assumes you have completed both the IMVU Getting Started
tutorial and my How to Make a Shirt tutorial. Skills discussed
there will be only be brushed over here.
Again this Tutorial
focuses on tools available in Photoshop. Not all tools will
be available in all programs but most of the techniques
and concepts can be emulated.
Okay
first… What the heck is an Opacity Map?
An Opacity Map,
also know an Alpha Channel, is a version of the texture
that is a grayscale image that tells what level of transparency
the texture should have and where. Wherever you want solid
on the Opacity Map version you make white, clear you make
black, and sheer the varying shades of gray, the lighter
the shade the more solid the texture will be. Don’t
worry, it will make more sense once we start making it.
Not all meshes
available to derive from have Opacity maps and if they don’t,
you cannot add one without adverse side effects. In order
for opacity to function properly, the mesh would have to
be remade with opacity in mind. Before you begin making
the texture you’ll want to make sure the mesh has
an Opacity map.
Getting
and Examining the Mesh
For this tutorial
I will be retexturing Cassiopeia’s Longer
Black Buttoned Top, product #41574
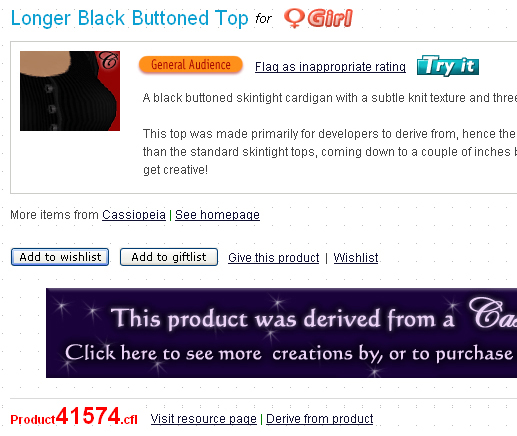
*waves to Cass*
TY Cass for being the guinea pig for this tutorial.
Now lets open
it up in the previewer. Click Derive from product on the
products catalog page or input its product number and derive
straight from the previewer. (How to open a product in the
previewer is covered in detail it the other 2 tutorials
you were supposed to do :P)
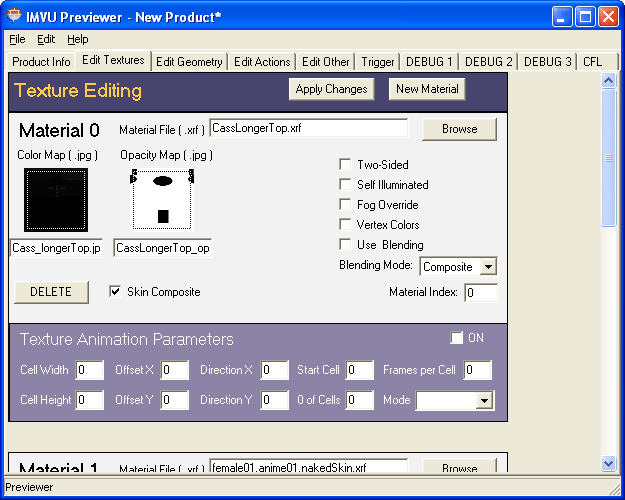
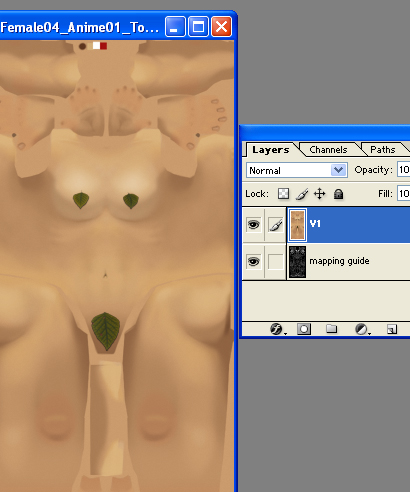
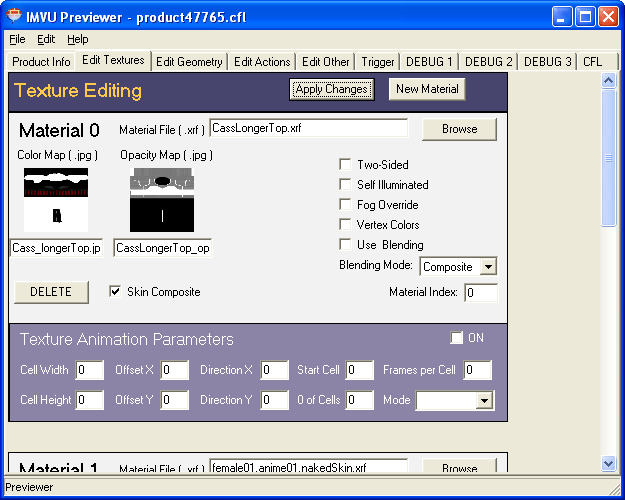
First I check
to see if indeed this mesh has an opacity map, and the opacity
map field has a texture in it.
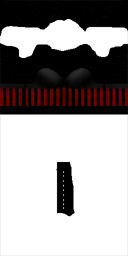
Just for reference,
here’s what the originals look like. Note how the
main texture doesn’t need to worry about where it
is transparent and where it isn’t. Also look at how
the Opacity map looks, white is what you’ll see, black
is clear.


Looking at it
on the Previewer’s Edit Textures tab I ca see that
this shirt uses the basic skin texture map. Soooo off to
IMVU the grab the skin texture map. You’ll get an
eye for identifying the maps the more you do.
It looked like
the model was wearing the 40degree skin so that’s
the one well grab, not that it will matter one whit for
the final product but it will make the designing process
much easer.
Go to the IMVU
Developers page, Texture Templates, and download
Female01_Anime01_Tops_naked_040degrees.zip Save it where
you can find it.
Now open that
puppy up in Photoshop.
Delete everything but the mesh map (the one with all the
lines) and the skin layer.
Now move the
skin to the bottom and the map to the top and make a mesh
mapping test mesh like we did in the other tutorial and
save it as a JPG to the Previewer.
Now we also need
to make a test texture for the opacity map. For testing
we will need a solid gray texture, later we will need a
solid white one so to save time later we can just make both
now.

Make two new
layers and fill them completely in using the paint bucket
tool, color one all white and one a medium gray. Save each
to the Previewer without anything on them but the color.
Don’t forget to label them so you’ll remember
them.
Now back to the
Previewer, if it’s not still open reopen the shirt…
product41574.
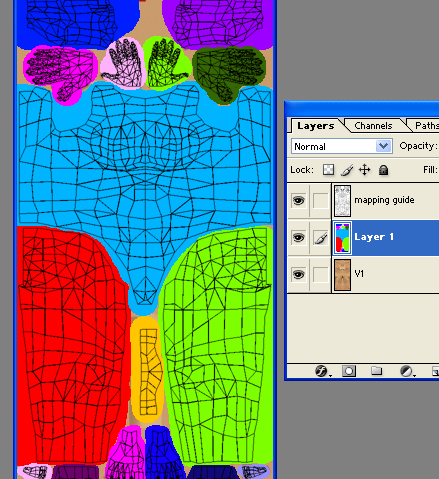
Now load the
map texture we just made into the Color Map box and the
all gray one into the Opacity Map box. Having put the all
gray one there we have told the previewer render the whole
texture with half transparency so now we can see the anatomy
a bit beneath and because it covers the whole texture we
can see all the areas the mesh covers.

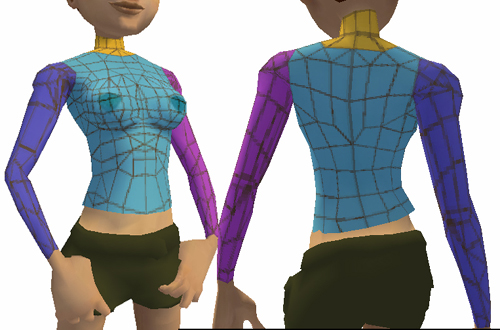
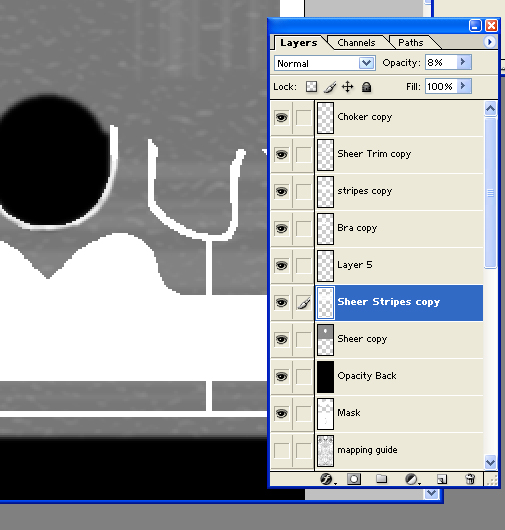
Now take the
time and study how the template wraps, what is where, and
also take note at what is not used.
I like to take
screenshots for future reference.
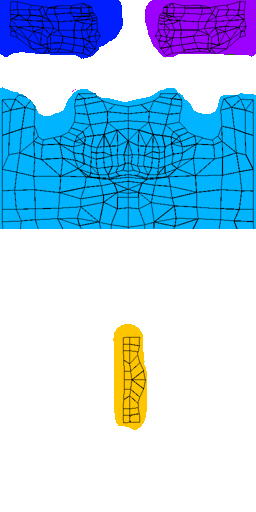
One last trip
to Photoshop before the fun begins. I want to make a masking
layer above the map layer to mask off the areas of the template
that are not used so that I don’t get unnecessarily
distracted by parts of the mesh not used. The feet, legs
and groin area are all not used. Pay special note where
the neck is, it’s that little swatch of rectangle
between the legs, be careful not to cover that up. Try the
texture on again just to make sure you didn’t cover
anything important up.
Make
your shirt texture… Inspiration and sources.
Alright, now
we’re at what we’re here for in the first place,
making a shirt. Real life clothes, magazines, catalogs,
TV, film, fantasy, anime, sketches odd doodles all can be
great resources for inspiration.
Note, I said
‘INSPIRATION’.
Photo sourcing,
the act of using photographic sources for textures is a
tried and true valid way to texture. There are many many
free websites chock full of textures for the using. Be sure
to read the terms of use on the sites, many are free free,
but many are also restricted to personal use only. Be sure
what you use is intended for commercial use. Pictures found
randomly on the internet, catalog and magazine shots, other
game textures not set for free commercial redistribution
are all protected by copyright and should never be used.
One of my favorite
photo source recourses is my own camera. Never leave home
without it, you’ll never know when a cool texture
will appear. Yes people will think your nuts when you take
pictures of dirt, just wink at them and say you’re
an artist. I luckily work where unusual fabrics and textures
abound. I also have fabric collector friends who indulge
my strange need to take pictures of their amazing textile
collections and graciously give me permission to use the
images. Don’t forget the mundane too, that old raggedy
pair of jeans for a buck in the thrift store is a great
texture source.
Oh and just a
heads up, most top skilled developers in here got that way
from being tops in other worlds first. So, before you think
no one will notice something came from another world or
place DON'T BE SO SURE, we may even be the original designer
;). We also all use the same sites for research and inspiration…
and yes, we all subscribe to Renderosity
too. We know what’s free and what’s not and
WILL notify our fiends when their work is stolen. In short,
there are tons of real free resources so don’t steal.
Making
your shirt
Ok I hear ya,
sudup already and lets make a shirt.
I’m in
a funky Punk Pirate mood so look out I’m just goona
go crazy.
Just a warning,
when I say I go crazy…. I GO CRAZY!.
Alpha maps are FUN for me and never are just black, white
and a bit of gray. So be forwarded I’m doing a more
advanced texture than what you will want to start with,
but I did what to give you a demonstration of all an Opacity
map can do for you.
For your first
you should start with a simple design to get the feel of
it, once proficient with a black and white Opacity Map then
make the jump to adding gray then MANY GRAYS! :D
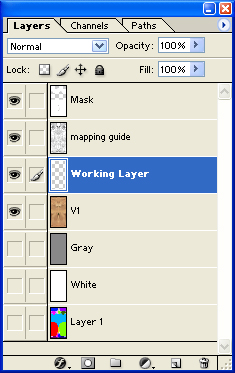
Back to Photoshop.
Drag the skin layer of the texture up to just under the
map layer that is set to multiply mode. Now make a new layer
in between them, this is your working area.
DO NOT paint
on the skin layer! We are only using the skin layer as our
background while we are working to see how the final texture
will look. Once the texture is fine-tuned and we have made
the opacity map we will lose the skin texture, Don’t
get hung up on it being the wrong skin or anything, it wont
be there in the final product.
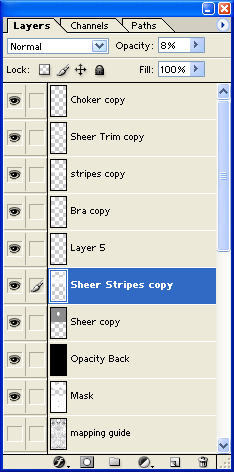
In the working
area between the map and the skin start painting your shirt.
I use a different layer for each part of the top. Bra, sheer,
trim, chocker, etc…. You don’t have to but it
makes editing much easer. If a part of the texture is going
to be a sheer material you’ll definitely want that
on its own layer.
I can’t
teach you how to draw here, just play with it, pay close
attention to the seams and how things align. Save and test
often.
Heh
heh bet ya wanna see it...
To test it in
the Previewer, save your working textures with the skin
layer ON. When you load it to the Previewer also swap out
that gray opacity map and replace it with the all white
one we made earlier. Switching it to the white one makes
the whole texture solid so you can fully see your texture.
Once I’m
happy with how the design is looking I’ll start to
add the texture details that I showed you in the other tutorial
that will bring the texture to life. I’ll add texture
and highlight and shadow when and where I think it is needed.
Once happy with
it one final test in the previewer then on to the Opacity
Map.
Making
the Opacity Map
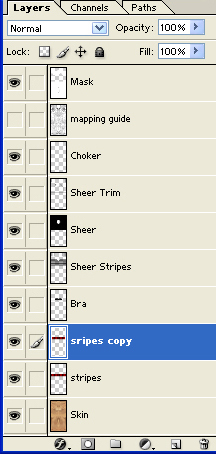
Make a new layer
and color it in a solid black and put it up above everything.
Now make copies
of all your working layers and drag the copies above the
black layer.
Now make each
layer that should be solid white. Use the Brightness/Contrast
up on the main toolbar, Image, Adjustments, Brightness Contrast.

Then make any
layer that should be sheer a shade of gray. Lighter more
solid, darker more sheer. If your image is color and looses
detail the opacity map needs, use Image, Mode, Desaturate
to get to gray.
Anything that
shouldn’t be in the final texture should then be left
black.
Save it as a
new JPG. I name it the same name as the main texture just
with an A at the end so I know this is that layers alpha
channel, name yours how you wish.
Finalizing
the Main Texture
Turn off all
your Opacity Map layers and get back to the main texture.
First we need
to solid up any sheer areas, the new Opacity map will now
be doing that job for us.
We also need
to loose the background skin and get the texture ready for
use with an Opacity Map so you won’t have any funky
halo action on your garment. Pick the main color make a
new layer, put it above the skin layer and below the garment
layers and color it in solid with that color.

Once it’s
all filled in Save and Save it to the Previewer and test
it out.
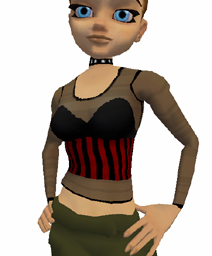
Final
Testing and Tweaking
Back in the Previewer
load your finalized texture and your new Opacity Map.
Take a look and
see how it looks. Does the sheer area need to be lighter?
Darker? If so, just go back to it in PS and make it darker
or lighter depending on what you need. Keep tweaking and
resting till your happy. Once happy, save your product and
you're done! Well, take catalog shots too then your done!

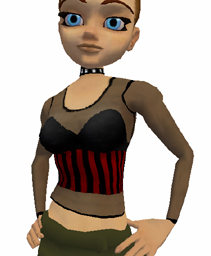
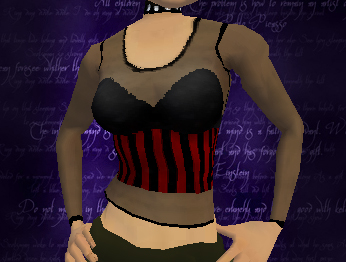
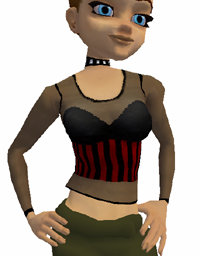
Ohh
and for all you nay sayers...'that looks just like the one
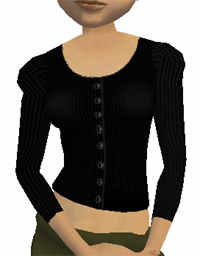
with the skin on it'...here it is on a different skin ;)

Now jump around
your room and yell “All Hail oh mighty conqueror of
the dreaded OPACITY MAP!”
If you want to
get a closer look at it, or heck just wear it, I put it
up for sale at no profit in the catalog.