G-Express
"I Share For The Better"
Home
About us
Lessons
Exercices
Gallery
Lessons
Lesson 9

Hue/Saturation lets you adjust the hue, saturation, and lightness of a specific range of colors in an image or simultaneously adjust all the colors in an image.

In this lesson you will learn about using the hue and saturation so Let's Get started.

Lesson 9: T-shirt
    Steps:
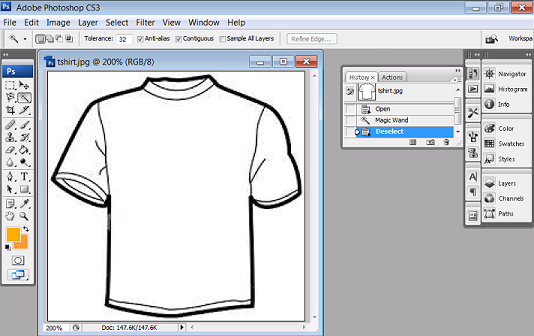
  1. Open Adobe Photoshop Cs 3 or any version will do such as Cs 3, Cs 4, Cs 5 or Cs 6.
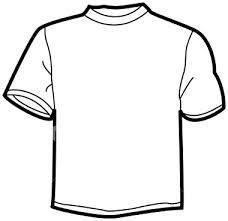
  2. Open the image that you will need, go again to the Application bar then click the file button. When the pop-up menu appears click the "Open" button. Open the neccessary image such as the plain white t-shirt


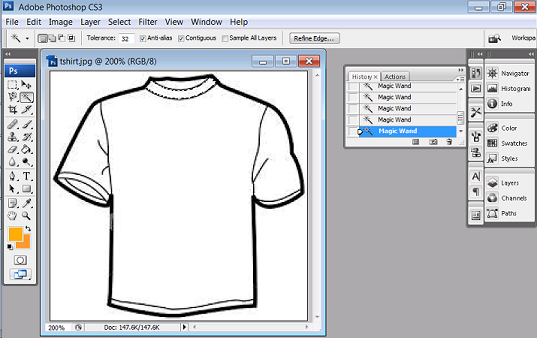
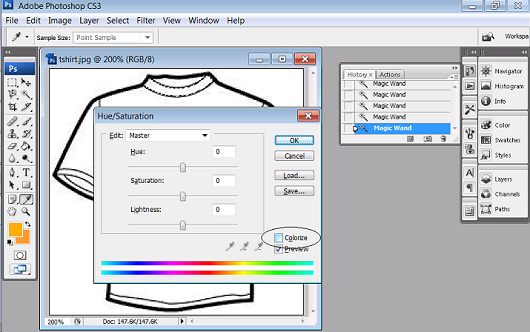
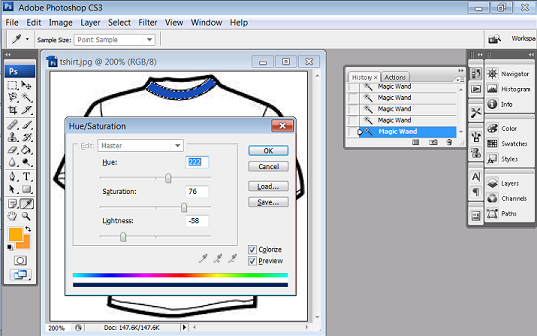
  3. On the original image, use the magic wand to select the parts of the shirt . Select first the neckline then press Ctrl+u for hue and saturation.
  • Introduction
  • Lesson 1 (Vegeman)
  • Lesson 2 (Kitchen World)
  • Lesson 3 (You Make Me Feel Like a Beauty Queen)
  • Lesson 4 (You Make Me Feel Young)
  • Lesson 5 (You Make Me Feel Brandnew)
  • Lesson 6
    (Peeled Sticker)
  • Lesson 7
    (Futuristic Grunge)
  • Lesson 8 (Glow In The Dark)
  • Lesson 9
    (T-shirt)
  • Lesson 10
    (Hair Color)


  • 4. Then move the slider to adjust the saturation and color. You may slide it in any value make sure and always remember that the "colorize" must be checked.
       
    5. For the sleeves, using the magic wand select it then press Ctrl+ u then slide the slider to put colors in the sleeves.

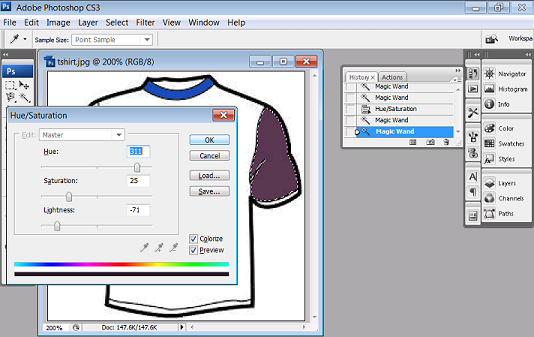
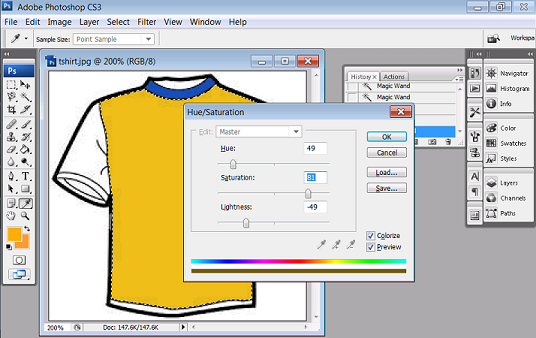
    6. For the body, repeat the processes as mention above.

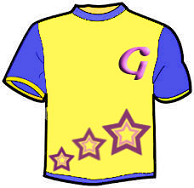
    7. You can add some detais such as texts or creative designs such as using brushes.
    8. Save your work as T-shirt_(your name).psd. Then you can also save it as a jpeg file or png file (eg.T-shirt_(your name).jpg, T-shirt_(your name).png)
    9. Congratulations now you have learn another use of Adobe Photoshop!
    Copyright � G-Express. All rights reserved 2014.