"I Share For The Better"
In this lesson you will learn about using the clone stamp tool so Let's Get started.
-
Steps:
- Open Adobe Photoshop Cs 3 or any version will do such as Cs 3, Cs 4, Cs 5 or Cs 6.
- Create a new canvas. Go to the Application bar.You can see first the "File" button. Click the button file then there will be a pop-up menu.When the pop-up menu appears click the button "New".
- After clicking the button New, the customizing canvas will appear use 72pixels as your resolution and the size will be width="4" height="5". Name it as You Make Me Feel Brandnew. Then click "OK".
- To open the images that you will need, again got to the Application bar then click the button file. When the pop-up menu appears click the button "Open".Open the neccessary image such as the finished Product and the original image.
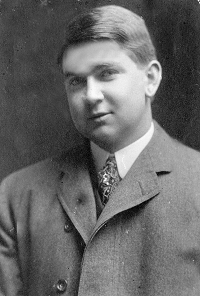
Before After
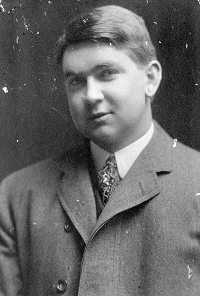
- Go to your new canvas then using the move tool, drag the original image of the black and white image from its canvas into your own canvas.
- To fit the "black and white" image into your canvas,use transform (Ctrl + T) to enlarge or decrease the size of the image or another way is to save the image as your file (eg. blackandwhite_gen.png, clonestamp
_gen.png) so that you will not need any transformations.
- Focus on your own canvas. In the toolbox you can see the clone stamp tool,click it. To use the patch tool, like the healing brush tool, you will need a source so that the source will be the one that will been clone.Alt + Click to the target source so that you can start cloning to the unwanted areas which are the white stains by the use of clone stamp tool. (tip: Get the source near to the target area or in the white stains)
- Make sure that the source complement and blend with the parts to avoid mismatching of the pixels.(tip: You can change the size of the brush in order for you to finish faster but make sure that the pixels will be the same.)
- Save your work as Youmakemefeelbrandnew_(your name).psd. Then you can also save it as a jpeg file or png file (eg. Youmakemefeel
brandnew_(your name).jpg, Youmakemefeelbrandnew_(your name)
.png) - Congratulations now you have learn another use of Adobe Photoshop!
(Peeled Sticker)
(Futuristic Grunge)
(T-shirt)
(Hair Color)