"I Share For The Better"
-
Steps:
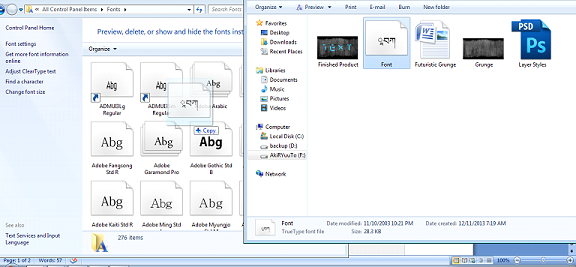
- Open Control Panel > Fonts, then drag the Font file in the folder to the Fonts folder.
- Open Adobe Photoshop Cs 3 or any version will do such as Cs 3, Cs 4, Cs 5 or Cs 6.
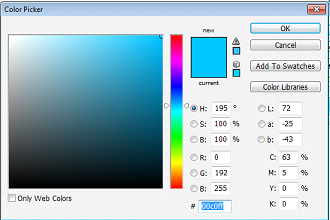
- Create a new canvas. Go to the Application bar.You can see first the "File" button. Click the button file then there will be a pop-up menu.When the pop-up menu appears click the button "New".
- After clicking the "New" button, the customizing canvas will appear make your foreground color to white and background color to black, then create a new document with measurements 1920 px x 1080 px and the Background Contents option to White.Then click "OK".
- To open the images that you will need, again got to the Application bar then click the button file. When the pop-up menu appears click the button "Open".Open the "Grunge" image.
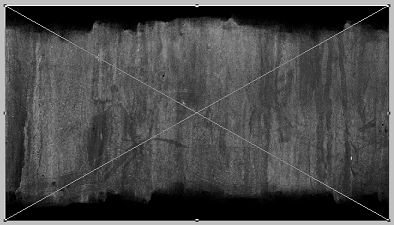
- Go to your new canvas then using the move tool, drag the ōGrungeö image into your canvas and resize it to fit the screen.use transform (Ctrl + T) to enlarge or decrease the size of the image.
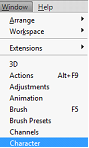
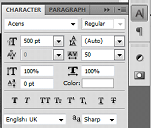
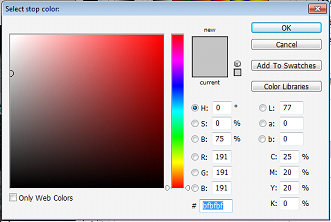
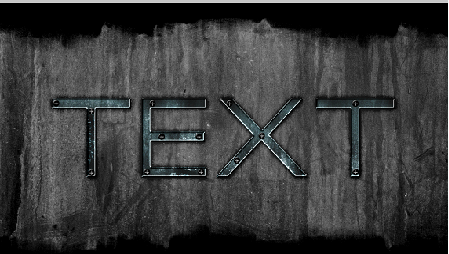
- Use the Horizontal Type Tool and click type in ōTEXTö using Acens as the font and 500 pt as the font size. Now open Windows > Character, and then change the settings exactly like this.

(Peeled Sticker)
(Futuristic Grunge)
(T-shirt)
(Hair Color)
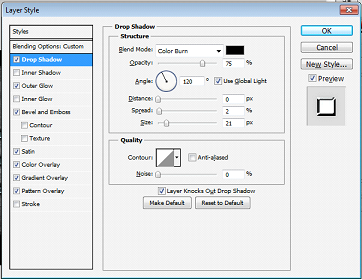
9. In the blending options, add a drop shadow to the ōTEXTö layer with these settings (1). Also
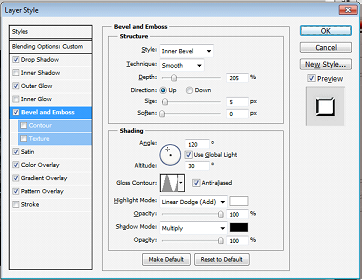
add an Outer Glow to the ōTEXTö layer with these settings (2). Add a Bevel & Emboss to the
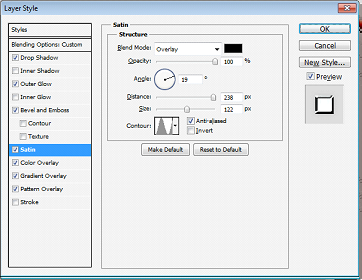
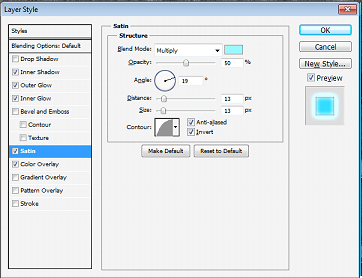
ōTEXTö layer with these settings (3). Then add a Satin to the ōTEXTö layer with these settings
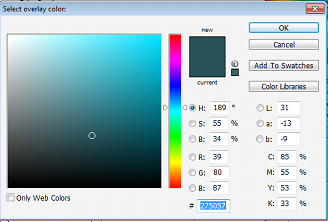
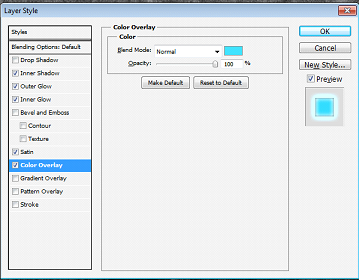
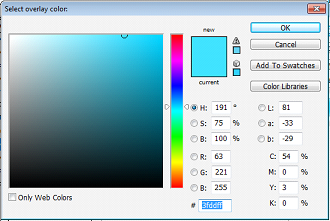
(4). Add a Color Overlay to the ōTEXTö layer with these settings (5). Add a Gradient Overlay
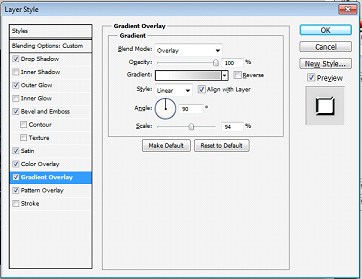
to the ōTEXTö layer with these settings (6) .Set the Pattern Overlay to rock patterns and you
chosen rock pattern to the ōTEXTö layer with the following settings (7).

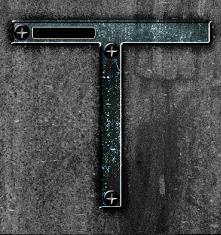
bolts far from each other like this. And use the rounded rectangle tool and make a rectangle
beside the bolts but inside the text like so.
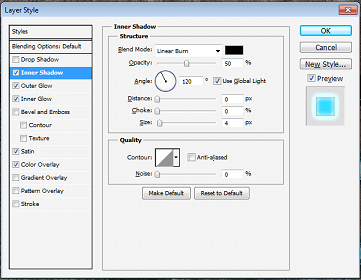
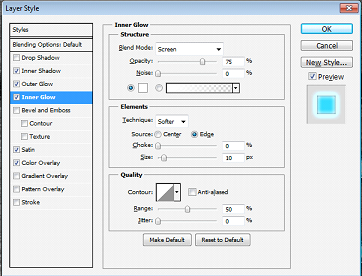
11. Now apply an Inner Shadow to the shape with these settings. Then apply an Outer Glow to the
shape with these settings. Also apply an Inner Glow to the shape with these settings. Apply a
Satin to the shape with these settings and a Color Overlay to the shape with these setting.


png file (eg. FuturisticGrunge_(your name).jpg, FuturisticGrunge_(your name).png)
13.Congratulations now you have learn another use of Adobe Photoshop!