"I Share For The Better"
Lesson 6: Peeled Sticker
-
Steps:
- Open Adobe Photoshop Cs 3 or any version will do such as Cs 3, Cs 4, Cs 5 or Cs 6.
- Create a new canvas. Go to the Application bar.You can see first the "File" button. Click the button file then there will be a pop-up menu.When the pop-up menu appears click the button "New".
- After clicking the "New" button. The customizing canvas will appear then make your foreground color to white and background color to black, and create a new document with measurements 1920 px x 1080 px and the Background Contents option to Background Color. Then click "OK".
- In the toolbox find the text tool. Use the Horizontal Type Tool and click type in “Sticker” using Poplar Std as the font and 300 pt as the font size.

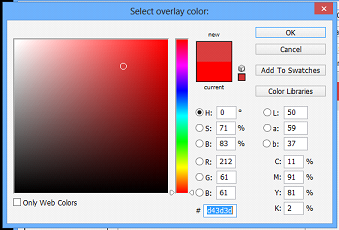
- Now add a color overlay with a number code of “#d43d3d” and add a stroke with a solid color of white and a size of 50 px. Then convert the text layer to a smart object.
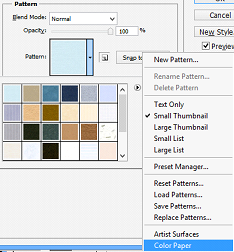
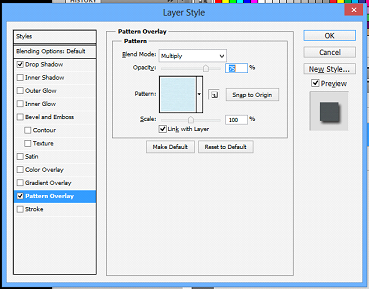
- Go to pattern overlay in the layer styles and change the patterns to “color pattern”. Choose any of the patterns there and apply the following settings to the pattern overlay.
(Peeled Sticker)
(Futuristic Grunge)
(T-shirt)
(Hair Color)
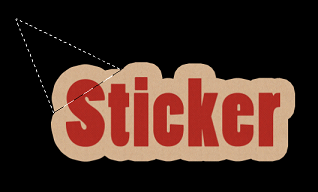
8. Use the polygonal lasso tool to select the edge of the word "Sticker" that you want to peel off.
Then right click on the selection and choose “layer via cut”. Go to Edit > Transform > Rotate 180.
9. Now apply a color overlay of a solid white color. Then apply a satin with the following settings.
with the new layer selected select the brush tool and reduce the hardness to 0%. Then gently stroke
the brush tool to the edge of the peeled layer to make a new shadow – like effect to the peel. 11. Using the magnetic lasso tool select the sticker itself, and then create a new layer. Use
the brush tool, gently stroke around the edge where the peel is until you make a new shadow – like
effect on the sticker.

12. Save your work as Peeledsticker_(your name).psd. Then you can also save it as a jpeg file or
png file (eg. Peeledsticker_(your name).jpg, Peeledsticker_(your name).png)
13. Congratulations now you have learn another use of Adobe Photoshop!