|
A Tag Art Tutorial - Project 5
This is the fifth tutorial about tag art. There is no right way to do this, but I hope that this will help you find the best way for YOU to make a tag. I am by no means an expert when it comes to making tags, rubber stamping, or anything else, as a matter of fact. These are the basic steps that I go through when I sit down to make a tag. I'm just trying to share my love for art and making tags! :-) (Yes, I'm saying this again!) The fifth project will feature a tag with a stamped vellum overlay and a sponged background. If you have read my other tutorials, you will notice that the steps are basically the same, we are just using a different technique to decorate the tag. If you have any questions or comments, please e-mail me.
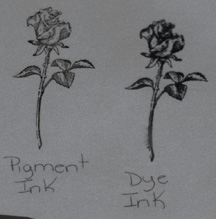
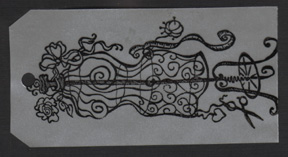
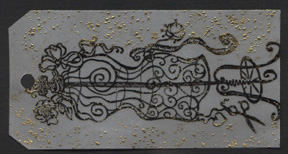
Step 1: Pick a Theme- It's always the first thing that I do. Pull out one stamp that appeals to you and find 2 or 3 more that go well with it. For this project, I am going to use the wire dress form by Personal Stamp Exchange ©2000 and alphabet & numbers from Stampers Anonymous. I will also use my favorite stamp (the one that I use on everything!) the speckle stamp (©Stampin' Up 1990-2001). The dress form will fill up the whole tag, so I am not going to pick any other stamps. You may use more stamps, if desired You might want to pick a background stamp to stamp on the mailing tag and use your main stamp on the vellum overlay. Step 2: Decide on Colors- Think about your theme and pick 3-4 colors of ink that work well with the 'mood' you are trying to set. Here are the colors that I chose: olive, mustard and eggplant. I don't really know why, they just appealed to me at the time! :-) I am going to use black pigment ink and a little gold pigment ink on the vellum. You will need to heat set the pigment ink on the vellum or emboss. I tried using both dye ink and pigment on the vellum and the pigment ink produced a more clear image. Use any color that would work well with your color theme.
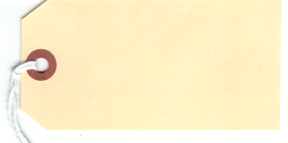
Step 3: Assemble Supplies- Now that you have decided on a theme and your colors, get everything ready. Look at your stamps and decide what size of a tag you will need. Will you be using a mailing tag or cutting your own? We're going to use a mail tag that measures 4 1/4" X 2 1/2 ". If you don't have a tag, make you own. You need some vellum to create the overlay. I am using white vellum for this project. There are many different colors and patterns of vellum available. You might be able to find a color and pattern of vellum that would work great with your theme. If you do use a colored vellum, be sure that your background works well with the colored vellum. Get your inks out and have your heat gun ready to use. I am going to use sponges to create the background. Remove the string from the tag before starting.
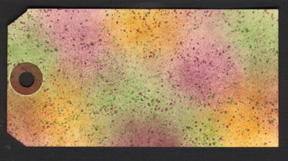
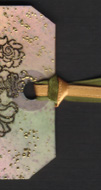
Step 4: Make Vellum Overlay- Place the tag on top of the vellum and lightly trace around the tag with a sharp pencil. I like to use my Fiskars Paper Trimmer to cut the vellum, because it makes a nice, straight cut. This will be your overlay. (I'm calling it that, because I can't think of a better word for it!) :-) Place the vellum tag on top of the mailing tag and use a 1/4" hole punch to punch a hole through the vellum. Make sure the holes line up, so that your vellum tag sets on top of the mailing tag nicely. 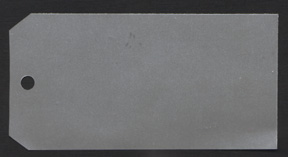 Step 5: Create a Background- Using the technique described in Project 2, create a sponged background. You may choose to do any type of background that you want, but for this project, I used the sponge technique. You might want to have the sheet of vellum handy while you are doing the background. Place the vellum over the tag every now and then and make sure that you can see the colors through the vellum. You may want the colors to show up very well through the vellum or just a little bit. If you want the colors to show up well through the vellum, add more color. Use less for a lighter effect. 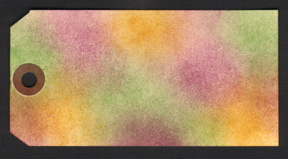
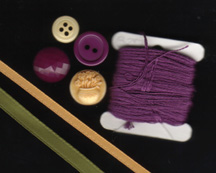
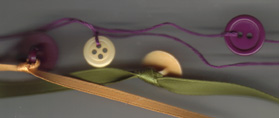
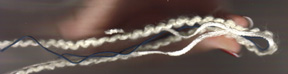
Step 7: Add Fibers and Beads- Choose fibers and embellishments that work well with your colors and theme. Here is what I chose:
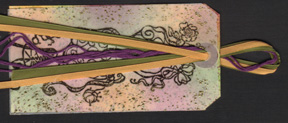
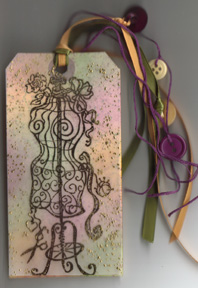
Step 8: Sign Your Artwork- Always remember to sign your artwork! Put your name and the date that you made it. You can also put a short note on the back, if the tag is a gift. Some people even have names for their tags. Step 9: The Finished Tag- Here it is! The finished tag with a rubber stamped vellum overlay and a sponged background:
Step 10: Other Options- If you're wanting something more, how about adding a smaller tag? This is a great way to give any tag a little extra something. 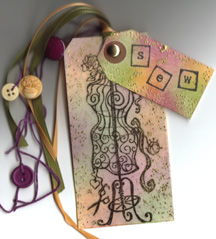 I hope that you enjoyed this tag. I really like how the colors show through the vellum. It would be fun to experiment with different background stamps on the mailing tag and see how they show through the vellum tag. Have fun with this idea! This tag also shows how you can incorporate your theme into your embellishments. The buttons used on the ribbons go right along with the dress form. I picked up bags of buttons for just a couple of dollars at my local thrift store. I'm busy trying to decide what the next tutorial will be. If you have any suggestions, I would love to hear them! Just send me an e-mail and let me know what you would like to see. Di~
This set is courtesy of:
This page was last updated
on:
|